Physics Simulation and Particle System#
Blender offers tools to simulate real-world physics with the 3D objects you created, let’s see how to set it up.
Tip
Both physics simulation and particle system are modifiers.
Particle System#
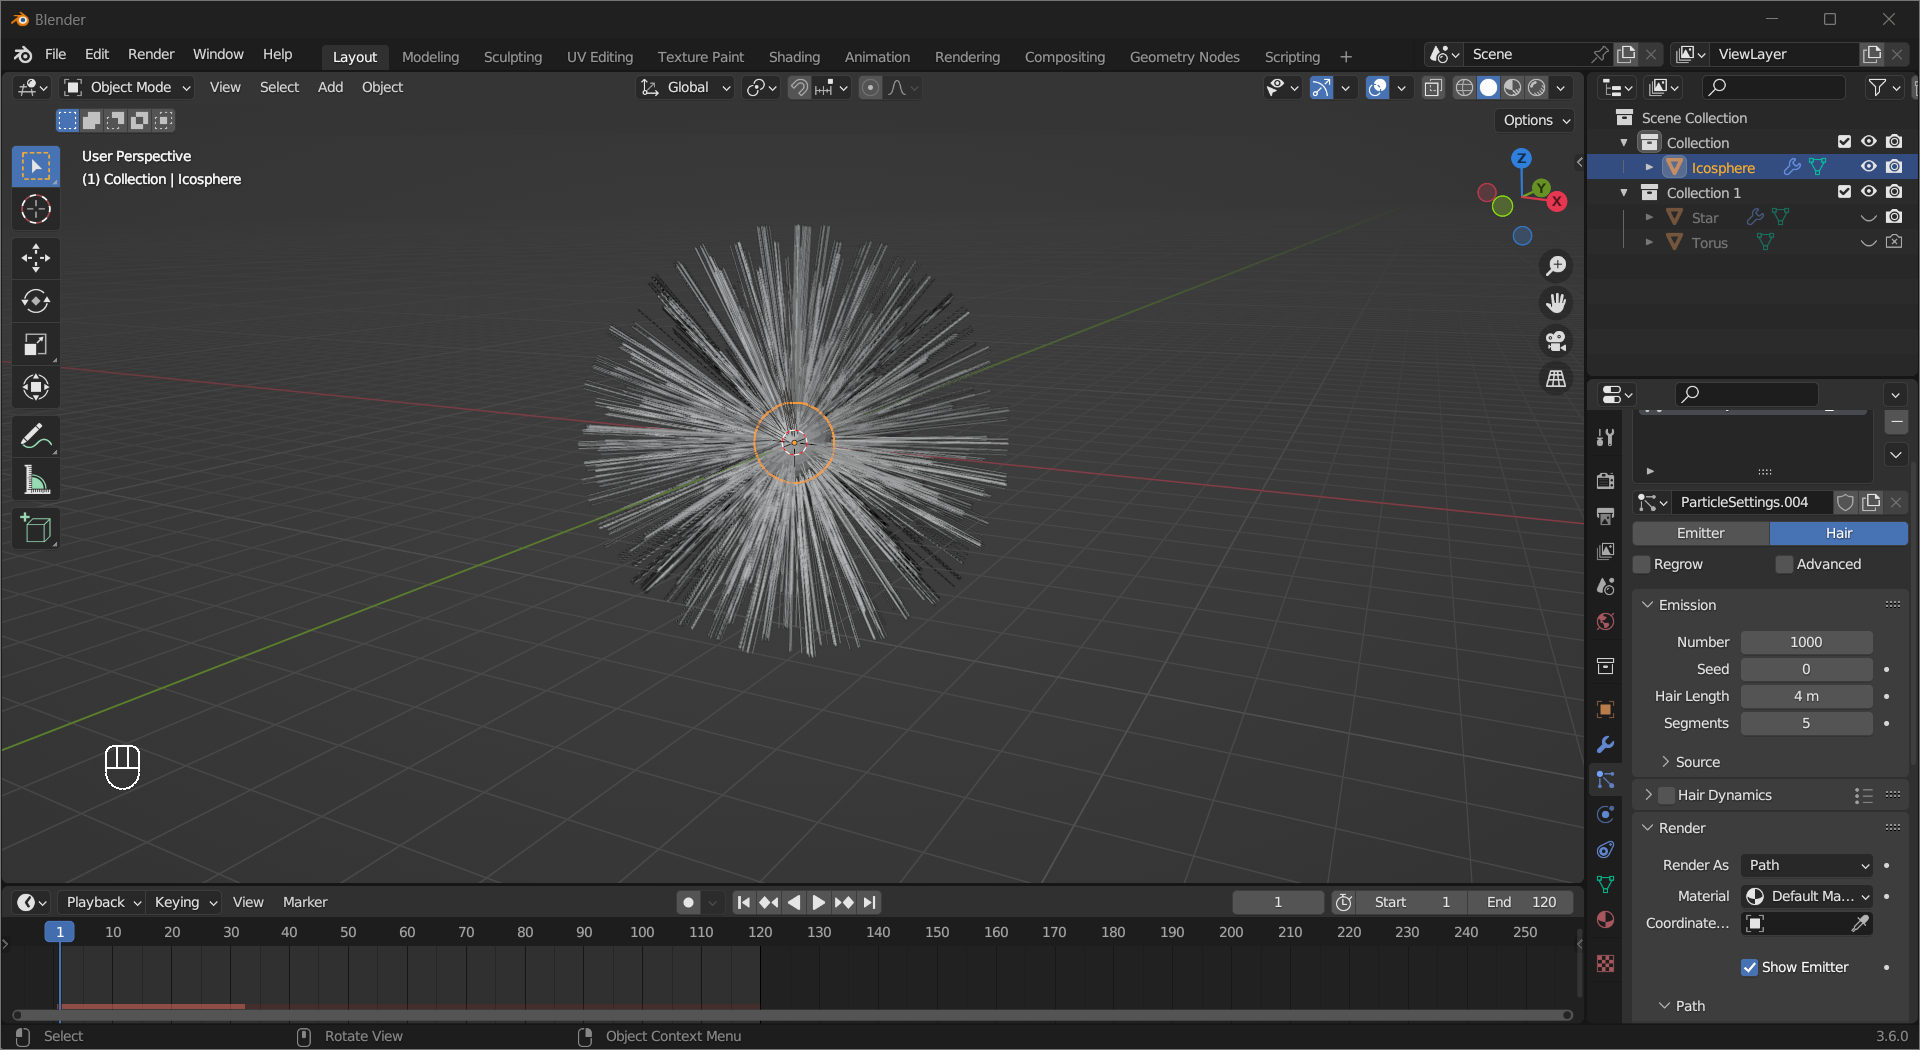
The Particles tab in the properties area is quite similar to the Material one. You can add a new Particle System Slot to the object by Left Mouse Click the + button, and it will also create a linked Particle Settings. There are two kinds of particles, Emitter and Hair.
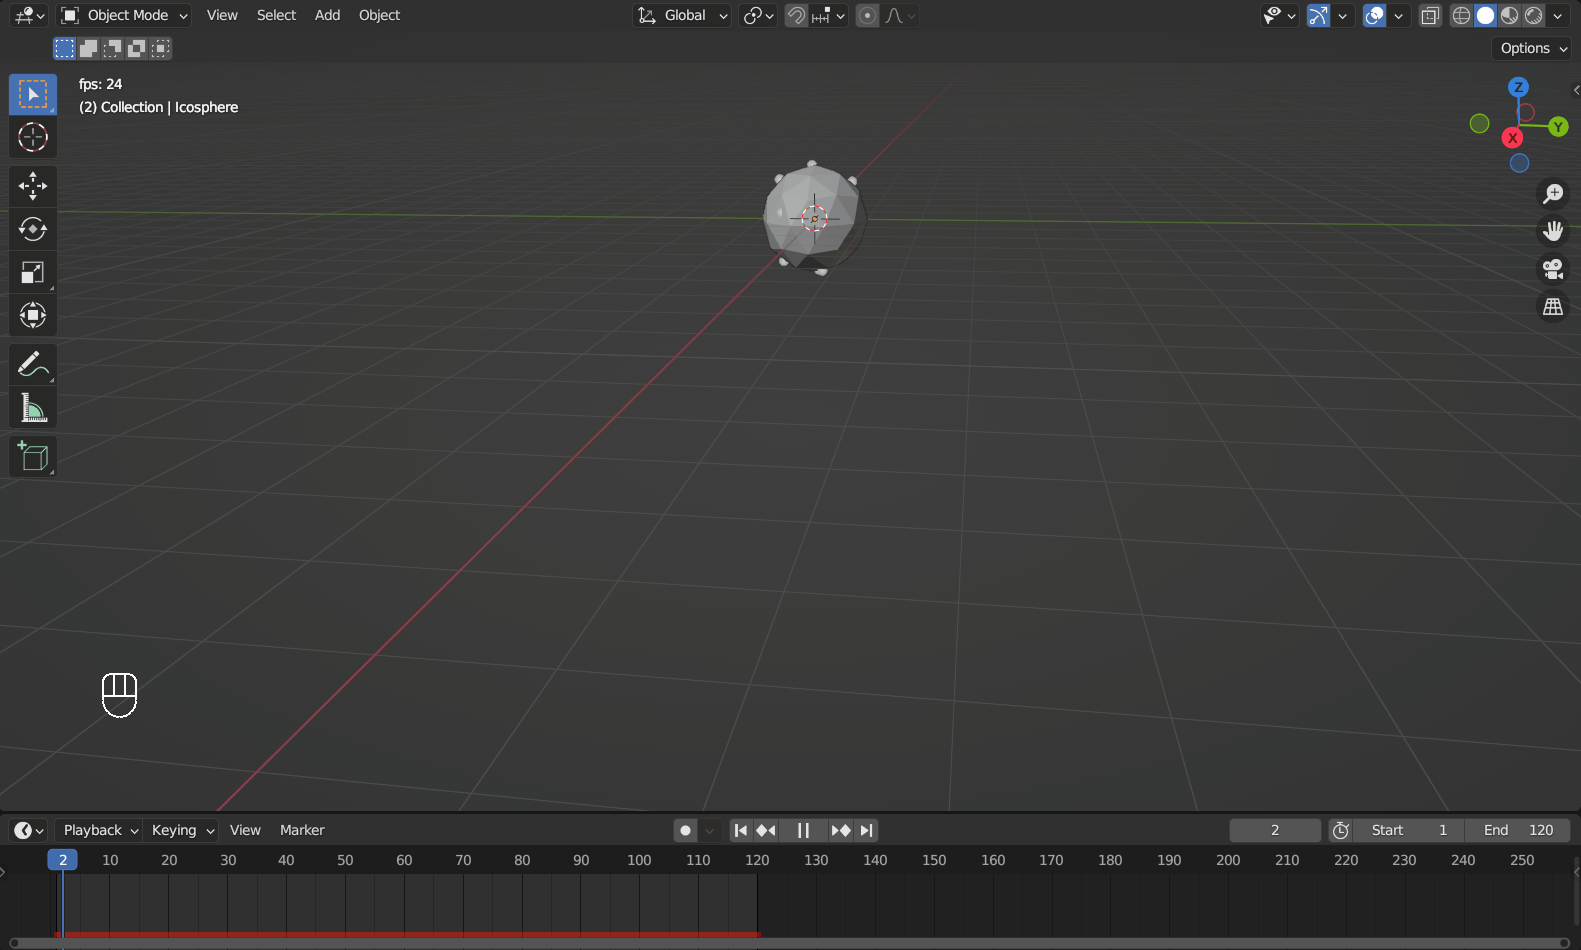
This is how a default emitter looks. In this example, from frame 1 to 120, 1000 particles are randomly generated, and they each exist for 30 frames. You can change these under Emission.
Tip
The particles fall because default particles has Newtonian as its Physics Type and Gravity is enabled, for the latter you can change it in the Scene tab.
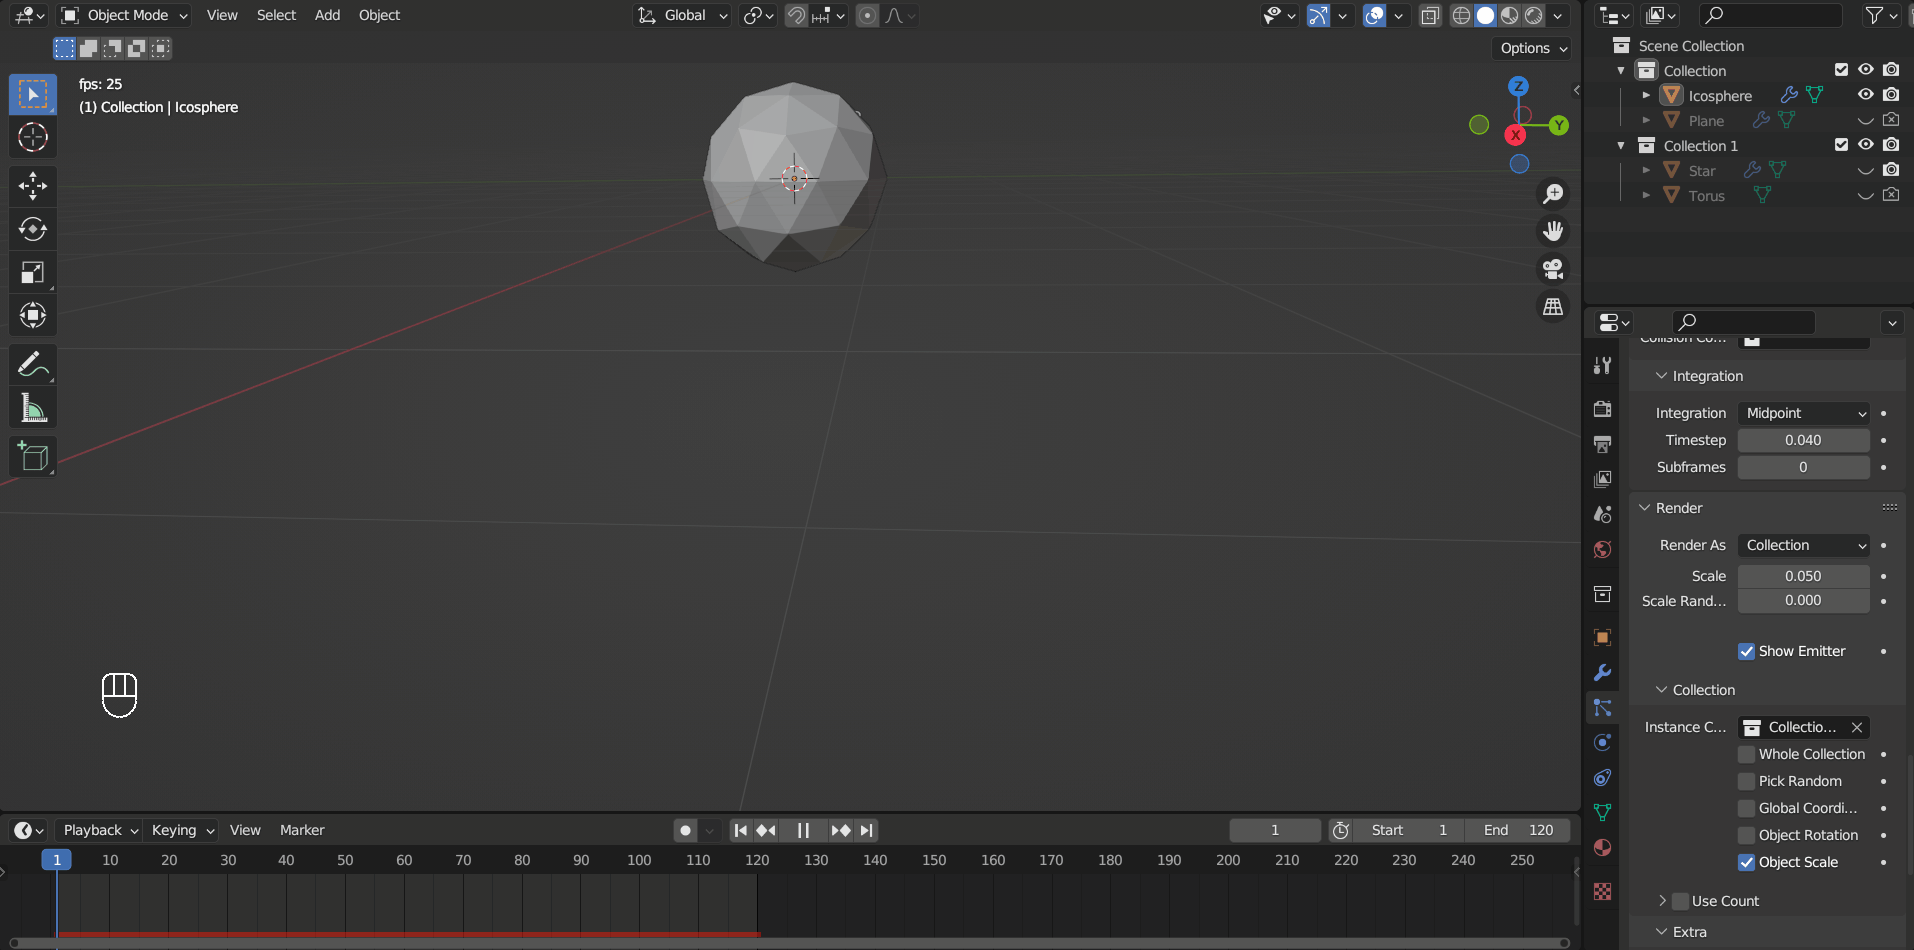
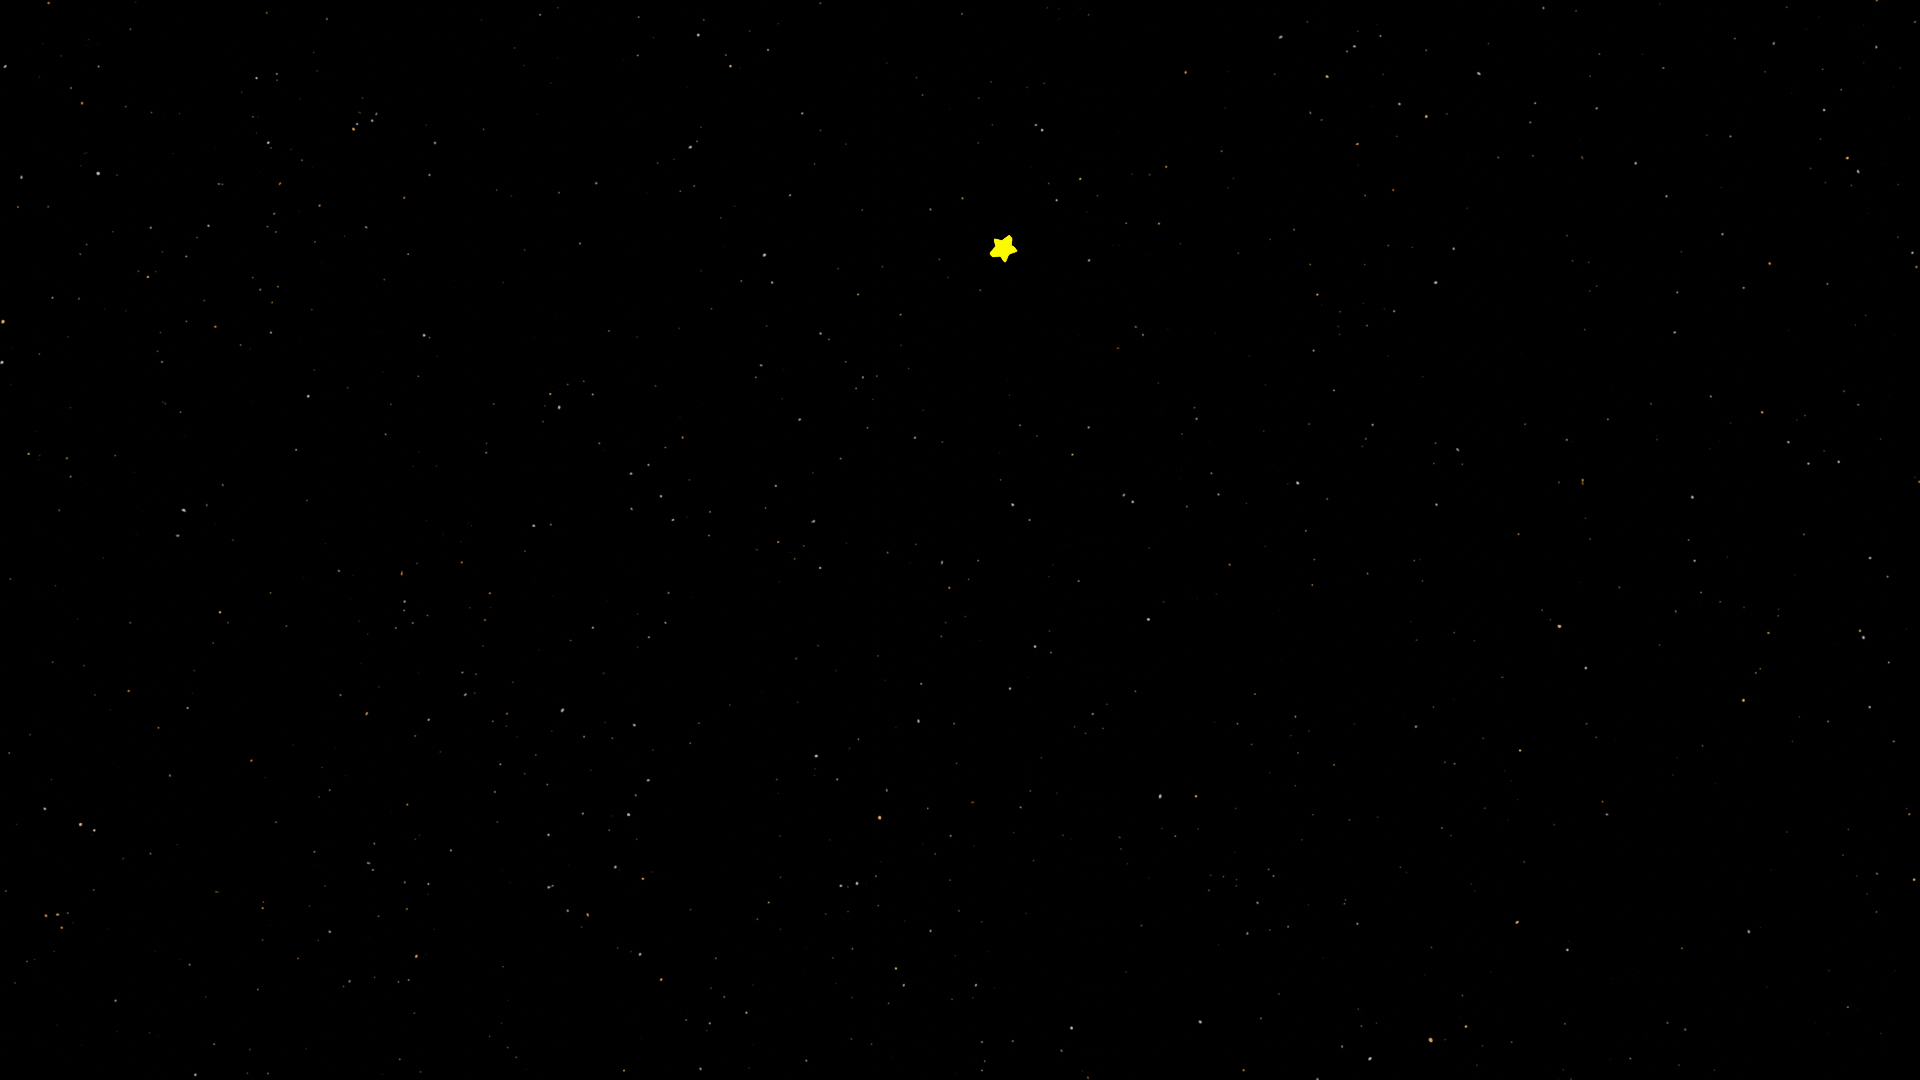
To change how the particles are rendered, Scroll down to Render. Here the ico sphere is raining down stars and donuts by rendering particles as these two objects in a collection.
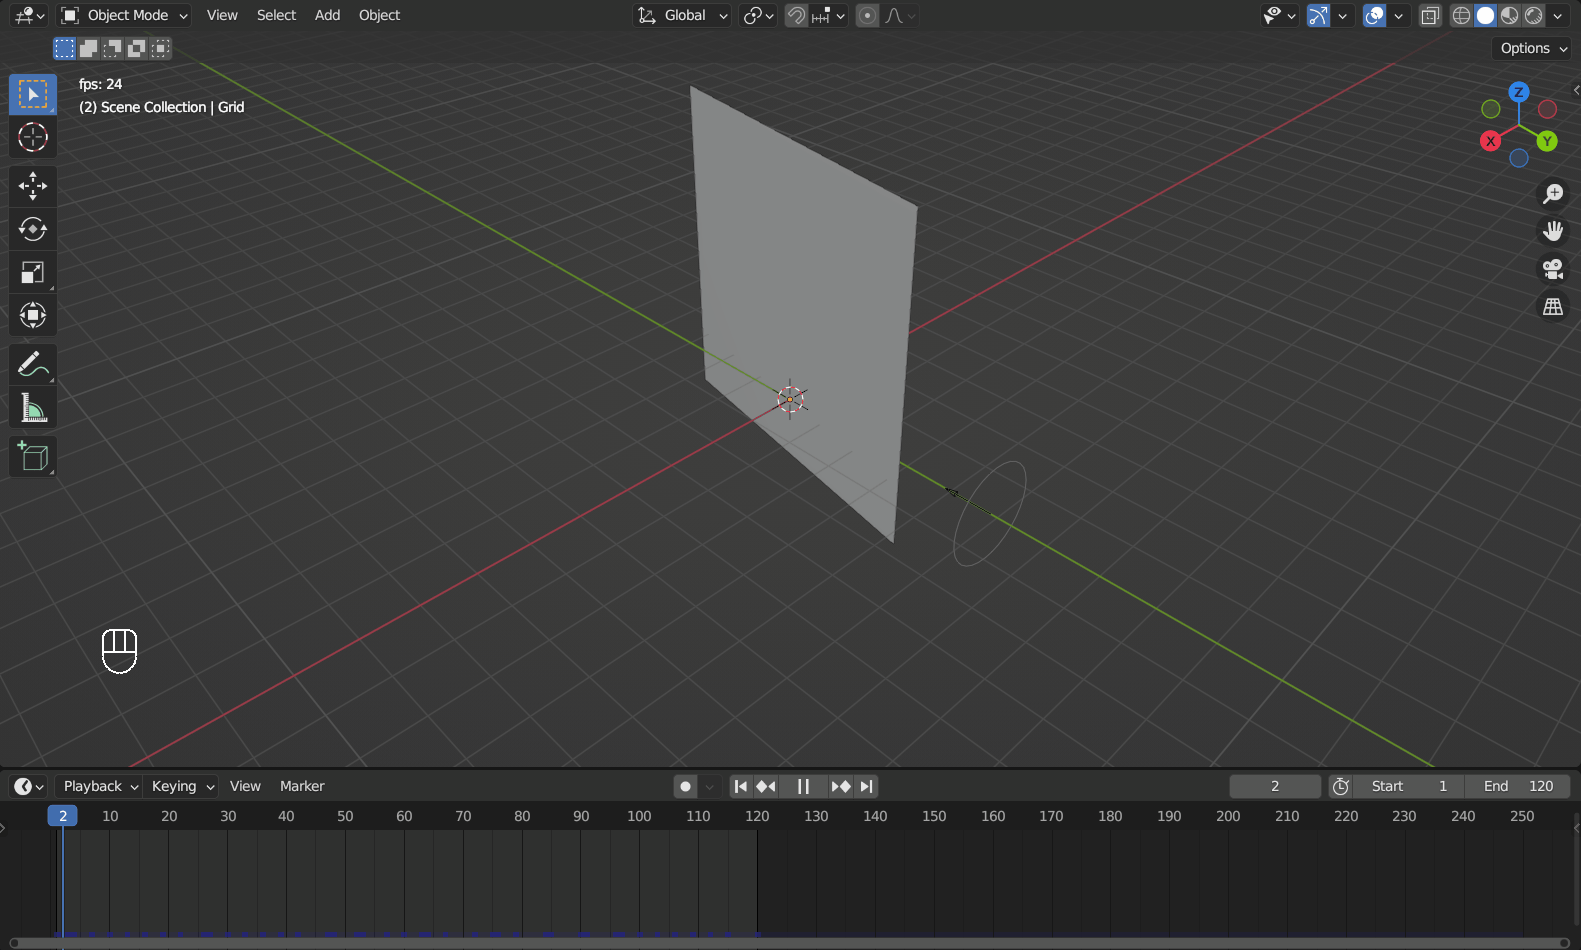
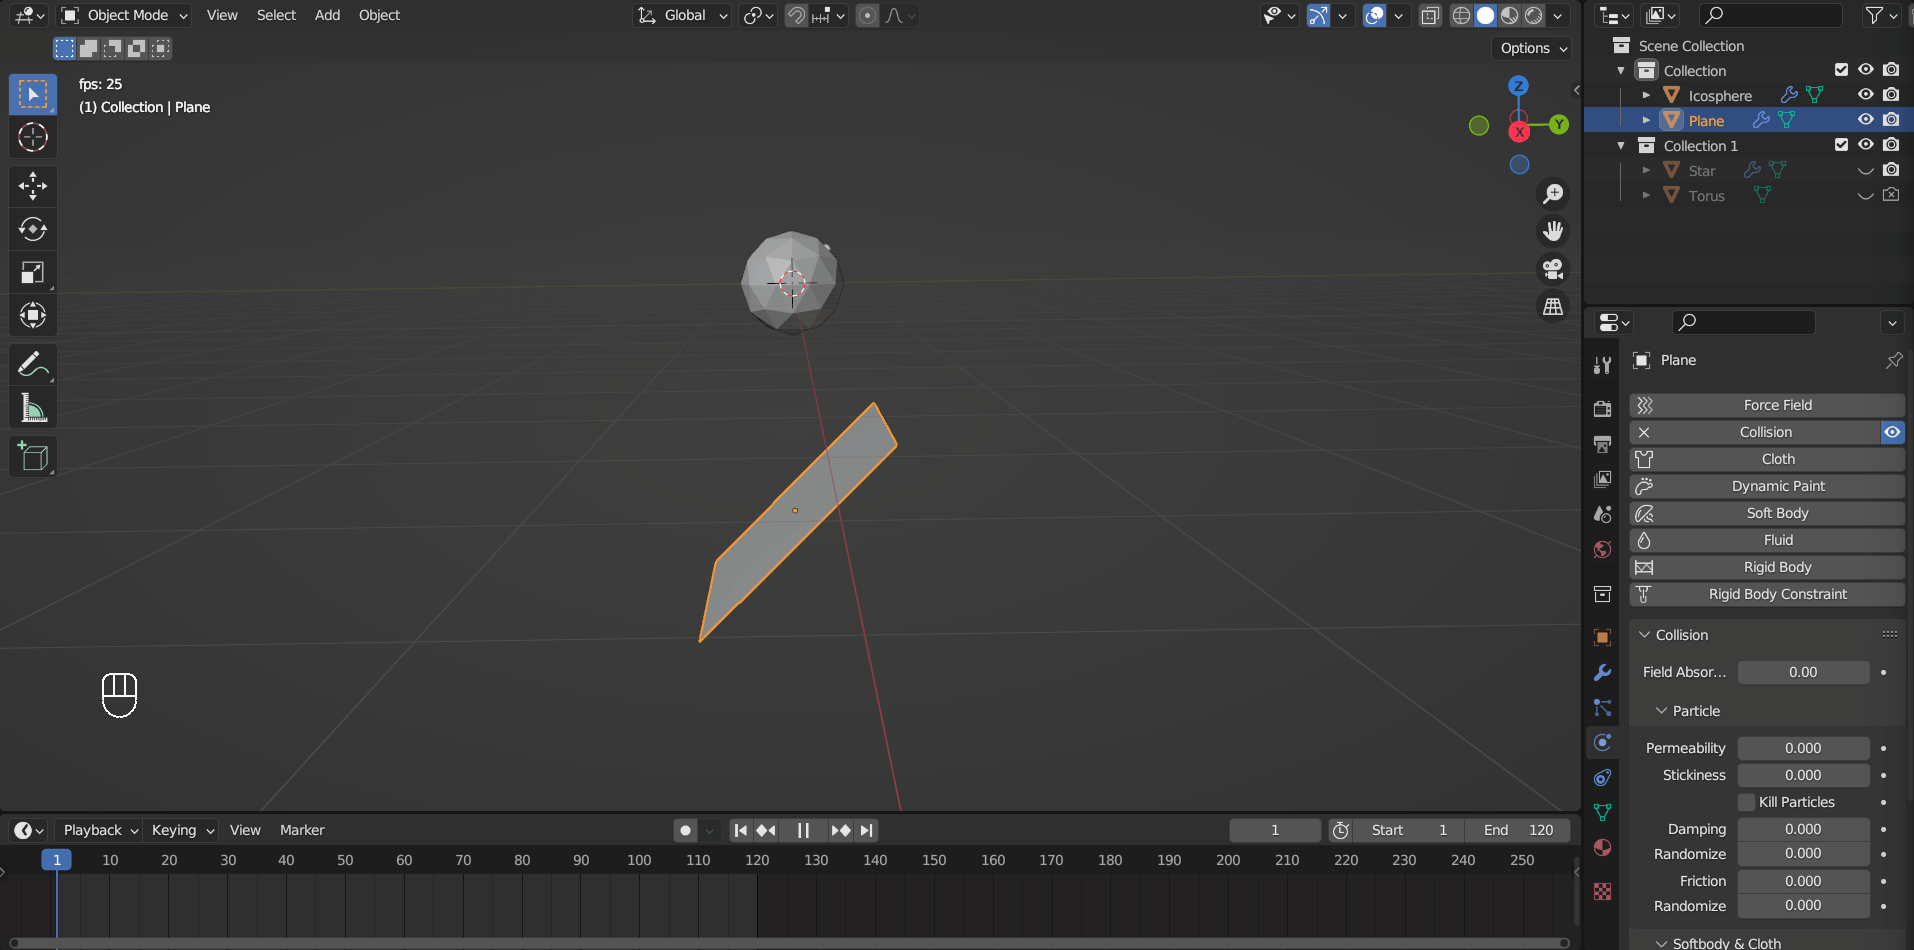
Particles can interact with other objects that have physics effects enabled, like the plane in this example, which has a Collision physics modifier.
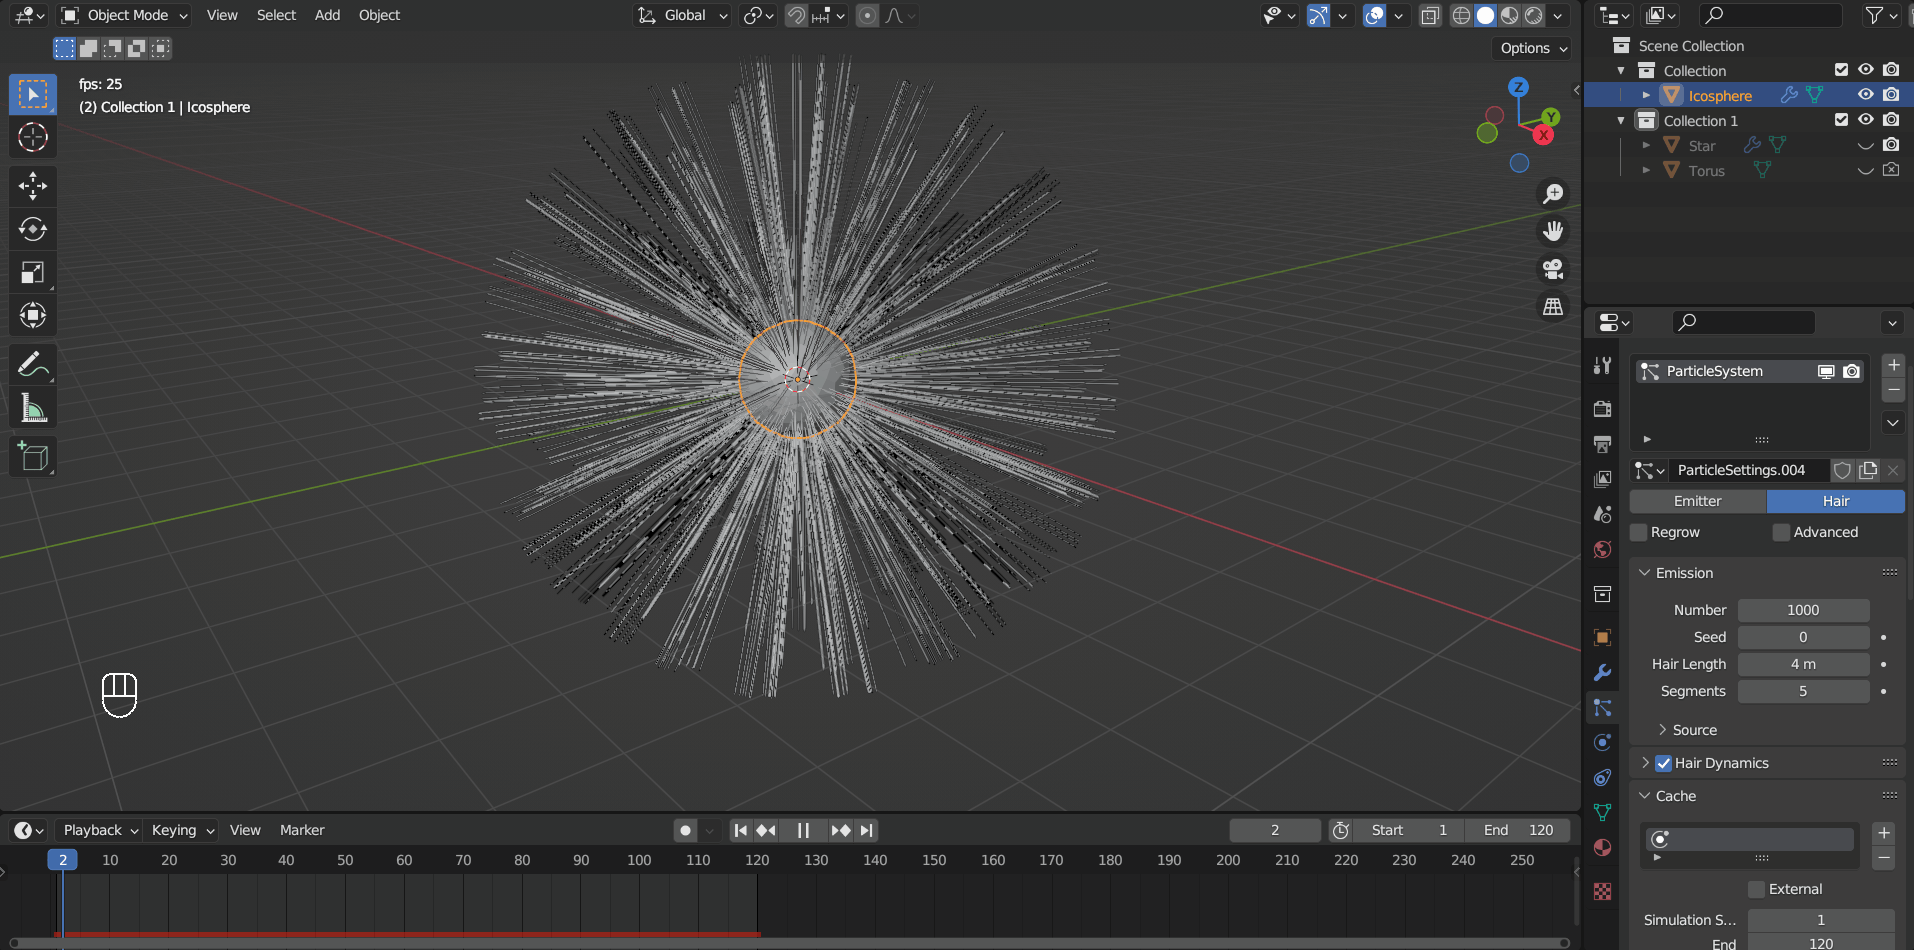
The default hair is not affected by gravity.
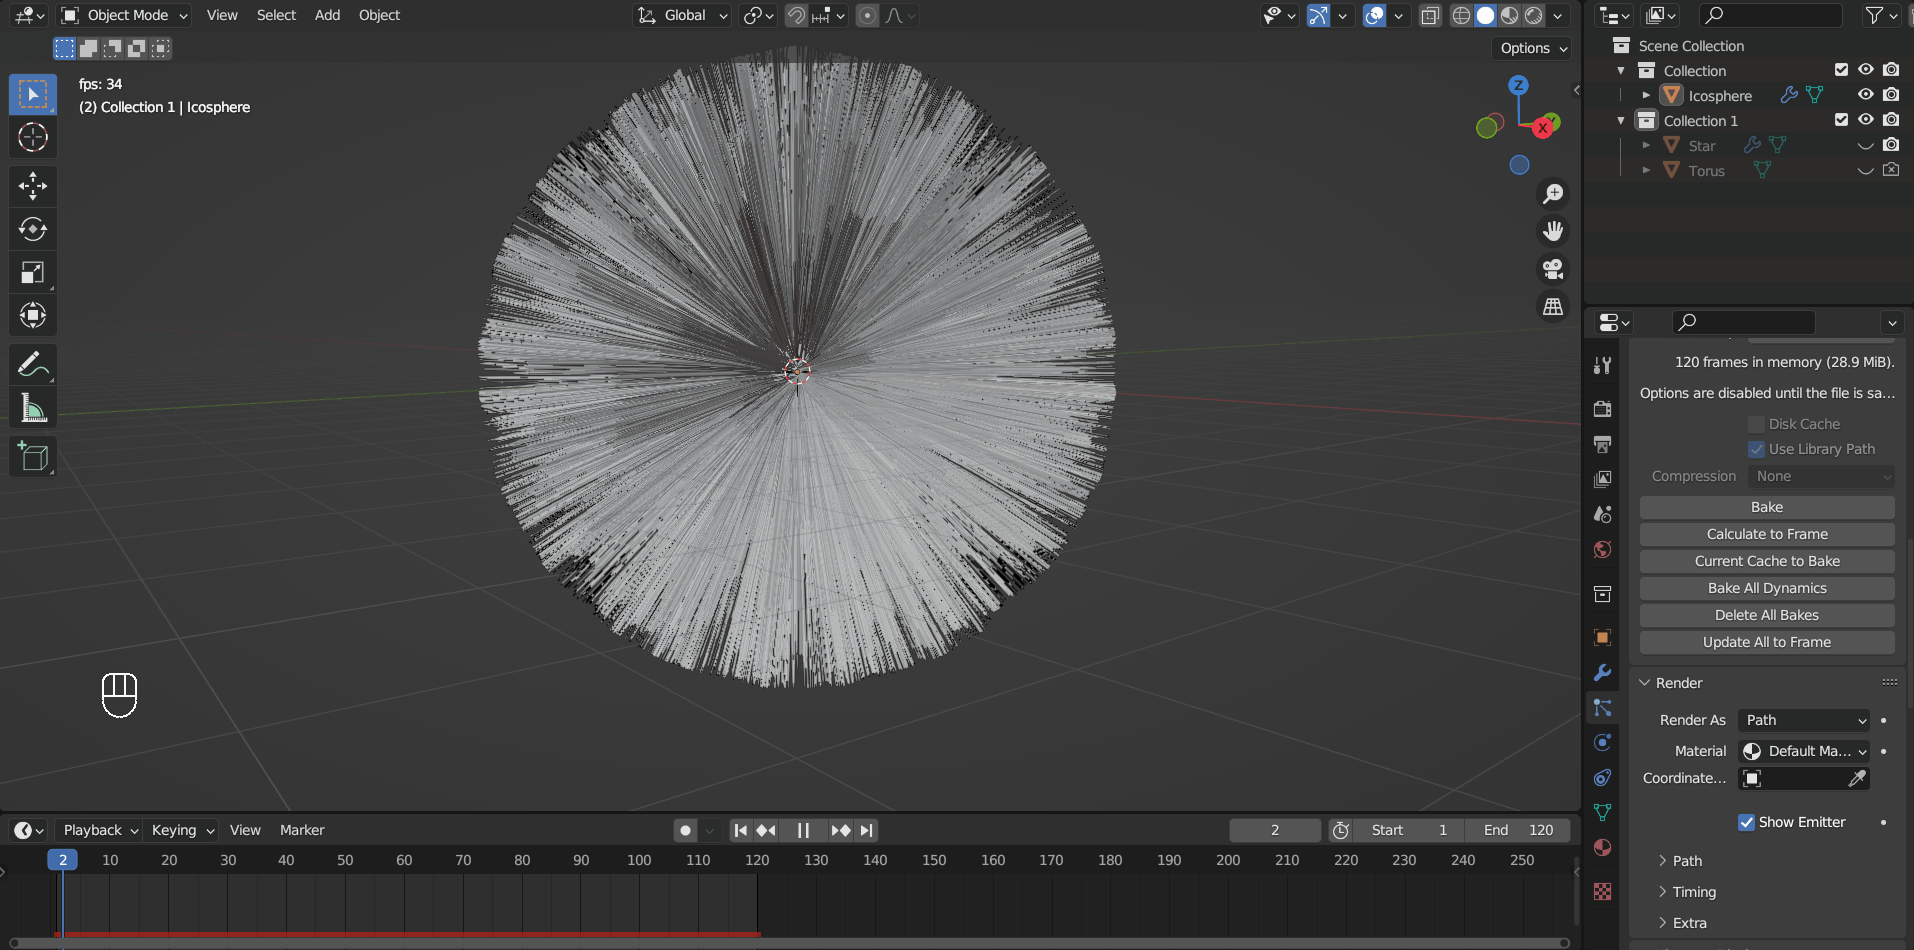
Ticking Hair Dynamics enables physics simulation for the hair.
Enabling Children allows you to render more hair without extra simulations.
Force Fields are generated from objects to influence simulations. All kinds of objects can be used, but the easiest way to try out is feature is to add one in Add > Force Field menu. Let’s see how Wind affects hair.
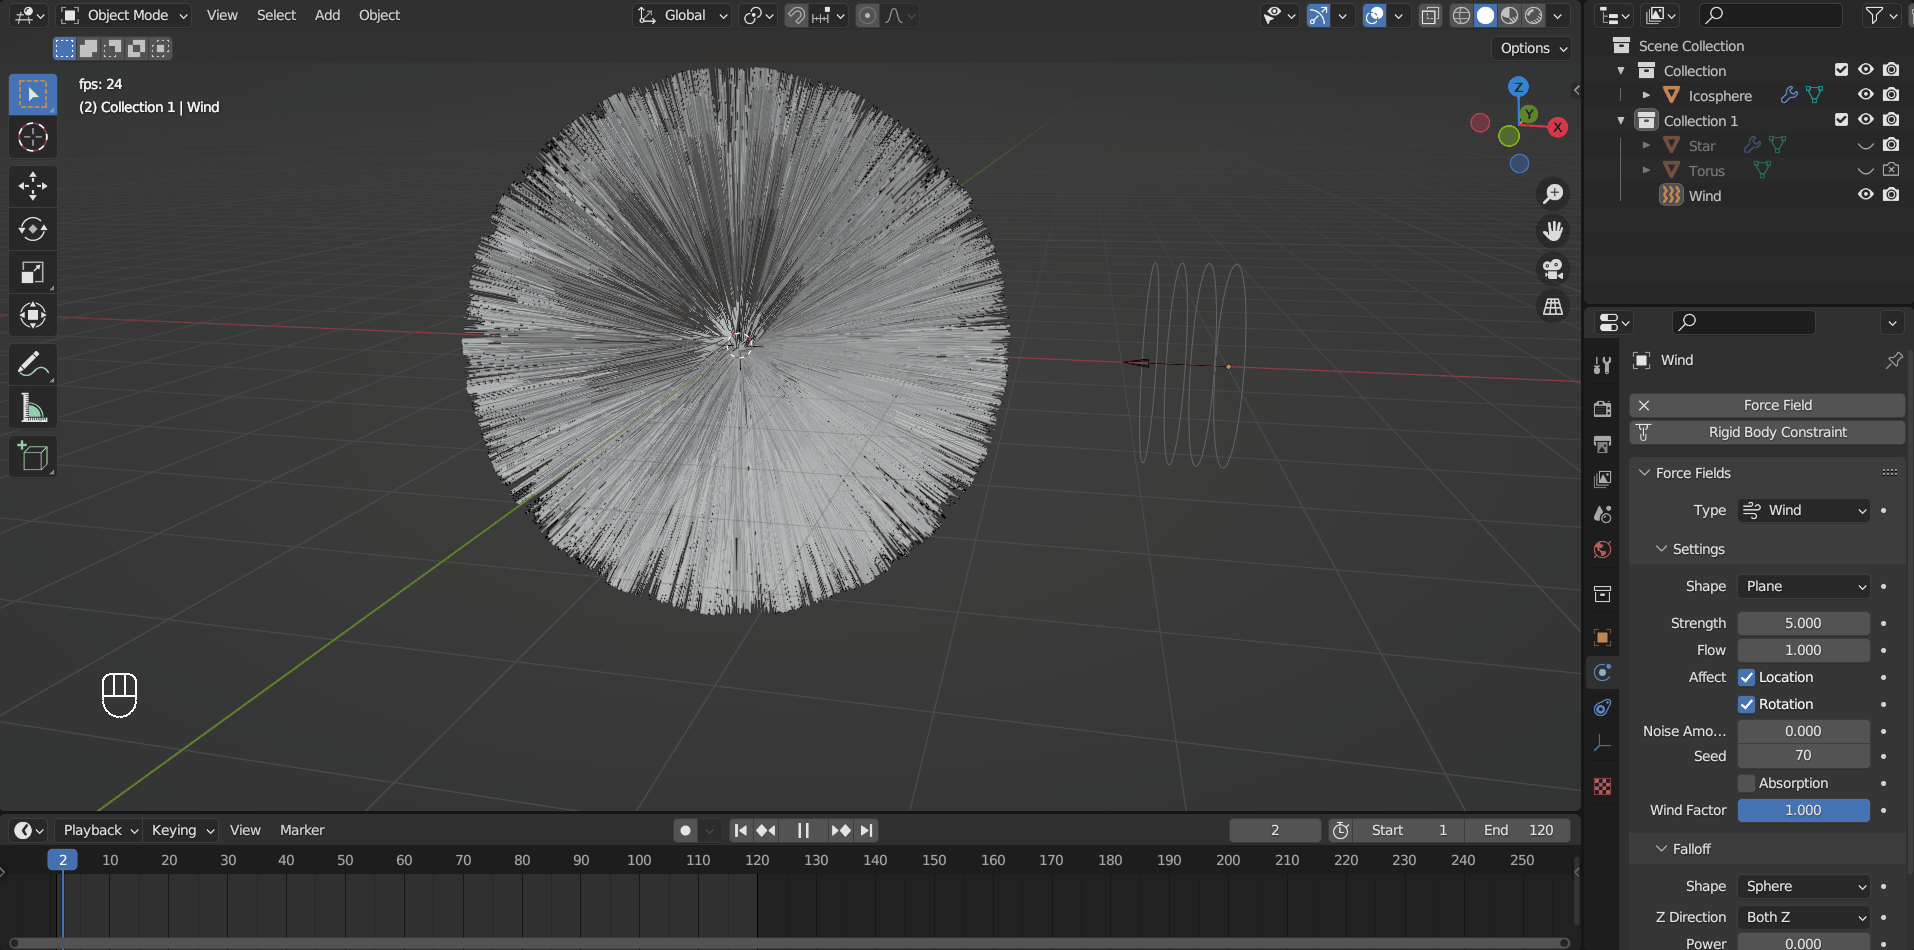
They work on emitters too.
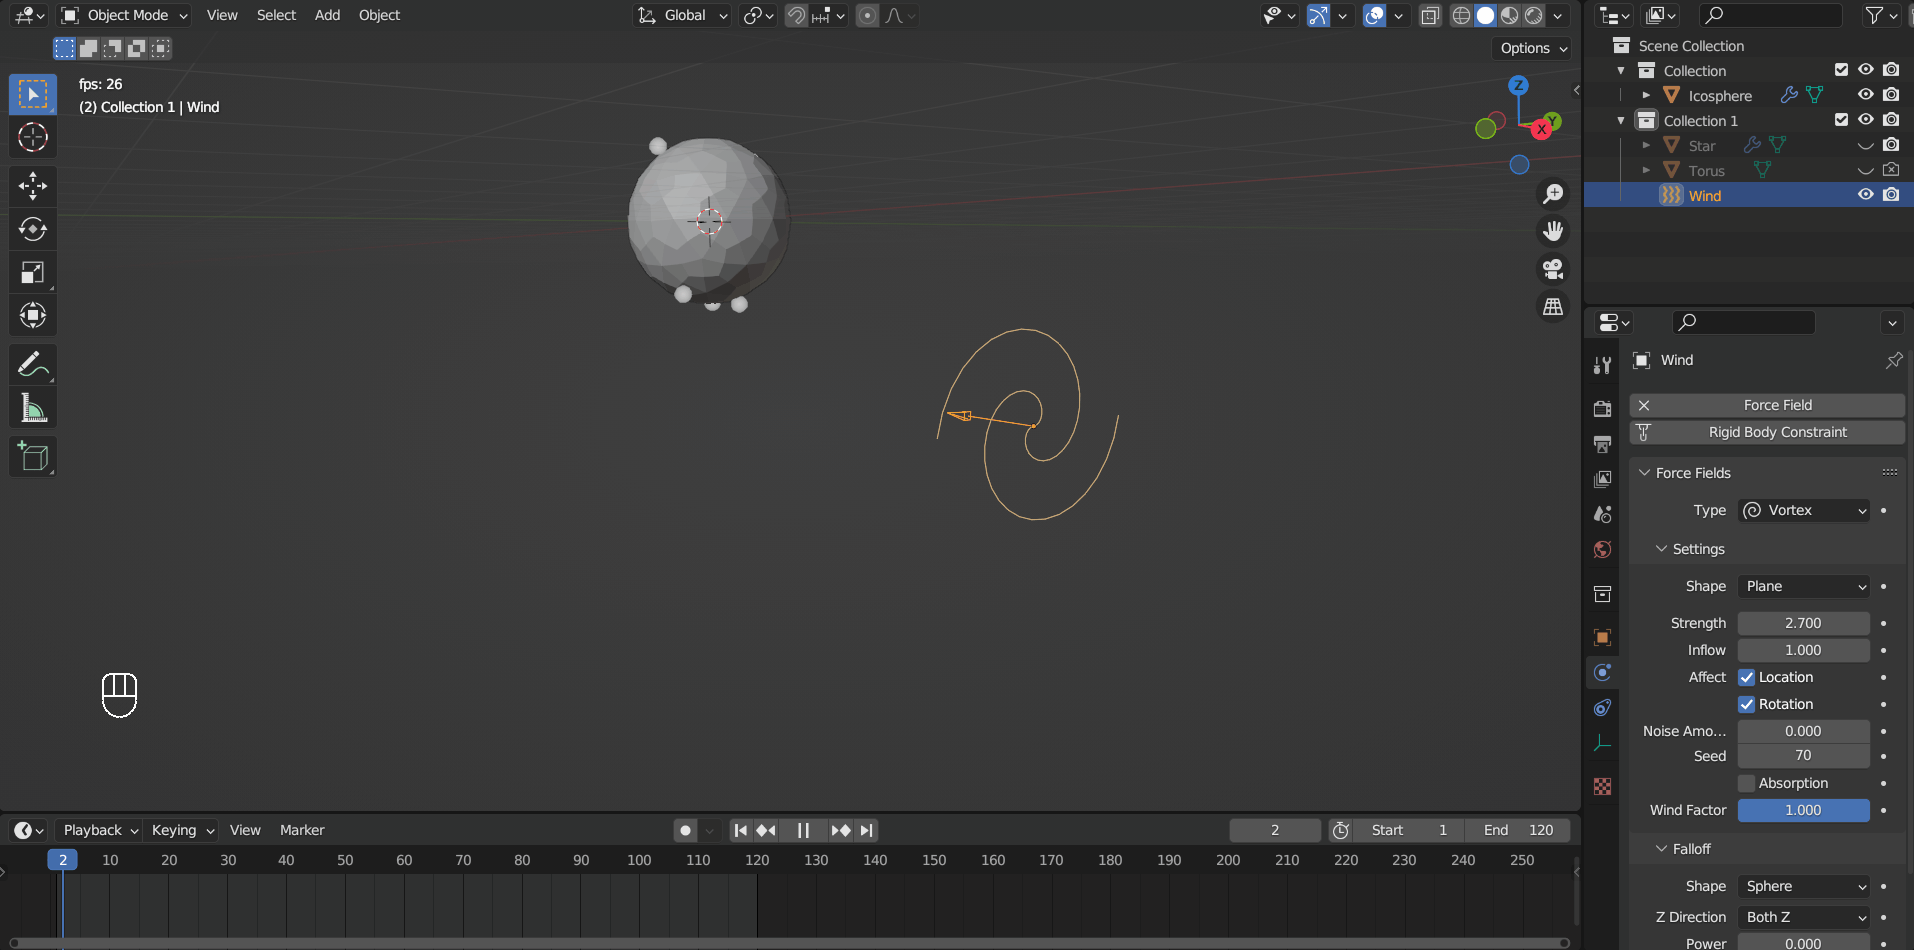
This example is made with a Turbulence at the center of the emitter.
Physics Simulations#
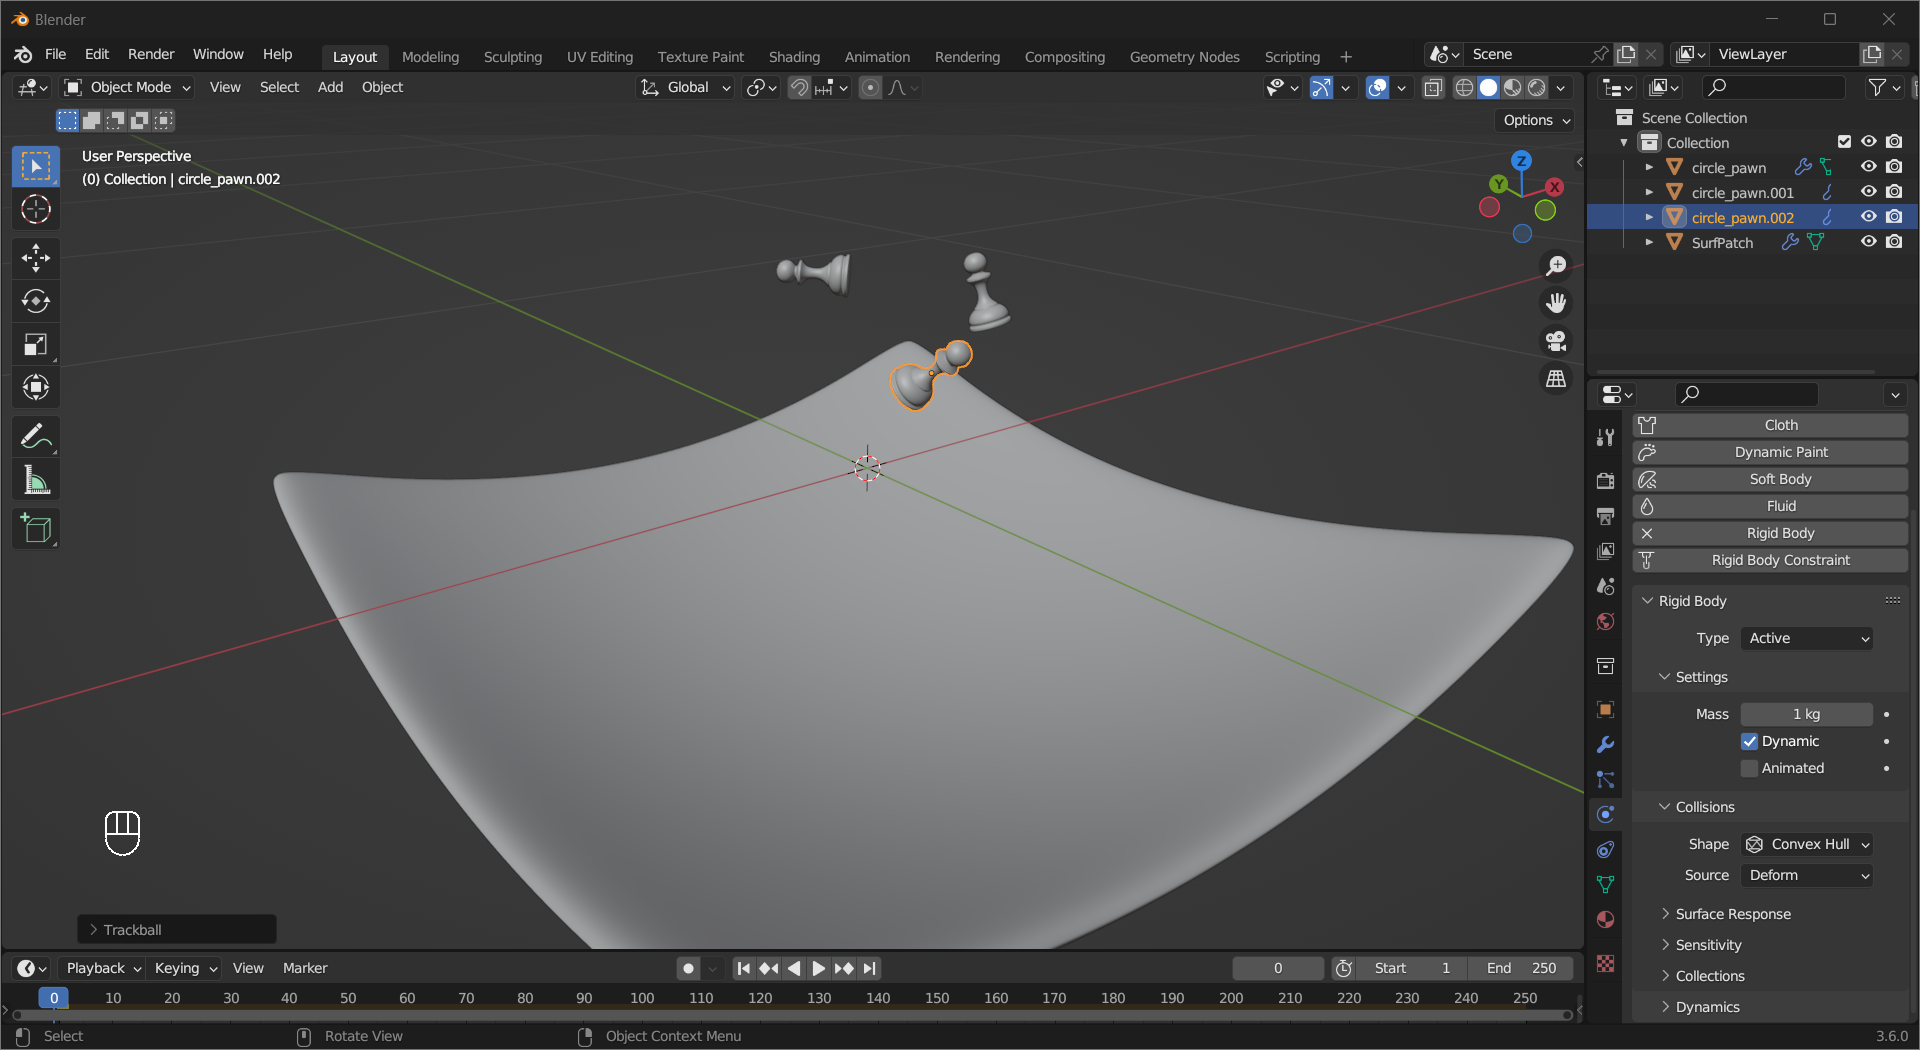
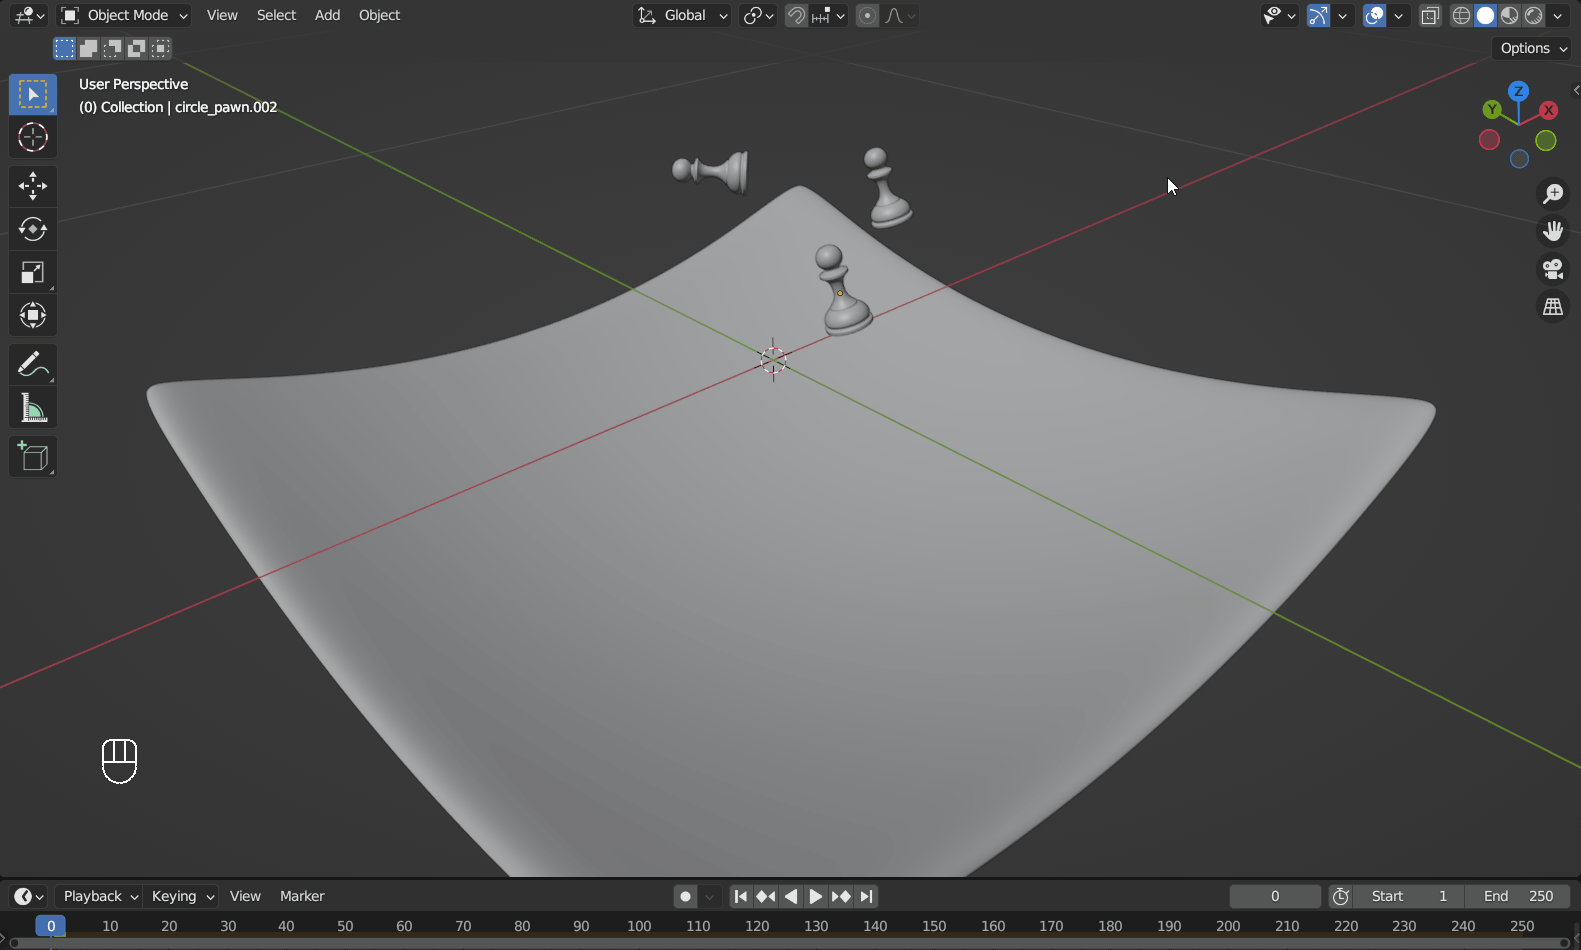
The Rigid Body simulates the motion of solid objects, and you can choose between two types: Passive and Active. A Passive body remains static during the simulation, to make a mesh object into one, go to the Physics tab in the properties area, Left Mouse Click the Rigid Body button, then set the Type to Passive.
Tip
If your object have a big concave surface like this one, change Collision Shape from Convex Hull to Mesh.

Tip
The pawn is imported from a previous project through File > Append....
An Active body will be dynamically simulated, add Rigid Body to the mesh object and make sure the Type is Active.
Hit Spacebar to run the simulation.
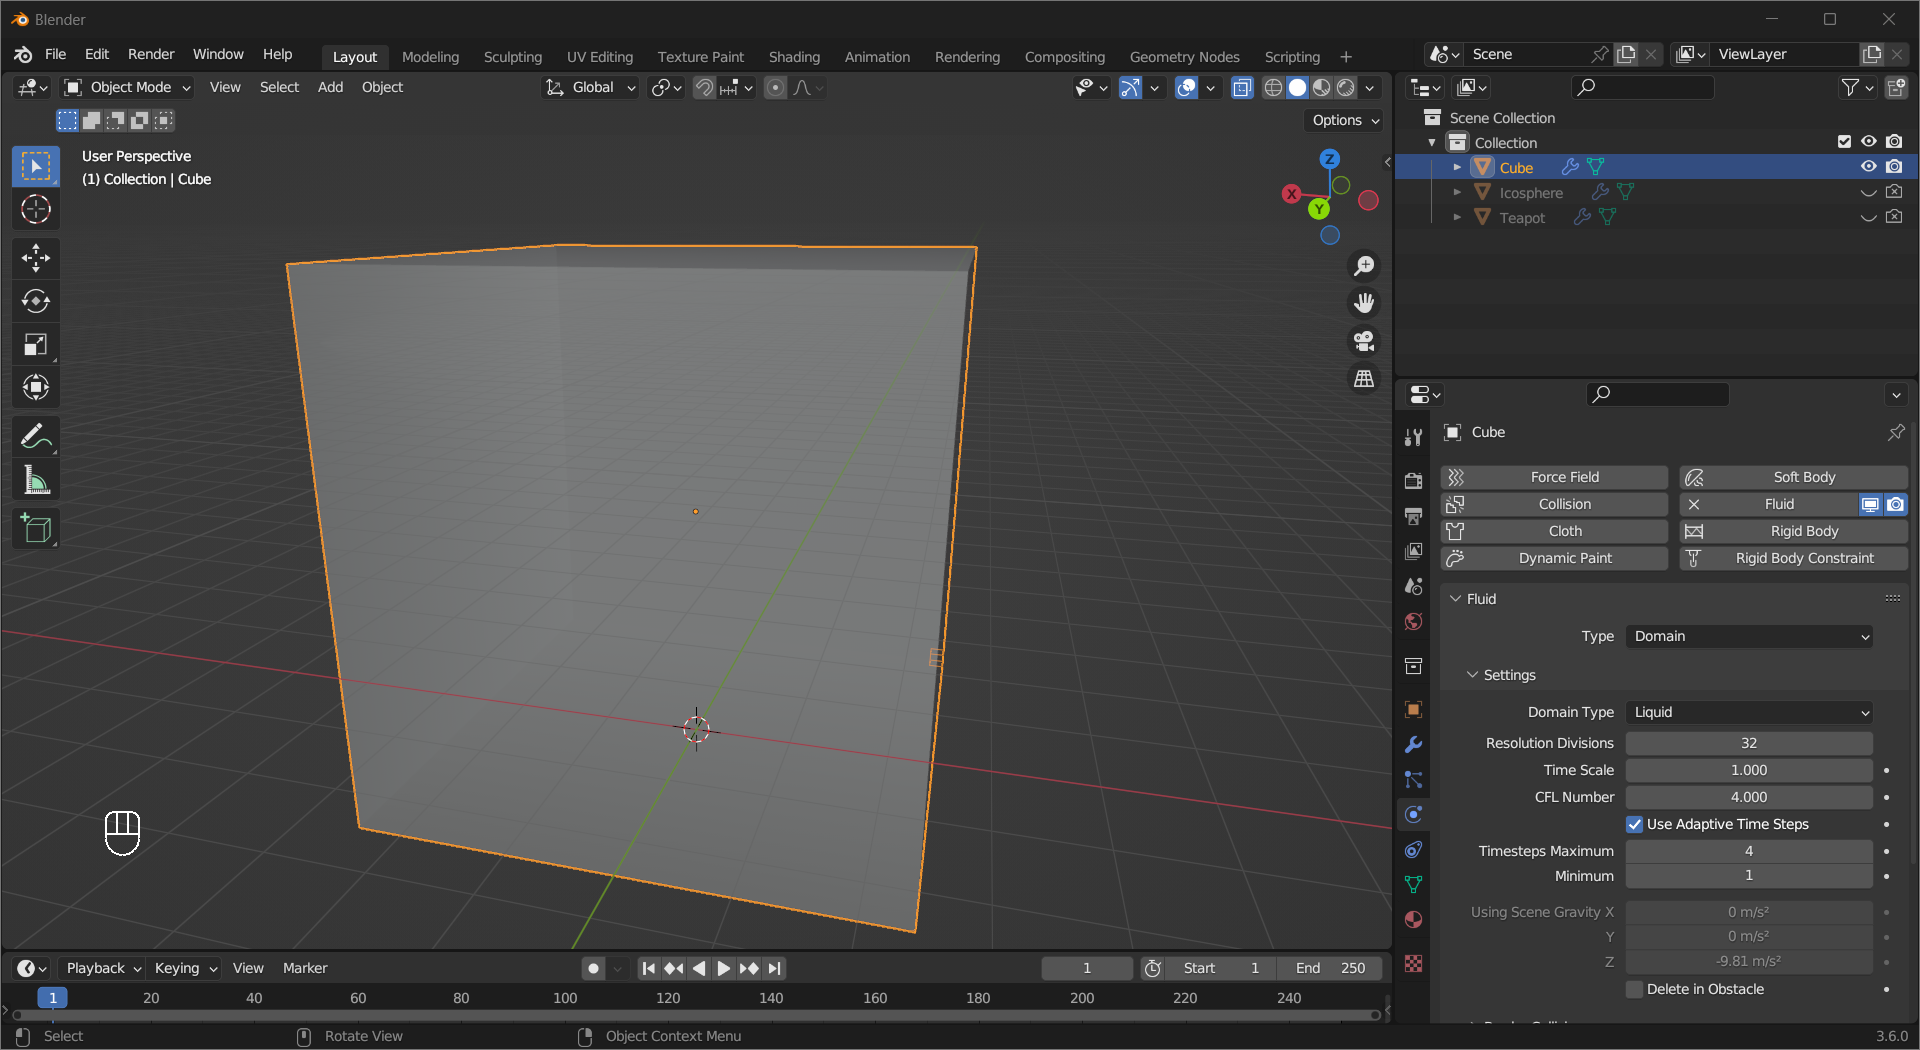
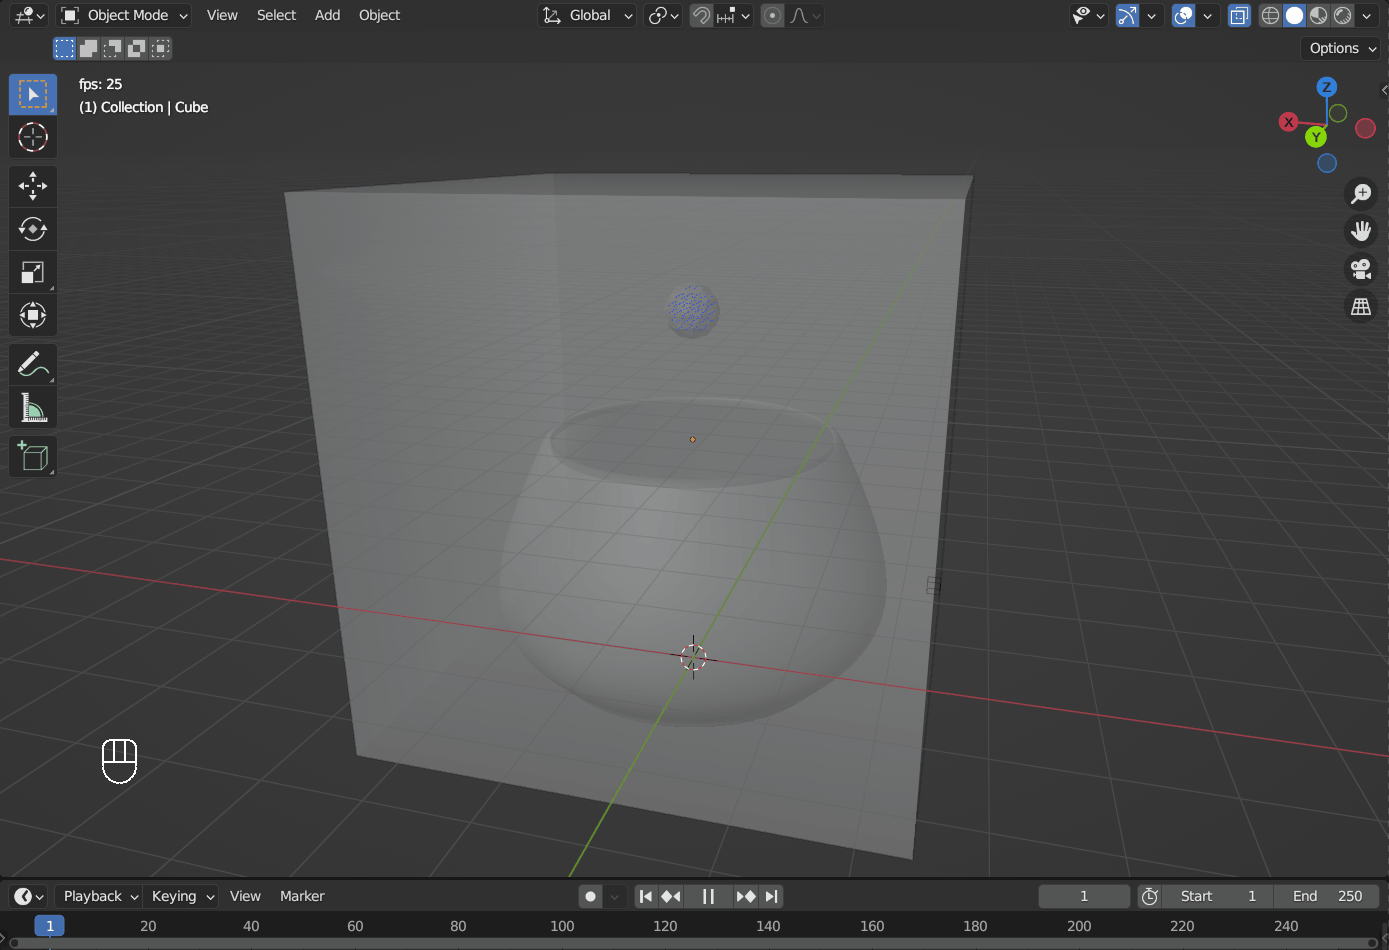
To make basic a flow of fluid, first you need a Domain, which defines the space where the liquid simulation happens. To make a mesh object a Domain for liquid simulation, go to the Physics tab in the properties area, Left Mouse Click the Fluid button, then set the Type to Domain and Settings > Domain Type to Liquid.
Tip
This also adds a
Liquidparticle system and two modifiers to the object.The properties of the simulated fluid are also set in this panel.
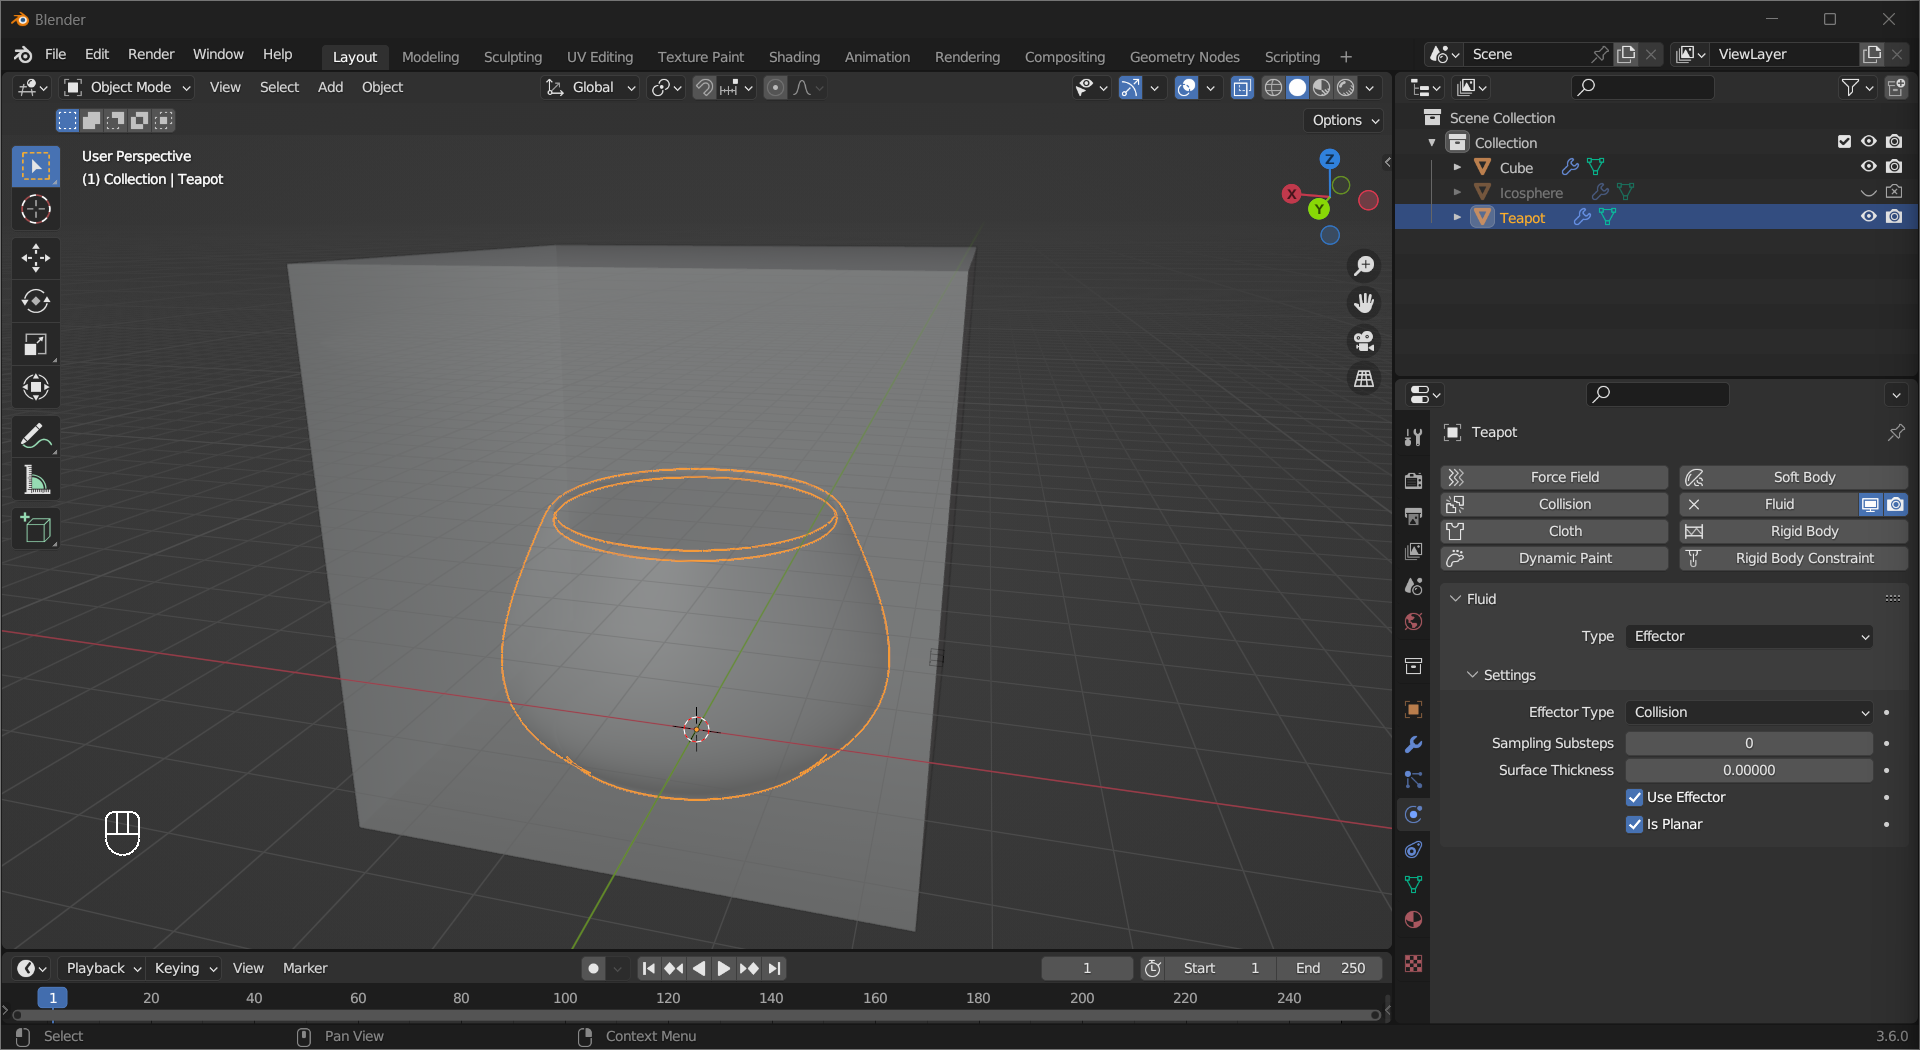
You will also need a vessel to collect the fluid. Make one and move it inside the Domain, give it fluid physics but set Type to Effector this time. If the mesh is unclosed, tick Is Planar.
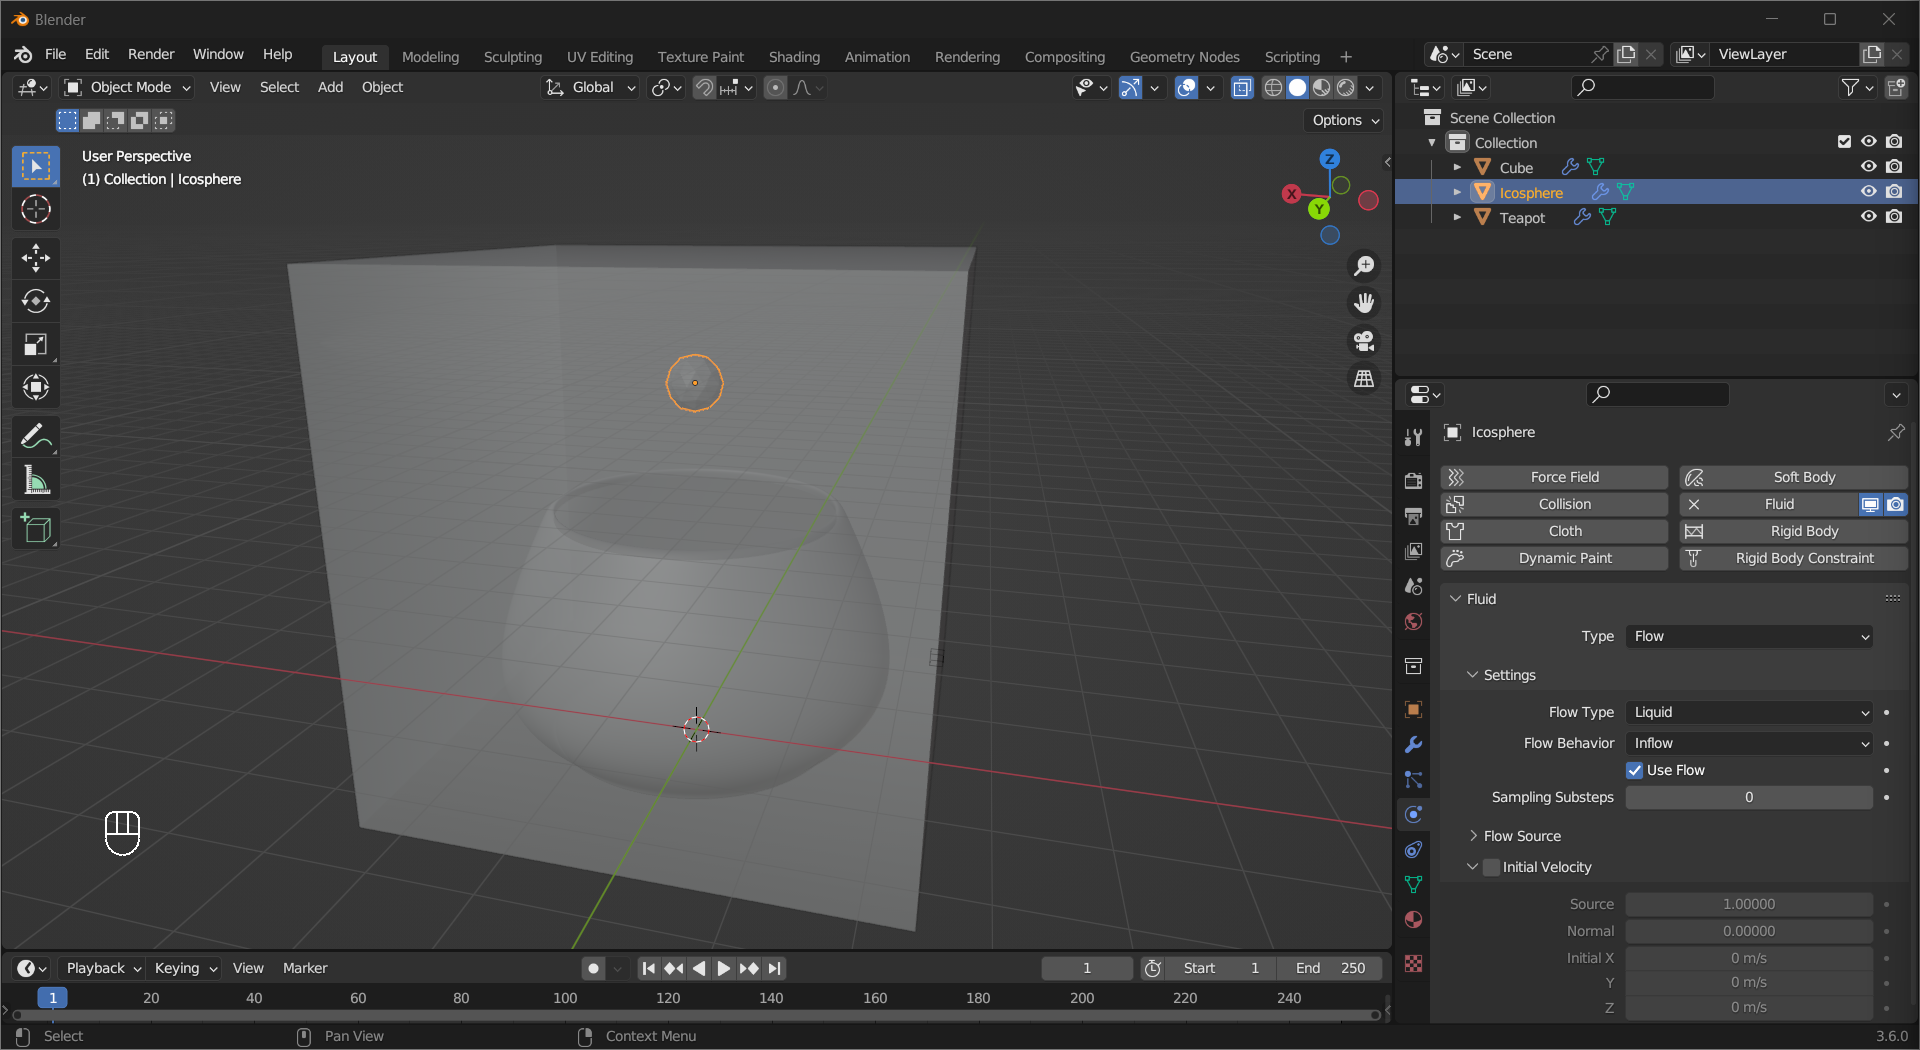
To complete this setup, Blender needs to know where to create the fluid. Add a small object and move it inside the Domain, and make it a Flow type in fluid physics and set Settings > Flow Type to Liquid and Flow Behavior to Inflow.
Tip
Use the size of the object and Settings > Initial Velocity to control the amount of fluid generated.
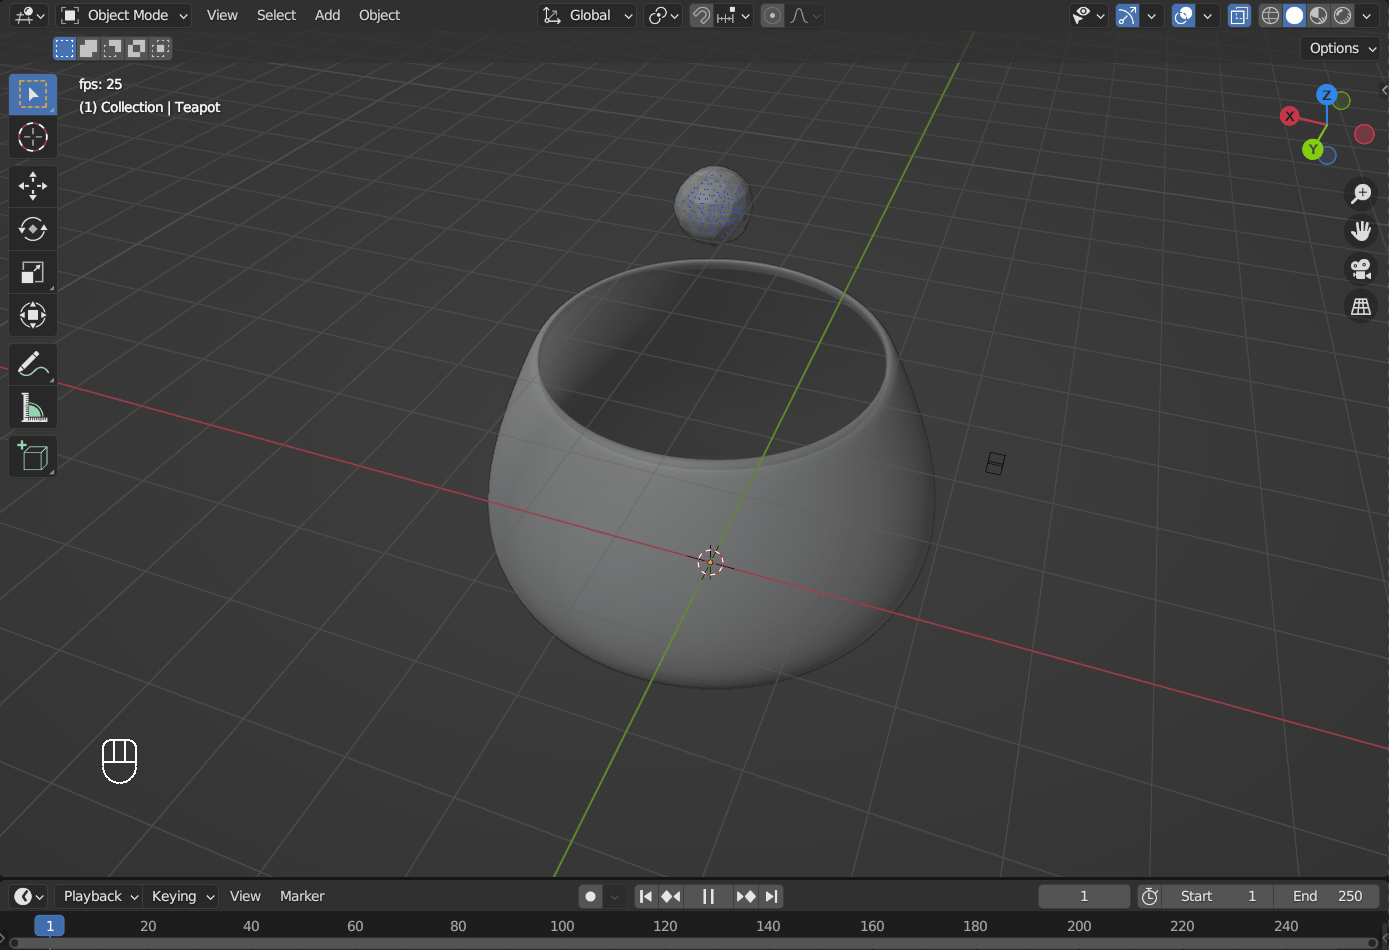
Hit Spacebar and you should see the simulation happening.
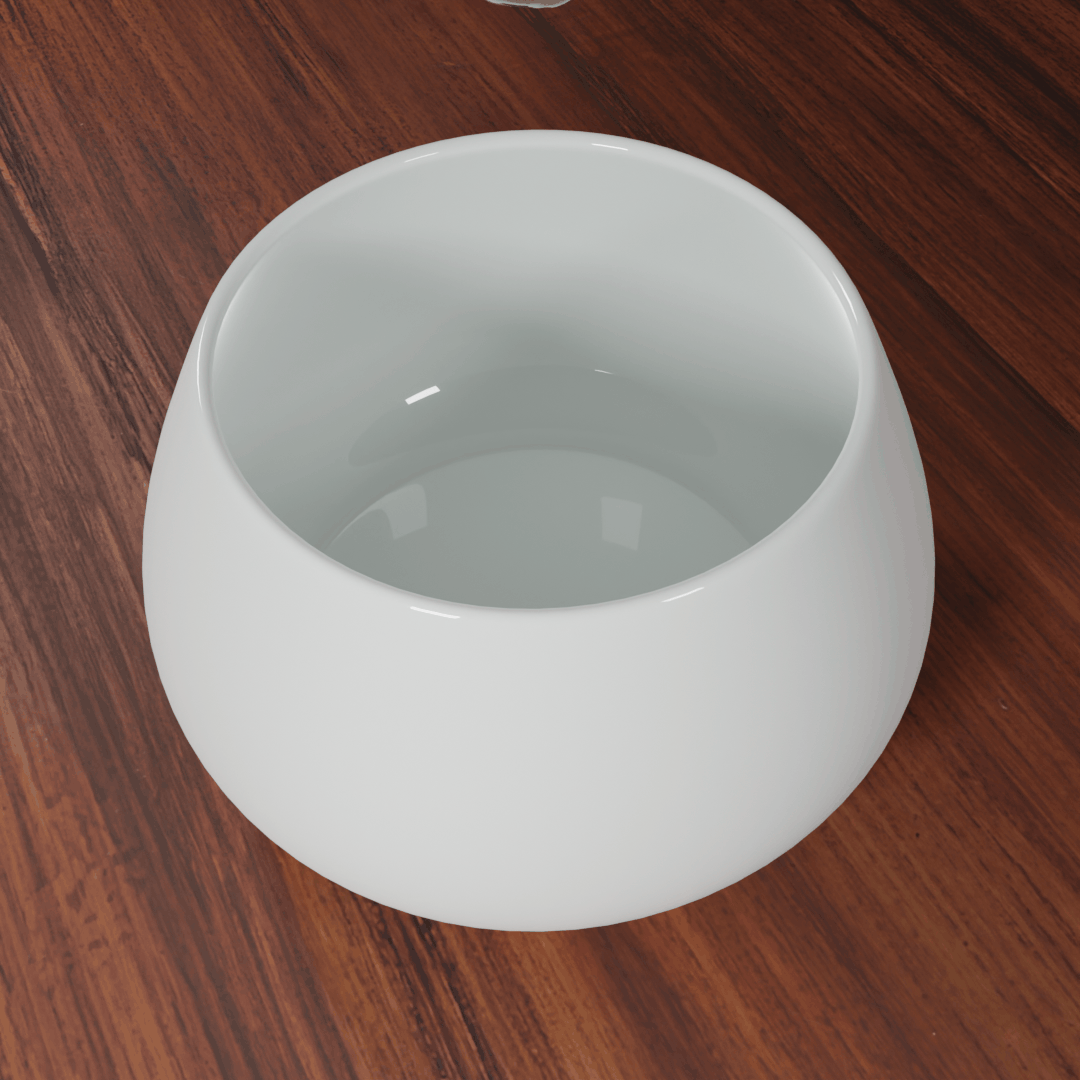
To Render the fluid, you need to turn it into a mesh. Select the Domain object, tick Liquid > Mesh, then restart the animation from frame 1.
Add the liquid material to the Domain object, hide the Flow object, and don’t forget to set Shade Smooth.
Tip
You can increase Settings > Resolution Divisions for a more detailed result if your computer can handle it.
Water in Glass
Sometimes water may look seperated to the glass holding it. This is because water and glass are separate mesh, when the refraction is calculated, the rendering engine acts like there is a layer of air inbetween.

A simple way to fix it is to scale up the water mesh, making the two meshes to overlap slightly.

To run a cloth simulation, first you need to have enough polygons on the mesh. If it doesn’t, use Subdivide in edit mode or add a Subdivide Surface modifier. Then go to the Physics tab in the properties area, Left Mouse Click the Cloth button. The other objects in the scene need to have a Collision physics modifier to interact with the Cloth object.
Tip
Cloth simulation is quite computationally intensive and Blender may freeze if you try to run it in real-time. A safer way is to calculate the physics simulation before the animation starts, also known as Baking. To bake the simulation, Left Mouse Click Cache > Bake.

Add a Subdivide Surface modifier after the Cloth modifier and set Shade Smooth to make it less blocky.
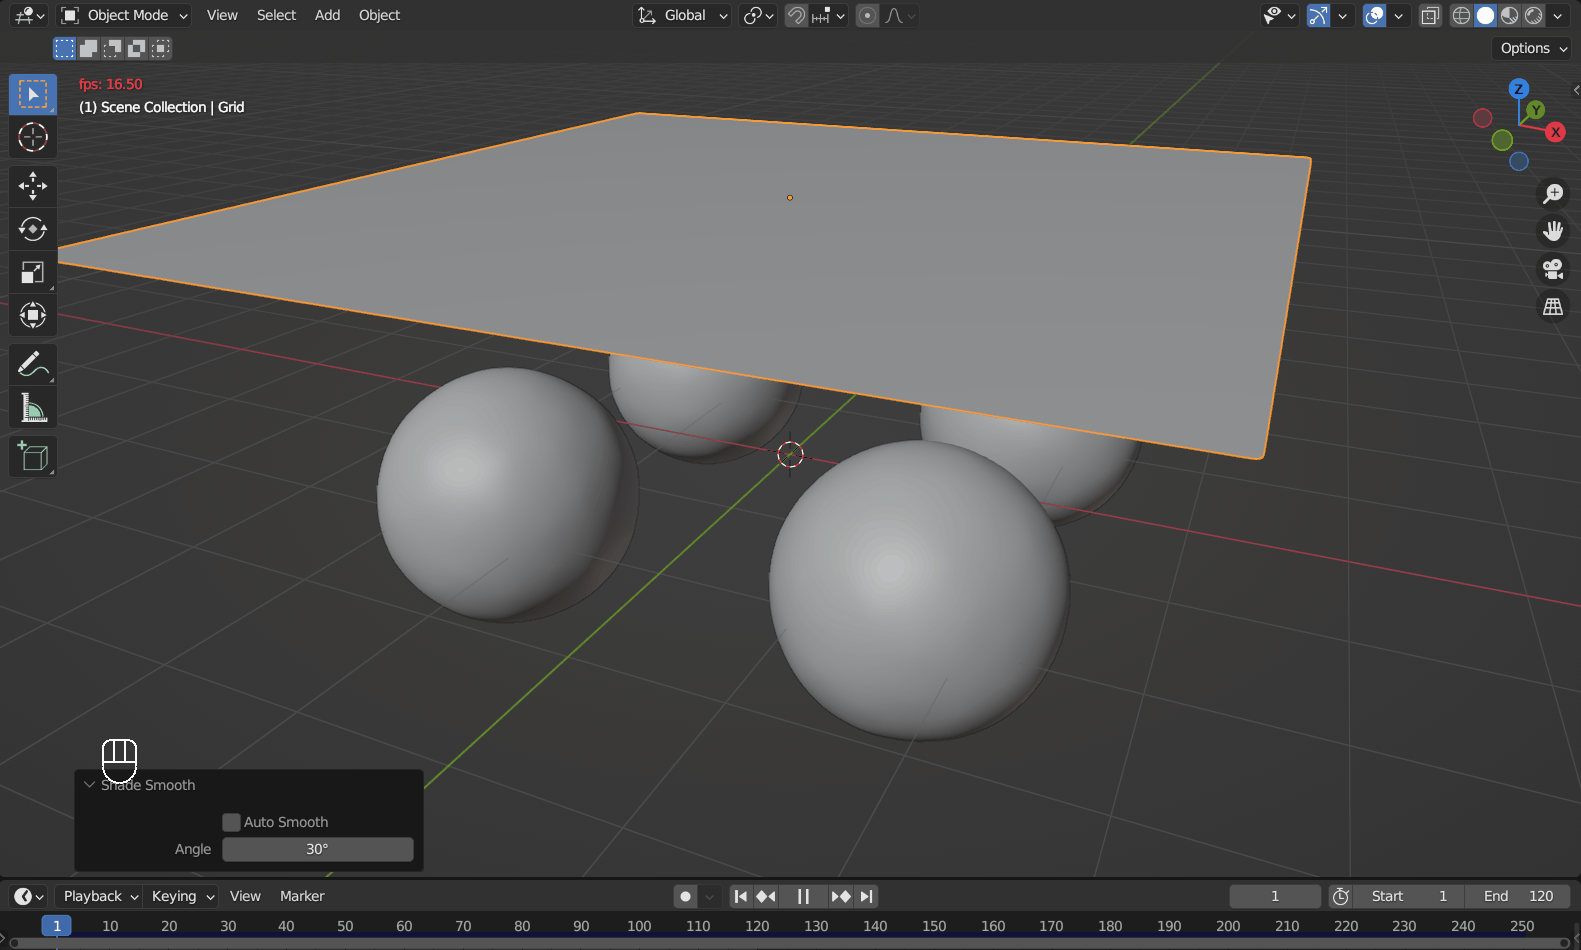
It also interacts with force fields like Wind.