Animation#
In 3D modeling, animation means moving objects and/or making them change shape over time. Just like the previous topics, we will focus on the basic concepts.
Frame#
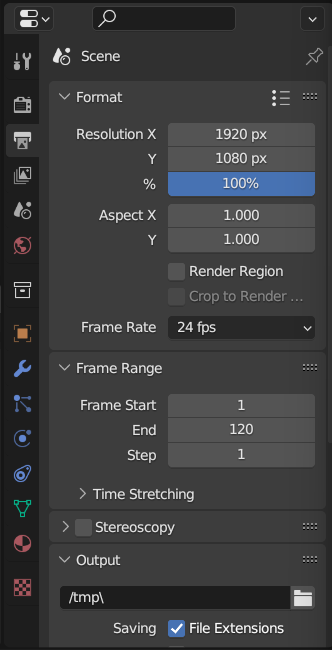
You may already know that videos are made of 24 or more images per second, and these images are called Frames. The concept of frames in 3D animation is mostly the same. On the Output tab in the properties area, you can change the frame rate (frame per second) of the current scene in Format > Frame Rate, and its range in Frame Range.
Keyframe#
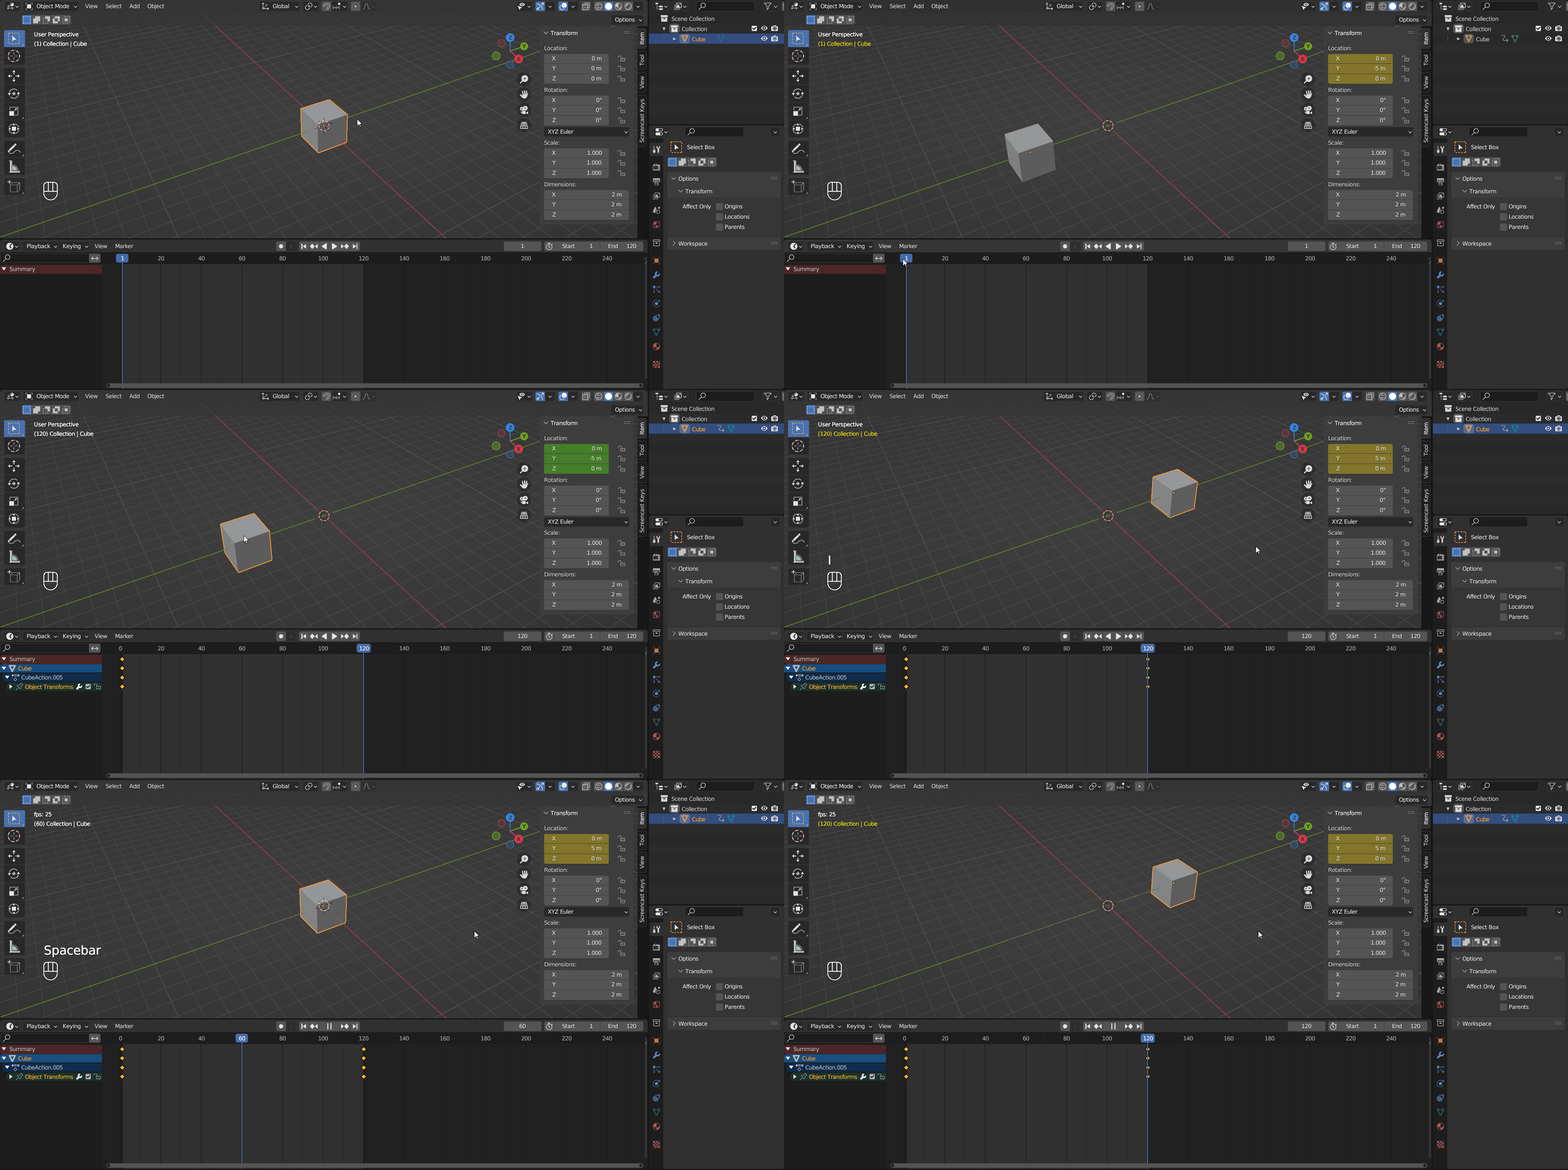
Keyframes store the values of properties at a certain frame. To add a keyframe, first move the current frame to the one you want to add the keyframe in the Timeline area (or change Current Frame on the header), then select the object and press I while the cursor is hovering on the property, or just press I to bring up the Insert Keyframe Menu and select the desired option. When you want to delete it, press Alt + I instead. A property with a yellow background means it is keyframed on the current frame; a green background means it is keyframed on another frame; an orange background means the value is changed from the keyframed one. After adding the keyframes, press Spacebar or Left Mouse Click the play icon to play the animation.
Driver#
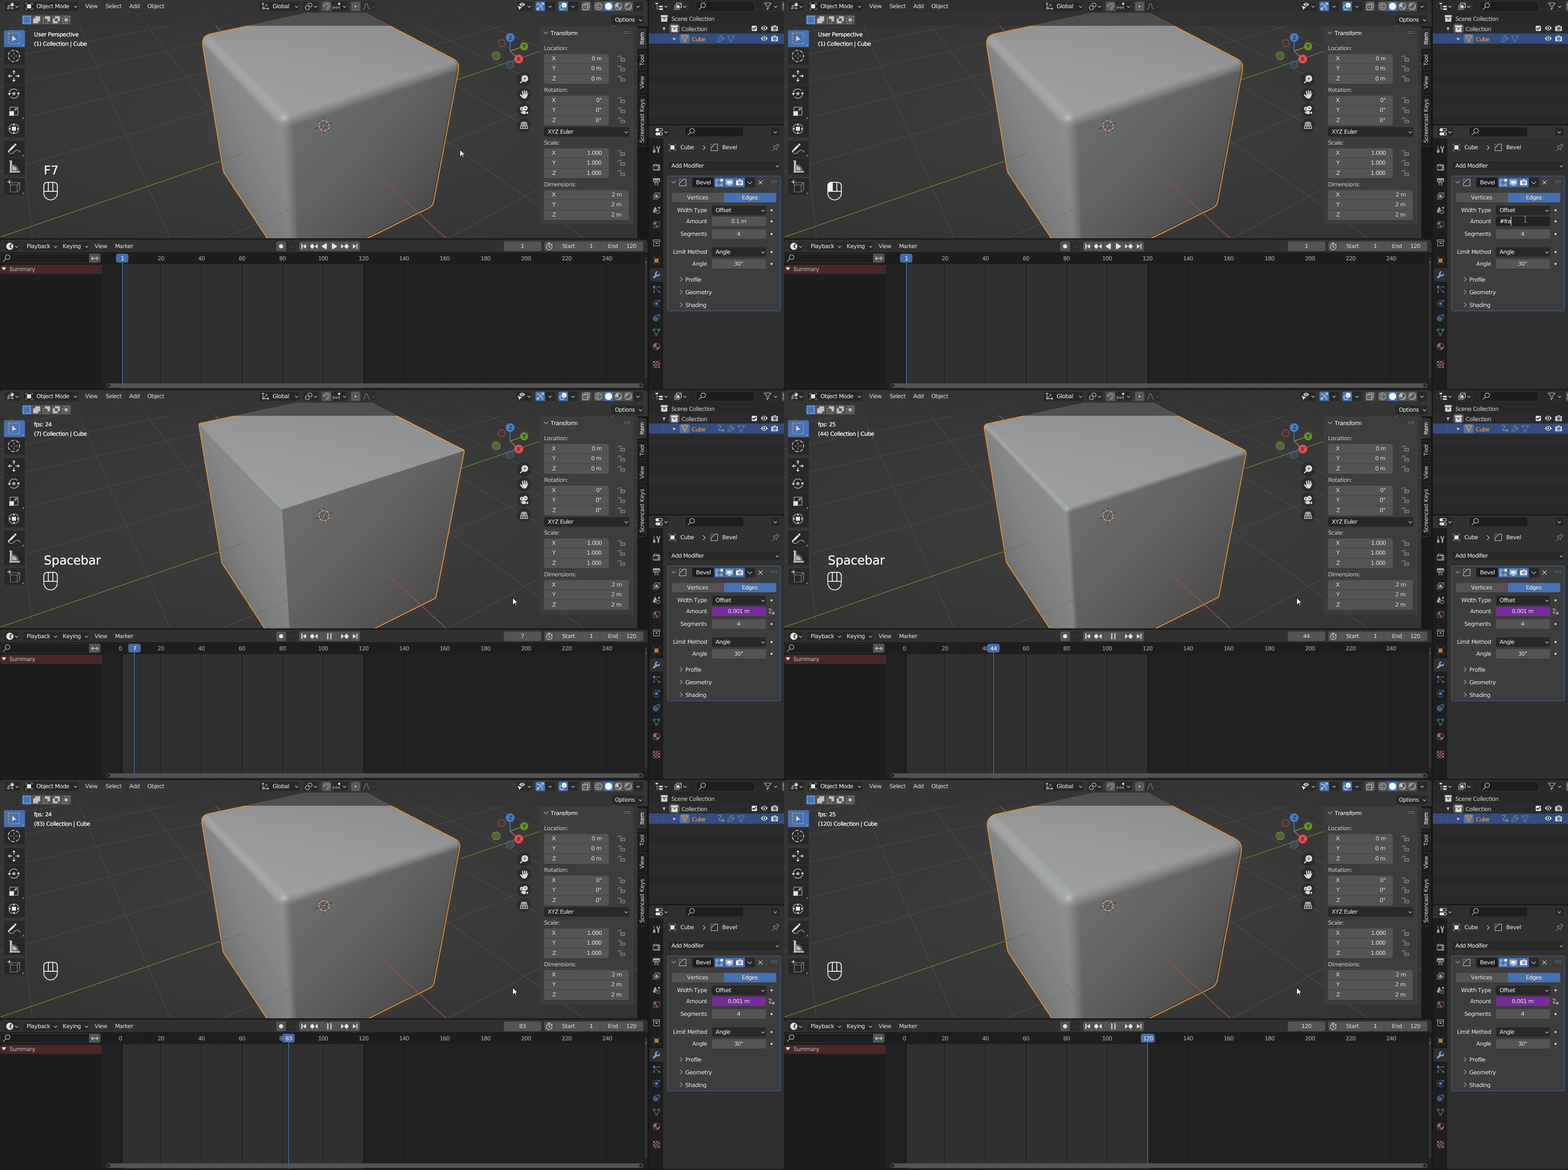
Drivers allow you to use a function as an input value, and a property with a driver is displayed with a purple background. Press Ctrl + D or Right Mouse Click and choose Add Driver on a property to add a driver to that property. You can edit the Expression and choose/add variables in the Driven Property menu. To access the menu again, Right Mouse Click on the property and choose Edit Driver. If a driver is not working as intended, you can try the Update Dependencies option in the menu.
Tip
It might be hard to figure out where the variable locates in the data when you are new to this. A easy way of making variables is Right Mouse Click on a property, choose Copy as New Driver, then Left Mouse Click the Paste Driver Variables icon on the right side of the Add Input Variable button.
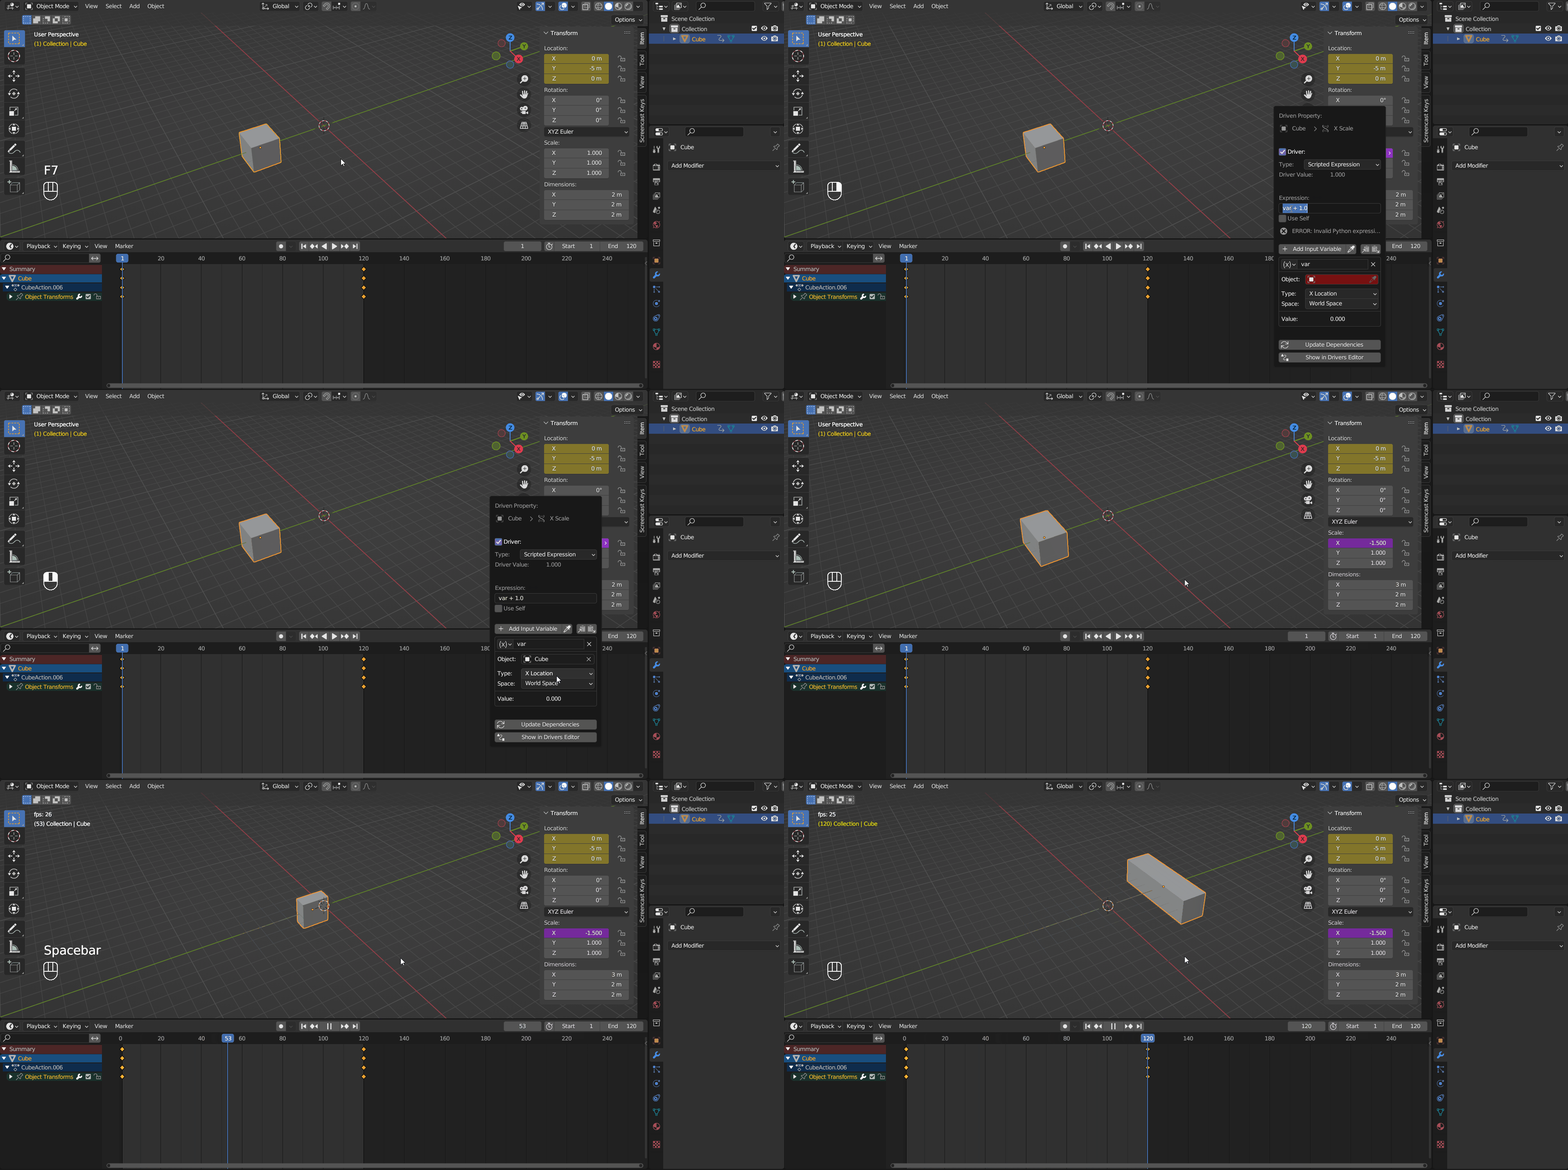
A useful shortcut is #frame, putting it in as a value automatically creates a Driver that outputs a value equal to the number of the current frame. You can also add some simple math in there, for example, if the frame number is too big for the variable, you can do something like #frame/1000.
Tip
If there is already a driver on that property, you need to delete it first for #frame to work.
F-Curve#
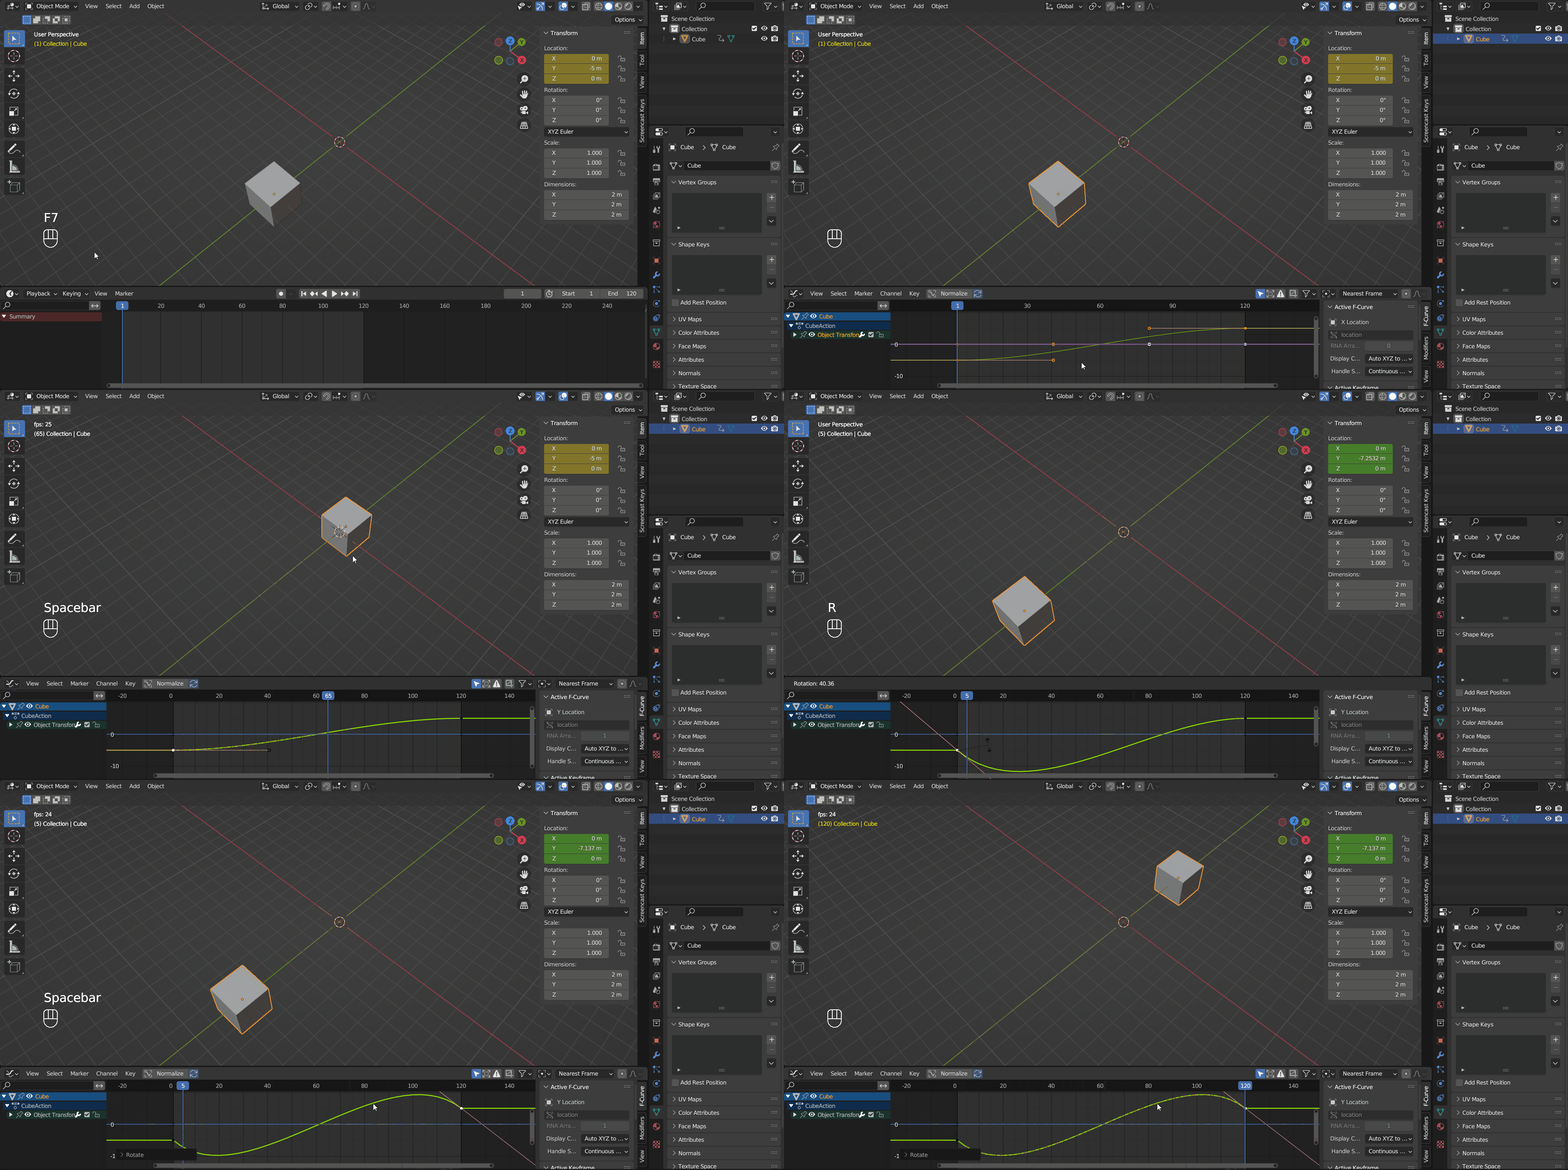
You may have noticed that in the animation examples above, the cube does not move at a constant speed. The keyframes determine the state of the object at certain frames, but how the in-between frames should be interpolated need to be decided in other ways. Change one of the areas in your workspace to Graph Editor and select an animated object, then the F-Curve will show up. Edit it will change how the interpolation works for the animation of the object per animated property.
Tip
Editing the F-curve is similar to editing a Bezier curve but in 2D.
