Projects#
First, import the necessary libraries and define the convenience variables, then clean up the scene.
import bpy
import math
import random
import addon_utils
from mathutils import Vector

D = bpy.data
C = bpy.context

# clean up the scene
bpy.ops.object.select_all(action="SELECT")
bpy.ops.object.delete()
bpy.ops.outliner.orphans_purge()
Set the end frame and change the background color to black.
# set up the scene
C.scene.frame_end = 60
# change background color to black
C.scene.world.node_tree.nodes["Background"].inputs["Color"].default_value = (0, 0, 0, 1)
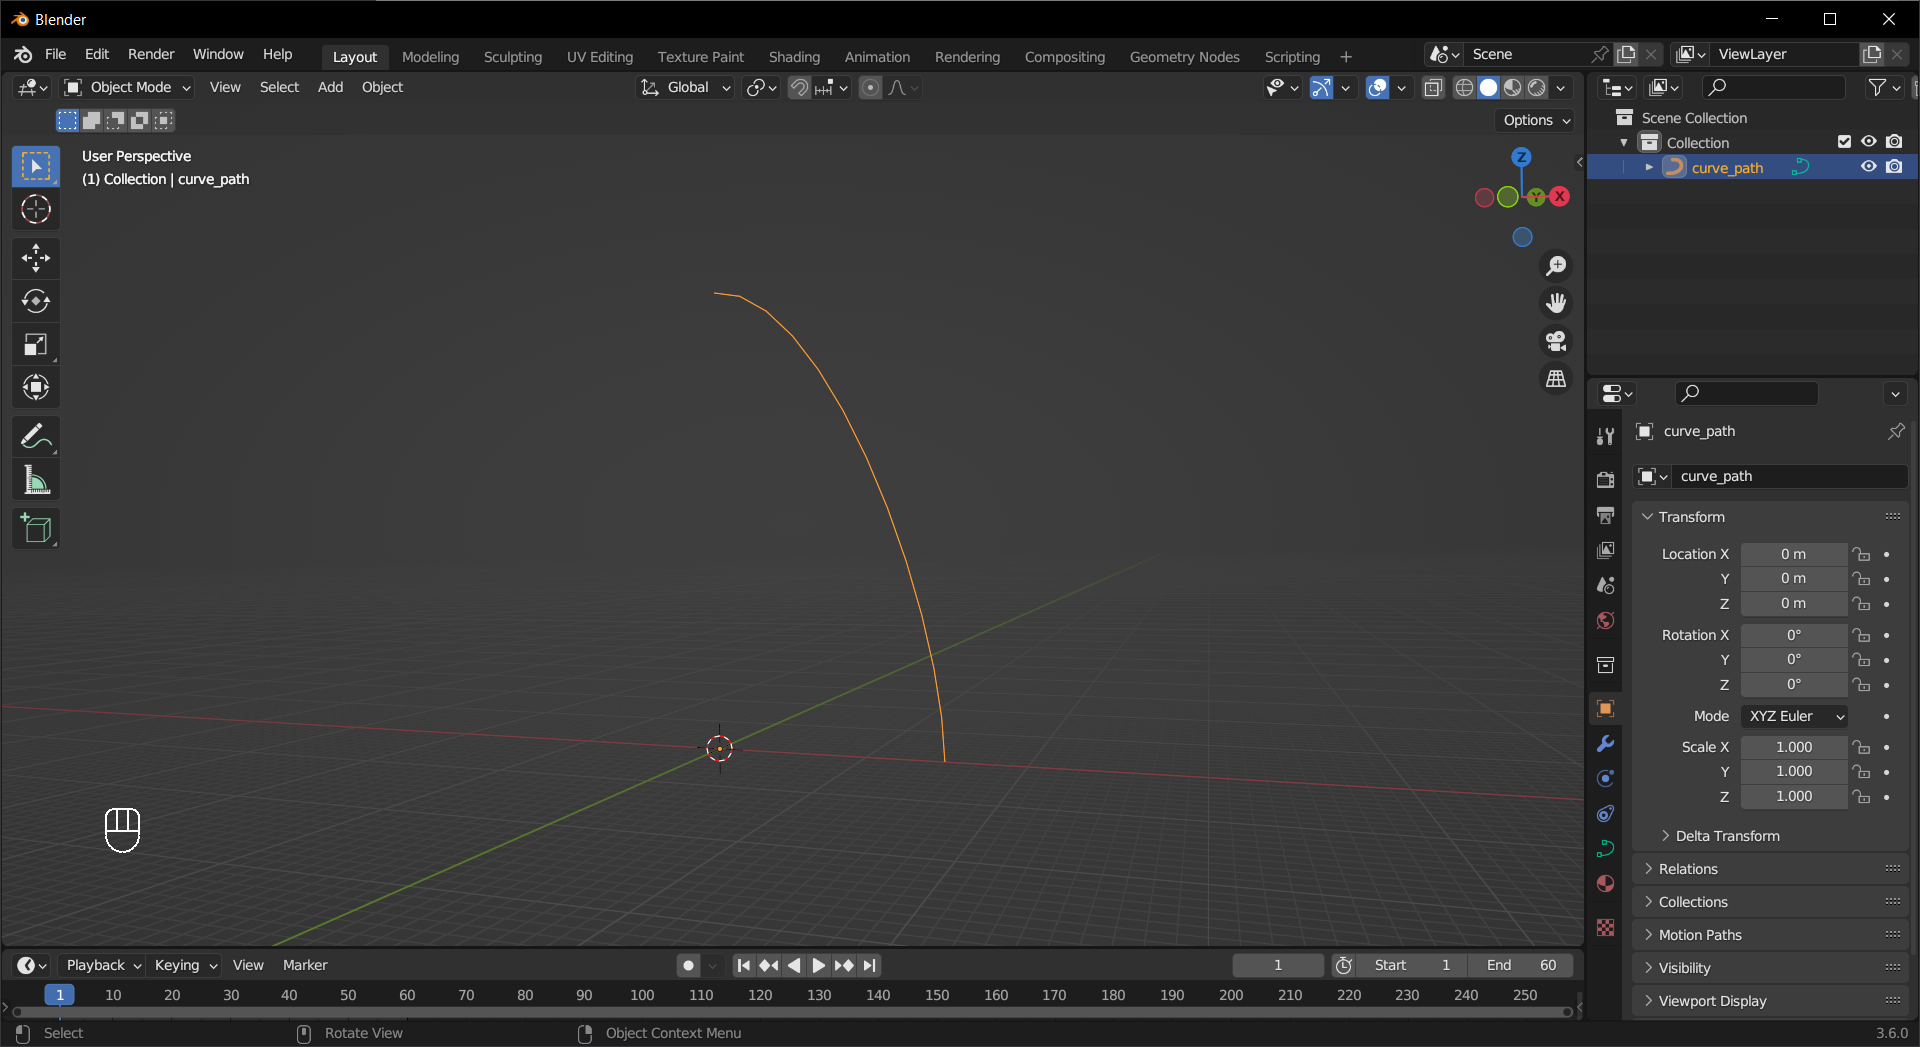
Make a curve that defines the path of the stars.
# make the curve path
bpy.ops.curve.primitive_bezier_curve_add()
c_path = C.active_object
c_path.name = "curve_path"
# edit the curve
c_path.data.splines.active.bezier_points[0].co = (0.0, 0.0, 30)
c_path.data.splines.active.bezier_points[1].co = (15, 0.0, 0.0)
c_path.data.splines.active.bezier_points[0].handle_left = (-7.5, 0.0, 30)
c_path.data.splines.active.bezier_points[0].handle_right = (7.5, 0.0, 30)
c_path.data.splines.active.bezier_points[1].handle_left = (15, 0.0, 10)
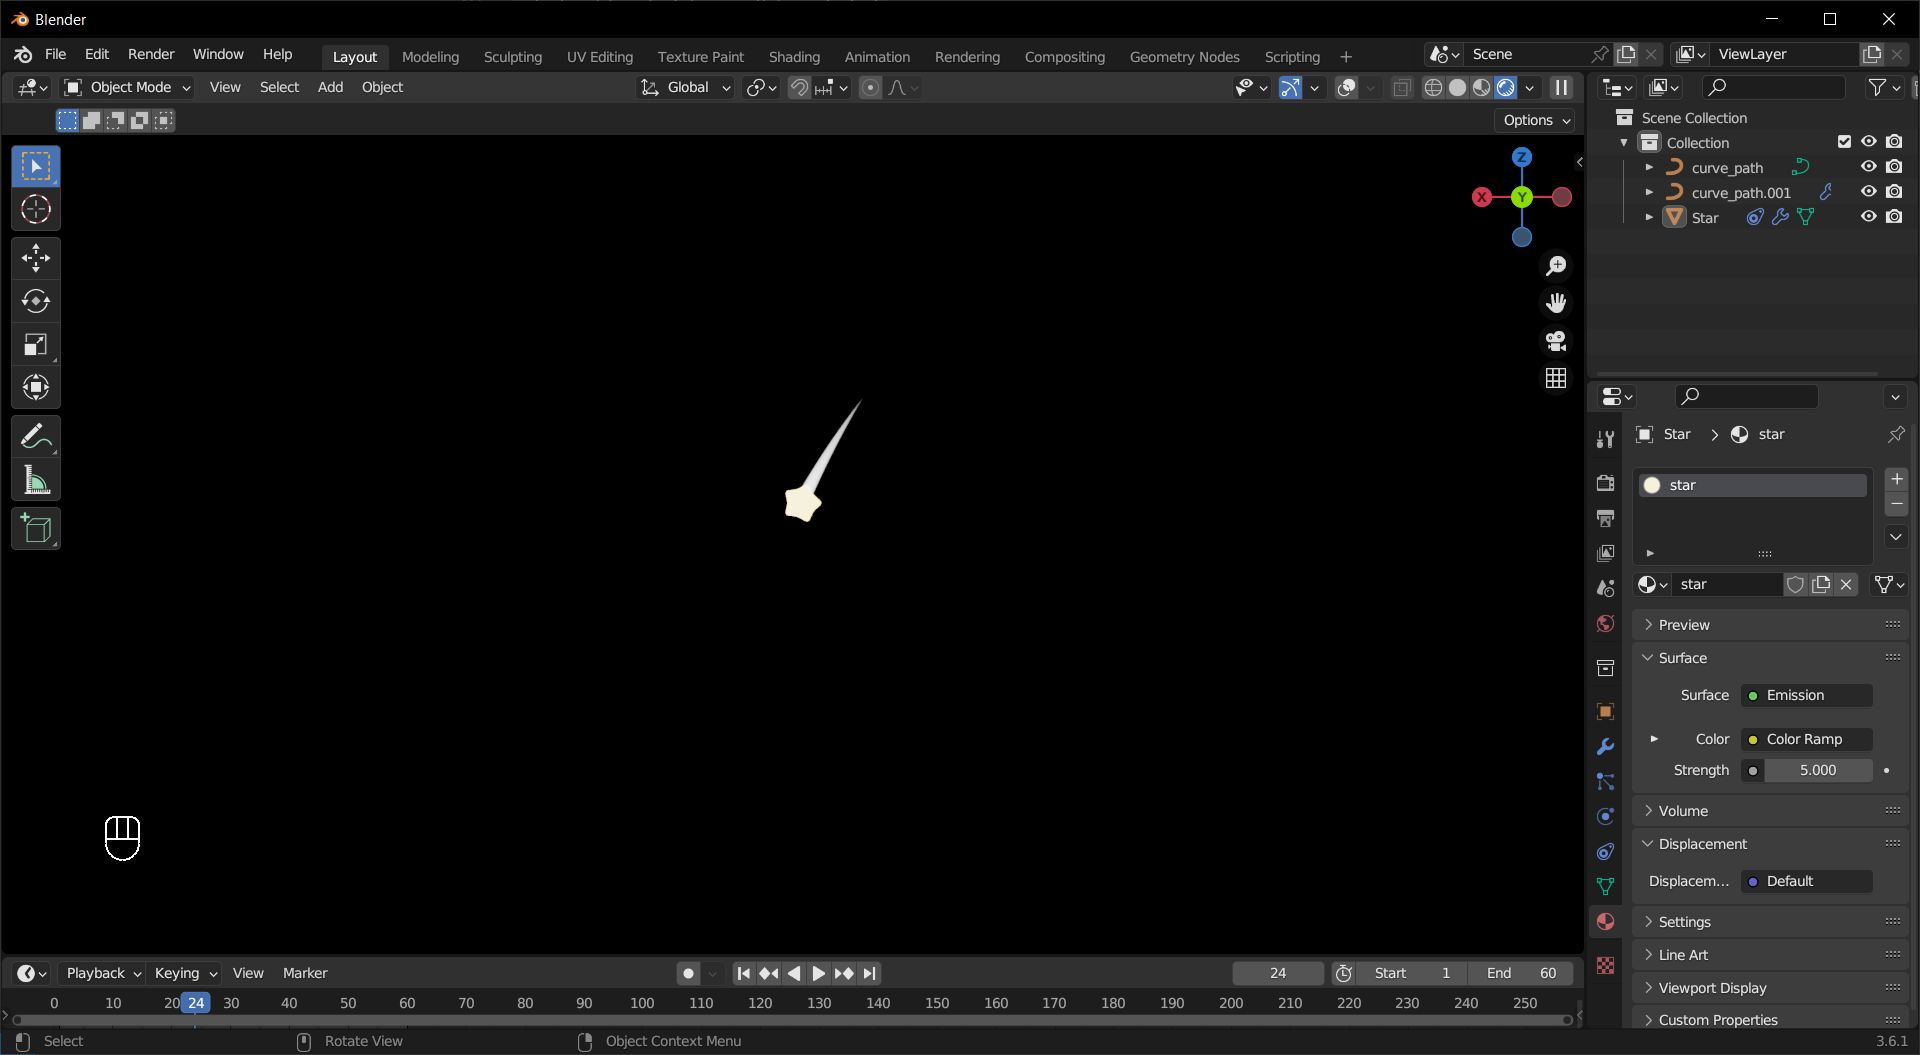
Enable the Extra Object add-on, create a star-shaped mesh object and rotate it to face sideways.
# enable extra object add-on
if not addon_utils.check("add_mesh_extra_objects")[1]:
    addon_utils.enable("add_mesh_extra_objects")
# make a star object
bpy.ops.mesh.primitive_star_add()
mesh_star = C.active_object
# rotate it
mesh_star.rotation_euler.x = math.pi / 2
Add a Subdivision Surface modifier and smooth-shade the star.
# add subdivision surface modifier
mesh_star.modifiers.new(name="subsurf", type="SUBSURF")
mesh_star.modifiers["subsurf"].levels = 3
mesh_star.modifiers["subsurf"].render_levels = 3
# set shade smooth
for face in mesh_star.data.polygons:
    face.use_smooth = True
To make the star move along the path, add a Follow Path constraint then animate the path and adjust the interpolation.
Tip
You can add a driver to c_path.data.eval_time instead.
# add follow path constraint
mesh_star.constraints.new("FOLLOW_PATH")
mesh_star.constraints["Follow Path"].target = c_path
# animate curve path (you can also use a driver, probably for the better)
c_path.data.path_duration = C.scene.frame_end
c_path.data.keyframe_insert("eval_time", frame=1)
c_path.data.eval_time = C.scene.frame_end
c_path.data.keyframe_insert("eval_time", frame=C.scene.frame_end)
# adjust f-curve interpolation
c_path.data.animation_data.action.fcurves[0].keyframe_points[0].interpolation = "LINEAR"
c_path.data.animation_data.action.fcurves[0].keyframe_points[1].interpolation = "LINEAR"

Reuse the curve data to make a new curve object for the trail of the star.
# add tail curve
t_curve = c_path.copy()
t_curve.name = "tail_curve"
C.collection.objects.link(t_curve)
We make a geometry node tree to create a tapering trail, starting from making input and output nodes
# make a geometry node tree that create tail from the curve
geom_tail = D.node_groups.new("geom_tail", "GeometryNodeTree")
# make input and output nodes
geom_input = geom_tail.nodes.new("NodeGroupInput")
geom_output = geom_tail.nodes.new("NodeGroupOutput")
# add input and output sockets
geom_tail.inputs.new("NodeSocketGeometry", "Geometry")
geom_tail.inputs.new("NodeSocketMaterial", "Material")
geom_tail.outputs.new("NodeSocketGeometry", "Geometry")
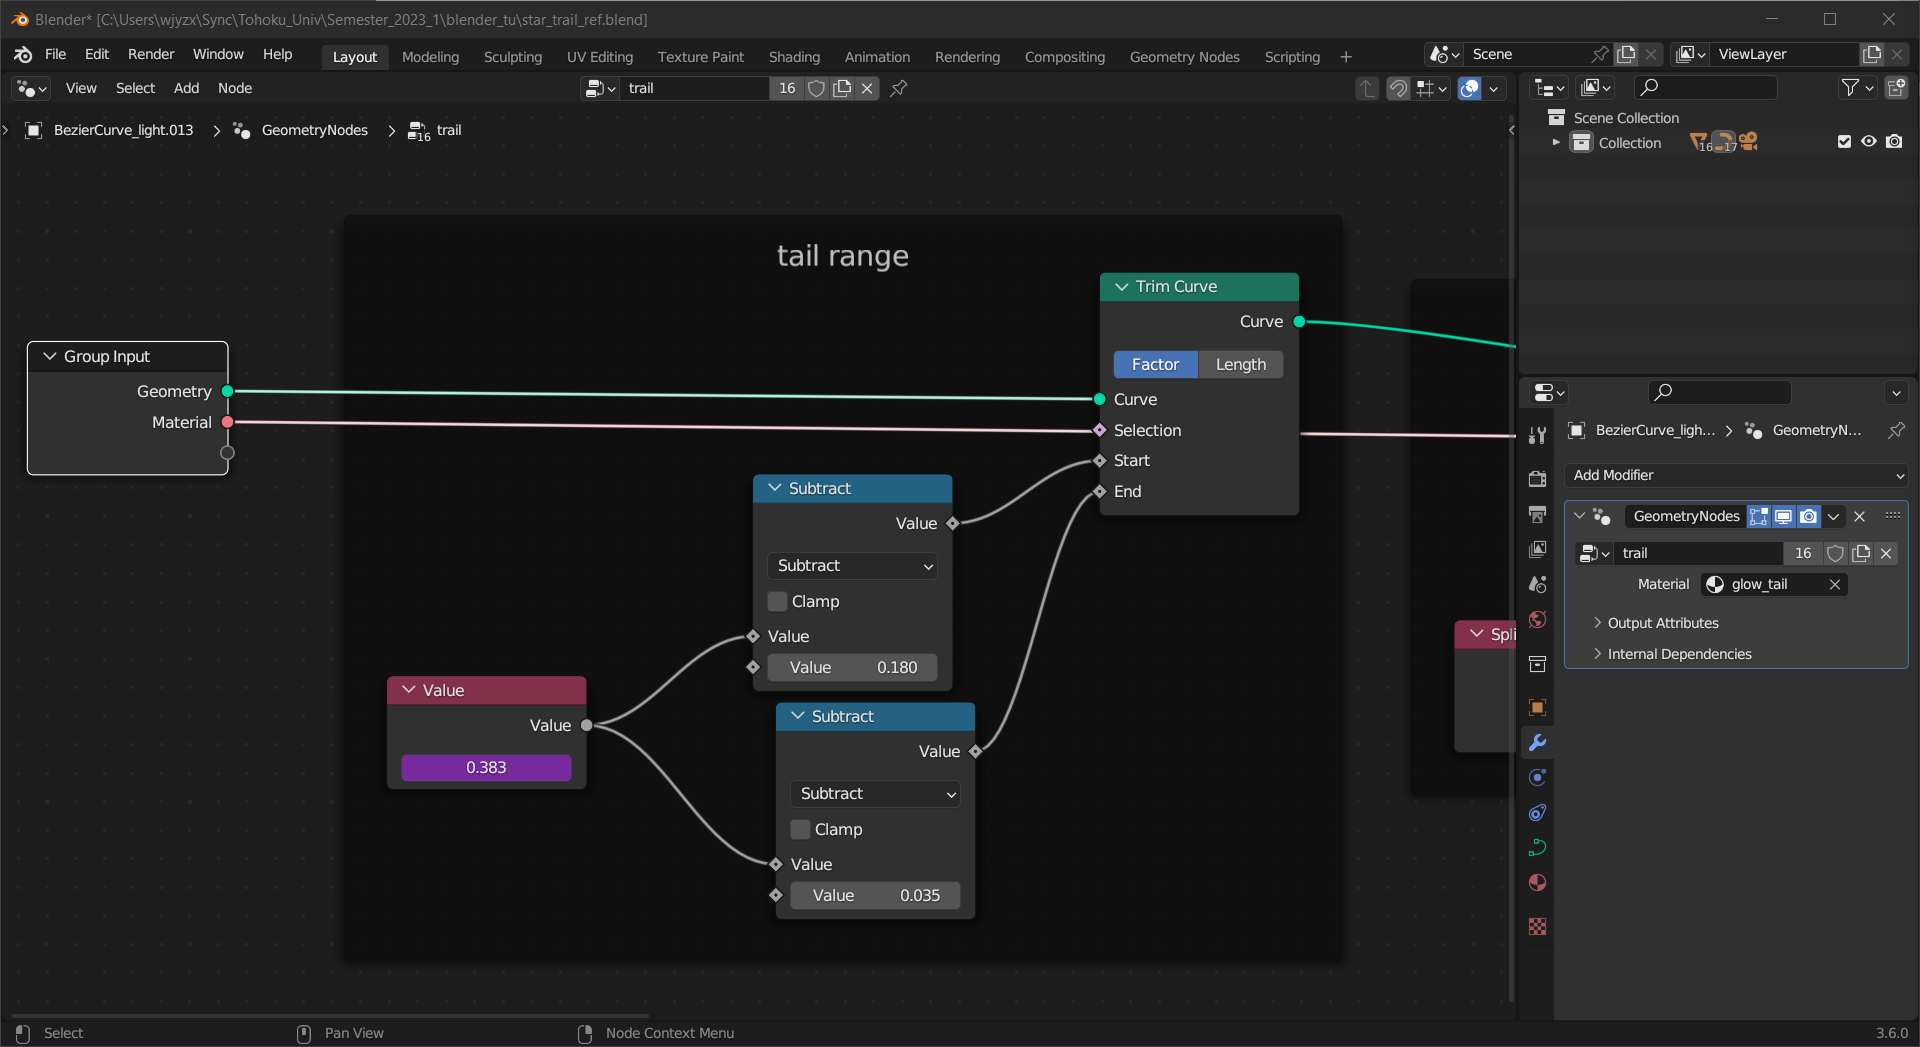
Trim the curve to make a small segment that follows the star using a driver.
Tip
The animation will sync better if you use driver or keyframe for both the star and the tail, we choose to use different ones to demonstarte the two methods.
# nodes calcuates the start and end of the tail
value_0 = geom_tail.nodes.new("ShaderNodeValue")
sub_0 = geom_tail.nodes.new("ShaderNodeMath")
sub_1 = geom_tail.nodes.new("ShaderNodeMath")
trim_0 = geom_tail.nodes.new("GeometryNodeTrimCurve")
# make a value node that outputs current frame/end frame.
value_0_driver = value_0.outputs[0].driver_add("default_value")
# make variable for current frame
value_0_var_0 = value_0_driver.driver.variables.new()
value_0_var_0.name = "c_frame"
value_0_var_0.targets[0].id_type = "SCENE"
value_0_var_0.targets[0].id = C.scene
value_0_var_0.targets[0].data_path = "frame_current"
# make variable for end frame
value_0_var_1 = value_0_driver.driver.variables.new()
value_0_var_1.name = "e_frame"
value_0_var_1.targets[0].id_type = "SCENE"
value_0_var_1.targets[0].id = C.scene
value_0_var_1.targets[0].data_path = "frame_end"
# expression
value_0_driver.driver.expression = value_0_var_0.name + "/" + value_0_var_1.name
# set values
sub_0.operation = "SUBTRACT"
sub_0.inputs[1].default_value = 0.15
sub_1.operation = "SUBTRACT"
sub_1.inputs[1].default_value = 0.01
# connect the nodes
geom_tail.links.new(value_0.outputs[0], sub_0.inputs[0])
geom_tail.links.new(value_0.outputs[0], sub_1.inputs[0])
geom_tail.links.new(geom_input.outputs[0], trim_0.inputs[0])
geom_tail.links.new(sub_0.outputs[0], trim_0.inputs[2])
geom_tail.links.new(sub_1.outputs[0], trim_0.inputs[3])
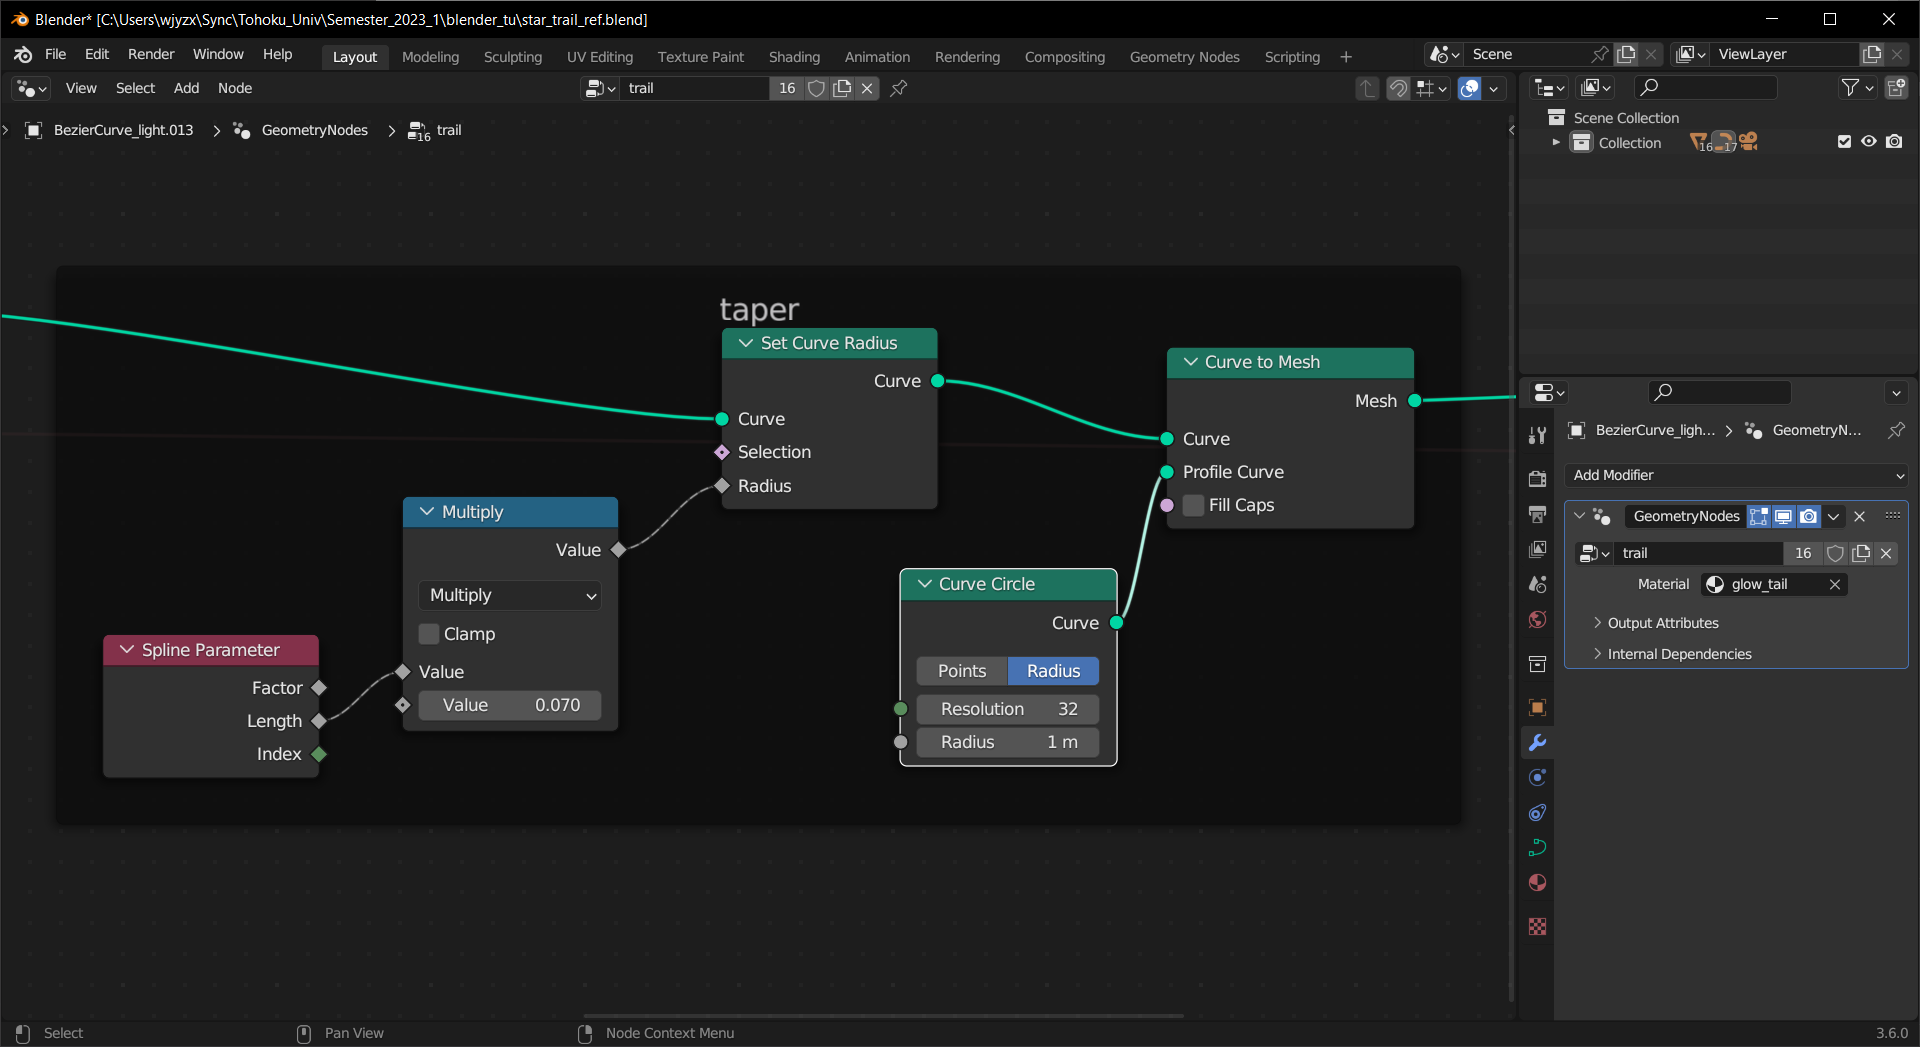
Give the segment a round profile and taper
# nodes that makes the taper
spline_param_0 = geom_tail.nodes.new("GeometryNodeSplineParameter")
mul_0 = geom_tail.nodes.new("ShaderNodeMath")
curve_rad_0 = geom_tail.nodes.new("GeometryNodeSetCurveRadius")
curve_circle_0 = geom_tail.nodes.new("GeometryNodeCurvePrimitiveCircle")
curve2mesh_0 = geom_tail.nodes.new("GeometryNodeCurveToMesh")
# set values
mul_0.operation = "MULTIPLY"
mul_0.inputs[1].default_value = 0.06
# connect the nodes
geom_tail.links.new(spline_param_0.outputs[1], mul_0.inputs[0])
geom_tail.links.new(trim_0.outputs[0], curve_rad_0.inputs[0])
geom_tail.links.new(mul_0.outputs[0], curve_rad_0.inputs[2])
geom_tail.links.new(curve_rad_0.outputs[0], curve2mesh_0.inputs[0])
geom_tail.links.new(curve_circle_0.outputs[0], curve2mesh_0.inputs[1])
Add Set Material nodes for later use, then apply the node tree to the tail curve
# add material
set_mat_0 = geom_tail.nodes.new("GeometryNodeSetMaterial")
geom_tail.links.new(curve2mesh_0.outputs[0], set_mat_0.inputs[0])
geom_tail.links.new(geom_input.outputs[1], set_mat_0.inputs[2])
geom_tail.links.new(set_mat_0.outputs[0], geom_output.inputs[0])
# add geometry node to the tail
t_curve.modifiers.new("tail_maker", "NODES")
t_curve.modifiers["tail_maker"].node_group = geom_tail
Make an emissive material for the stars, most of them will be yellow and around 10% pink.
# make material for the star
star_emissive = D.materials.new("star")
star_emissive.use_nodes = True
star_emissive_nodes = star_emissive.node_tree
# replace the principled BSDF with Emission
star_emissive_nodes.nodes.remove(star_emissive_nodes.nodes["Principled BSDF"])
star_glow = star_emissive_nodes.nodes.new("ShaderNodeEmission")
# set up random color
star_obj_info = star_emissive_nodes.nodes.new("ShaderNodeObjectInfo")
star_color_ramp = star_emissive_nodes.nodes.new("ShaderNodeValToRGB")

star_color_ramp.color_ramp.interpolation = "CONSTANT"
star_color_ramp.color_ramp.elements[1].position = 0.1
star_color_ramp.color_ramp.elements[0].color = (0.8, 0.4, 1.0, 1.0)
star_color_ramp.color_ramp.elements[1].color = (1.0, 0.75, 0.3, 1.0)
star_glow.inputs[1].default_value = 5.0

star_emissive_nodes.links.new(star_obj_info.outputs[5], star_color_ramp.inputs[0])
star_emissive_nodes.links.new(star_color_ramp.outputs[0], star_glow.inputs[0])
star_emissive_nodes.links.new(
    star_glow.outputs[0], star_emissive.node_tree.nodes["Material Output"].inputs[0]
)
# append the material to the mesh object
mesh_star.data.materials.append(star_emissive)
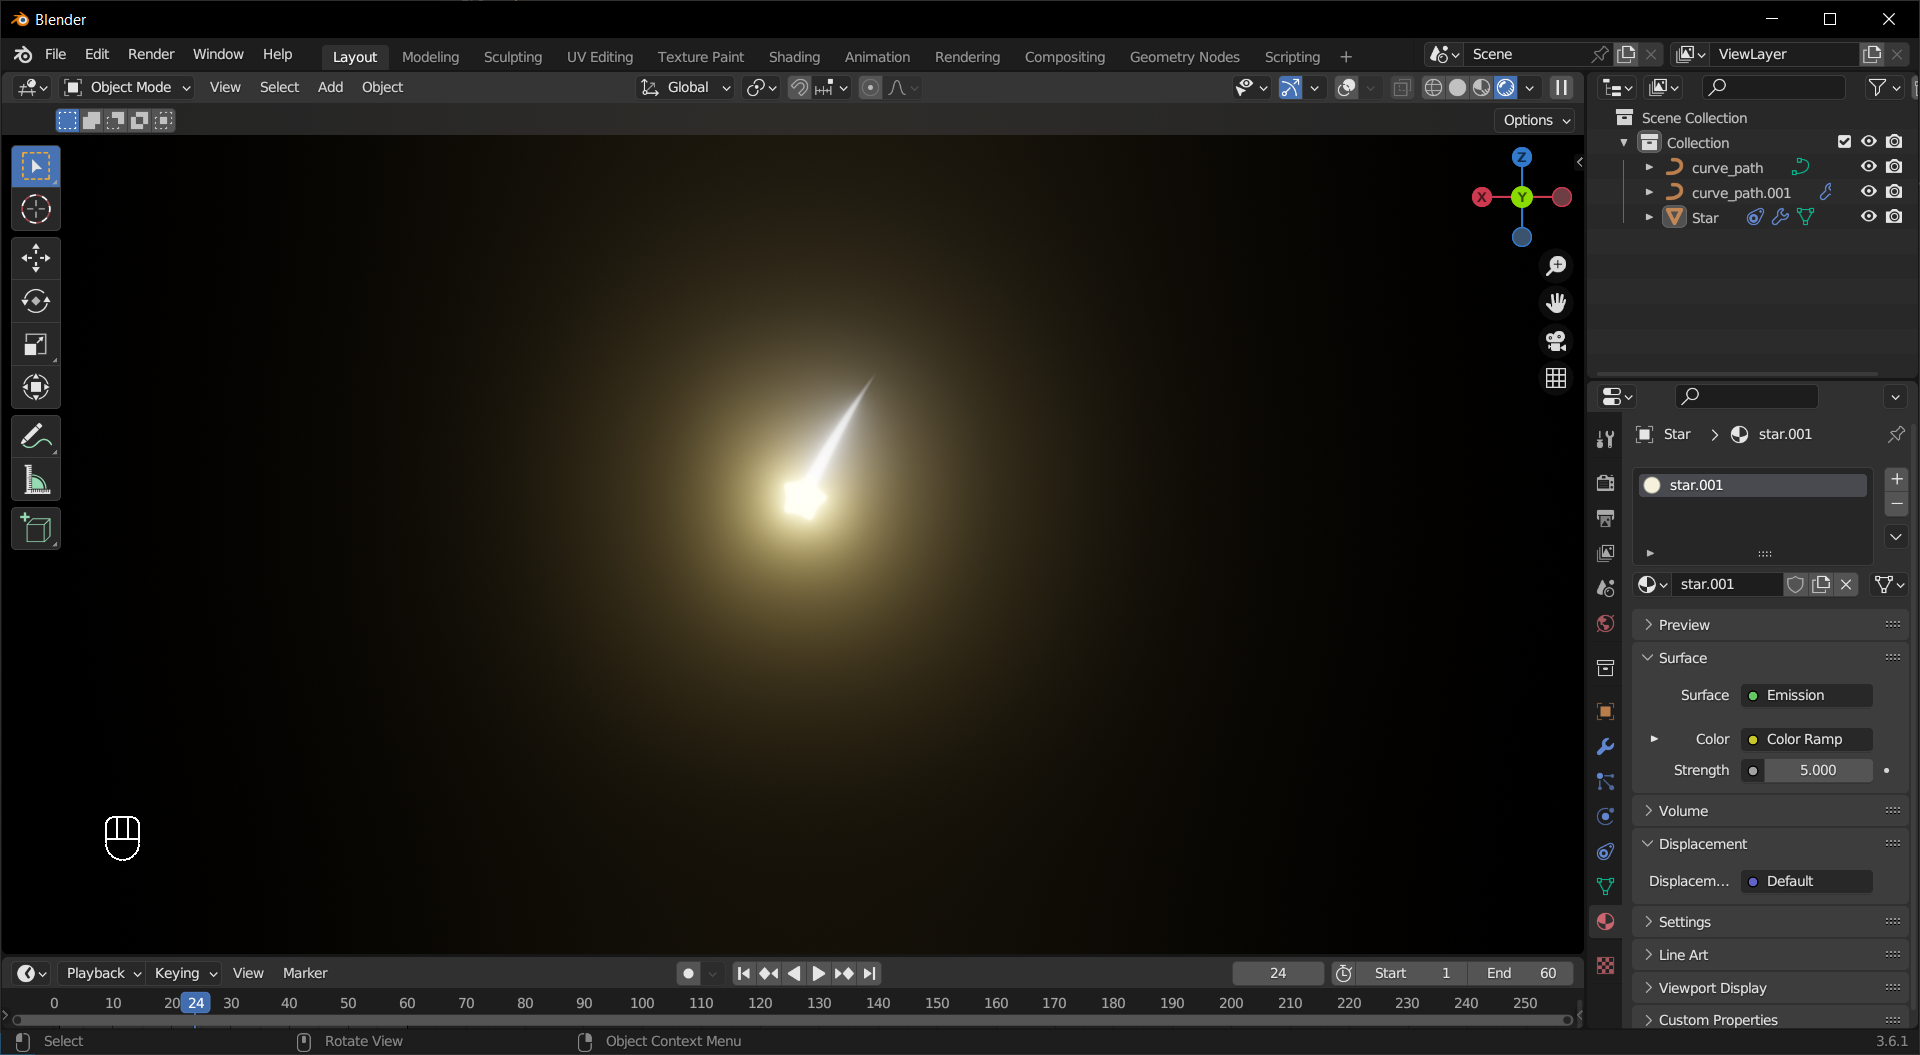
Make an emissive material for the tails, connecting the Emission shader to Volume so the thicker part will be brighter.
Tip
Use Cycles render engine to see the effect in real time.
# make material for the tail
tail_emissive = D.materials.new("tail")
tail_emissive.use_nodes = True
tail_emissive_nodes = tail_emissive.node_tree
# replace the principled BSDF with Emission
tail_emissive_nodes.nodes.remove(tail_emissive_nodes.nodes["Principled BSDF"])
tail_glow = tail_emissive_nodes.nodes.new("ShaderNodeEmission")
# adjust the brightness and connect emission to volume
tail_glow.inputs[1].default_value = 5.0
tail_emissive_nodes.links.new(
    tail_glow.outputs[0], tail_emissive_nodes.nodes["Material Output"].inputs[1]
)
# set the material
t_curve.modifiers["tail_maker"]["Input_1"] = tail_emissive
With no light scattering the stars looks a bit boring, here we add a glow and soften the image in the compositor.
Tip
To add true light scattering, make a big mesh that envelop the stars and add a material with a Volume Scatter node connected to the Volume, then adjust Render > Light Paths in the properties area. This solution takes much longer to render.
# add compositor nodes
C.scene.use_nodes = True
compo_nodes = C.scene.node_tree
bloom = compo_nodes.nodes.new("CompositorNodeGlare")
soften = compo_nodes.nodes.new("CompositorNodeFilter")
# set parameters
bloom.glare_type = "FOG_GLOW"
bloom.quality = "HIGH"
bloom.mix = 0.5
bloom.threshold = 0.5
bloom.size = 9
# connect nodes
compo_nodes.links.new(compo_nodes.nodes["Render Layers"].outputs[0], bloom.inputs[0])
compo_nodes.links.new(bloom.outputs[0], soften.inputs[1])
compo_nodes.links.new(soften.outputs[0], compo_nodes.nodes["Composite"].inputs[0])
Now we make linked copies of the stars and tails at random locations, and make the stars rotate.
# duplicate stars and tails
# set random seed
random.seed(42)

for i in range(64):
    # generate random offset
    new_coord_offset = Vector([random.random() * 100 for _ in range(3)])
    # duplicate
    new_star = mesh_star.copy()
    new_tail = t_curve.copy()
    C.collection.objects.link(new_star)
    C.collection.objects.link(new_tail)
    # move the duplications
    new_star.location += new_coord_offset
    new_tail.location += new_coord_offset
    # give star random rotation
    new_star.rotation_euler.y = random.random() * 2 * math.pi
    new_star.keyframe_insert("rotation_euler", frame=1)
    new_star.rotation_euler.y += 3 * math.pi
    new_star.keyframe_insert("rotation_euler", frame=C.scene.frame_end)
# hide original
mesh_star.hide_render = True
t_curve.hide_render = True
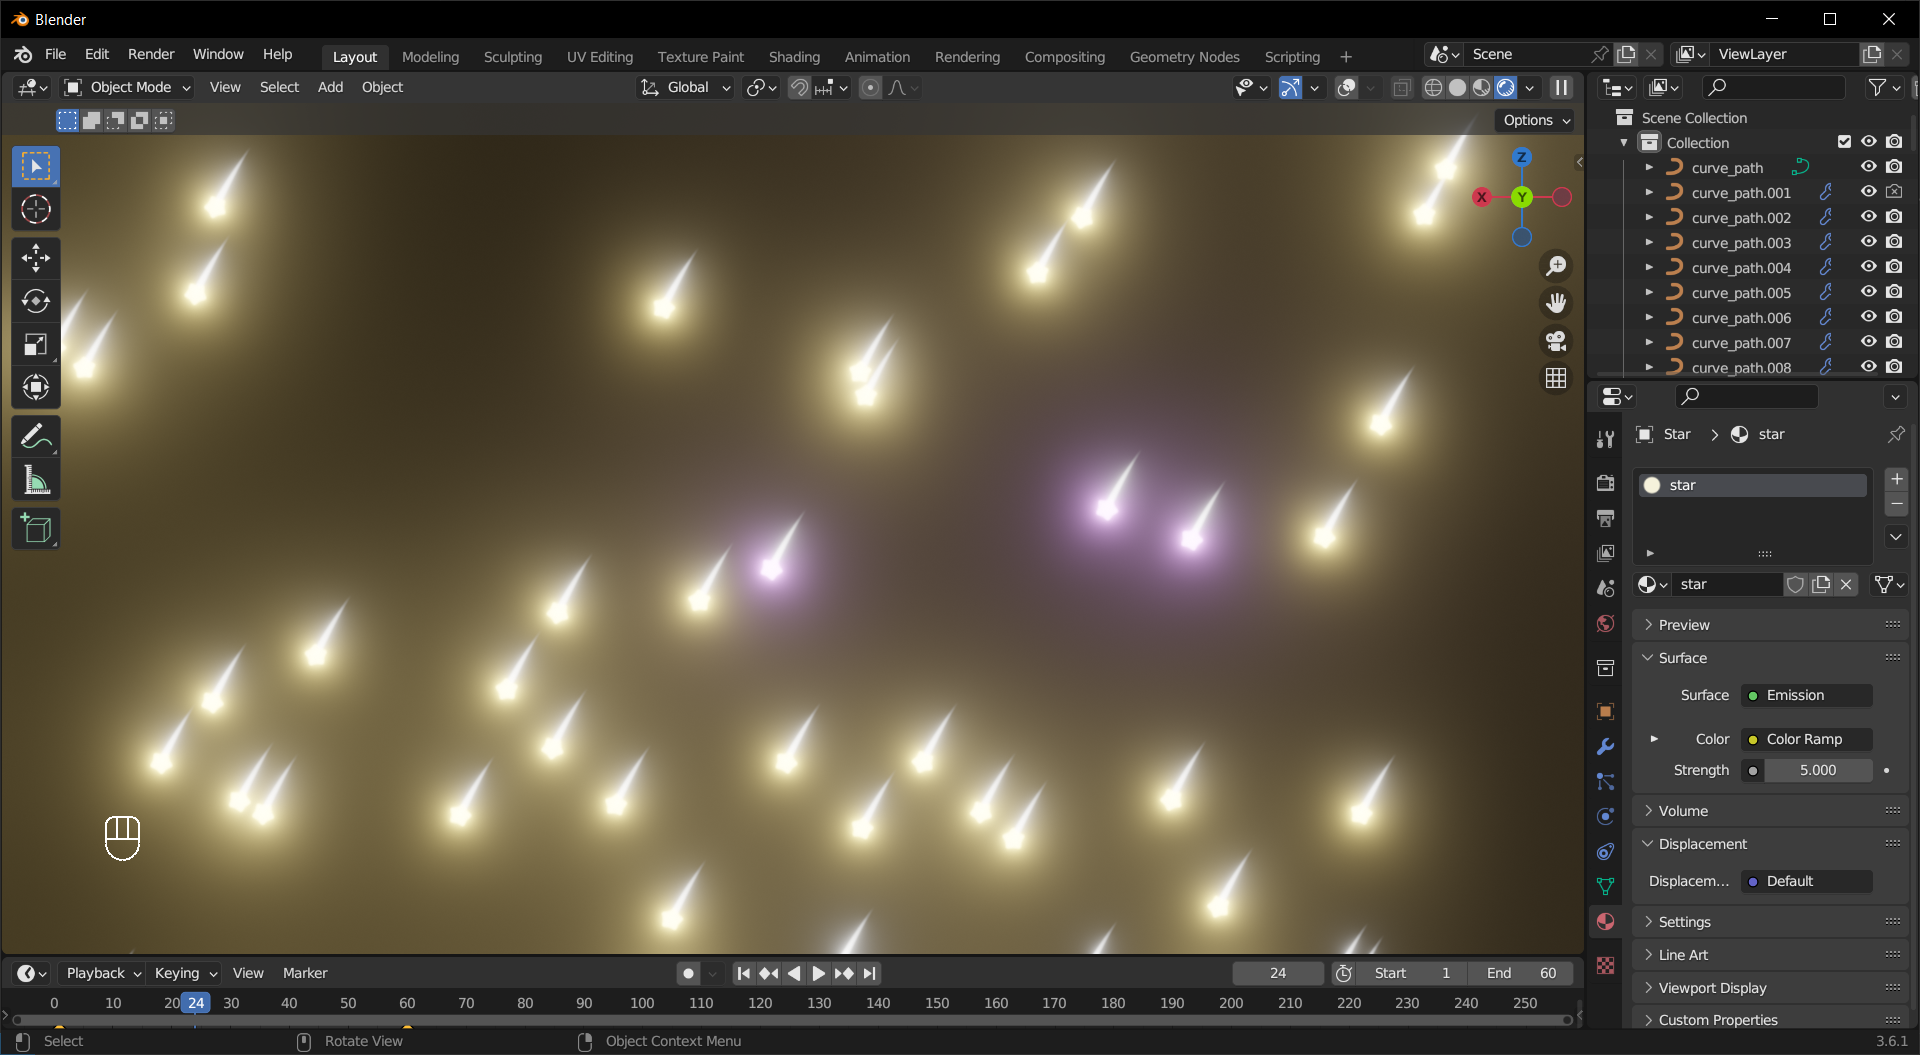
Finally, add a camera and render the scene.
# add camera
bpy.ops.object.camera_add(
    location=(100, 160, 40), rotation=(math.radians(100), 0, math.radians(-200))
)
cam_0 = C.active_object
C.scene.camera = cam_0

This example makes a material that draws shapes based on the mathematical function \(b(a - x)x = d(c - y)y\).
First, import the module and define the convenience variables.
import bpy
D = bpy.data
C = bpy.context
Since both sides of the equation have the same form, we can make a node group for it
def node_group_1_maker(ng_name="axis_calc"):
    """define the node group used in the material"""
    # make new node tree in the data
    ngroup_1 = D.node_groups.new(ng_name, "ShaderNodeTree")
    # add input/output sockets
    ngroup_1_inputs = ngroup_1.nodes.new("NodeGroupInput")
    ngroup_1.inputs.new("NodeSocketFloat", "Axis")
    ngroup_1.inputs.new("NodeSocketFloat", "par_0")
    ngroup_1.inputs.new("NodeSocketFloat", "par_1")
    ngroup_1_outputs = ngroup_1.nodes.new("NodeGroupOutput")
    ngroup_1.outputs.new("NodeSocketFloat", "Value")
    # add math nodes
    ngroup_sub = ngroup_1.nodes.new("ShaderNodeMath")
    ngroup_sub.operation = "SUBTRACT"
    ngroup_mul_0 = ngroup_1.nodes.new("ShaderNodeMath")
    ngroup_mul_0.operation = "MULTIPLY"
    ngroup_mul_1 = ngroup_1.nodes.new("ShaderNodeMath")
    ngroup_mul_1.operation = "MULTIPLY"
    #link nodes
    ngroup_1.links.new(ngroup_1_inputs.outputs["Axis"], ngroup_sub.inputs[1])
    ngroup_1.links.new(ngroup_1_inputs.outputs["Axis"], ngroup_mul_0.inputs[1])
    ngroup_1.links.new(ngroup_1_inputs.outputs["par_0"], ngroup_sub.inputs[0])
    ngroup_1.links.new(ngroup_1_inputs.outputs["par_1"], ngroup_mul_1.inputs[1])
    ngroup_1.links.new(ngroup_sub.outputs["Value"], ngroup_mul_0.inputs[0])
    ngroup_1.links.new(ngroup_mul_0.outputs["Value"], ngroup_mul_1.inputs[0])
    ngroup_1.links.new(ngroup_mul_1.outputs["Value"], ngroup_1_outputs.inputs[0])
    return {
        "ng_name": ng_name,
        "ng_inputs": ngroup_1.inputs.keys(),
        "ng_outputs": ngroup_1.outputs.keys(),
    }
With the function prepared, we can start creating the material.
# make material and add it to the object
mat = D.materials.new("math_shape_1")
mat.use_nodes = True
mat.node_tree.nodes.clear()
obj.data.materials.append(mat)
Add the nodes along with the node group. To make the curve visible, we calculate the difference between the two sides of the equation, then compare it to 0 with an Epsilon controlling the width.
# create node groups in data
ng_par = node_group_1_maker()
# make nodes
tex_coord = mat.node_tree.nodes.new("ShaderNodeTexCoord")
sep_xyz = mat.node_tree.nodes.new("ShaderNodeSeparateXYZ")
out_node = mat.node_tree.nodes.new("ShaderNodeOutputMaterial")
ngroup_x = mat.node_tree.nodes.new("ShaderNodeGroup")
ngroup_x.node_tree = D.node_groups[ng_par["ng_name"]]
ngroup_y = mat.node_tree.nodes.new("ShaderNodeGroup")
ngroup_y.node_tree = D.node_groups[ng_par["ng_name"]]
sub_node = mat.node_tree.nodes.new("ShaderNodeMath")
sub_node.operation = "SUBTRACT"
comp_node = mat.node_tree.nodes.new("ShaderNodeMath")
comp_node.operation = "COMPARE"
Then we connect the nodes
# link nodes
mat.node_tree.links.new(tex_coord.outputs["UV"], sep_xyz.inputs[0])
mat.node_tree.links.new(sep_xyz.outputs["X"], ngroup_x.inputs[0])
mat.node_tree.links.new(sep_xyz.outputs["Y"], ngroup_y.inputs[0])
mat.node_tree.links.new(
    ngroup_x.outputs[ng_par["ng_outputs"][0]], sub_node.inputs[0]
)
mat.node_tree.links.new(
    ngroup_y.outputs[ng_par["ng_outputs"][0]], sub_node.inputs[1]
)
mat.node_tree.links.new(sub_node.outputs["Value"], comp_node.inputs[0])
mat.node_tree.links.new(comp_node.outputs["Value"], out_node.inputs["Surface"])
and set the parameters
# set parameters
comp_node.inputs[1].default_value = 0.0
comp_node.inputs[2].default_value = 0.1
ngroup_x.inputs[1].default_value = 1.0
ngroup_x.inputs[2].default_value = 4.0
ngroup_y.inputs[1].default_value = 1.0
ngroup_y.inputs[2].default_value = 4.0
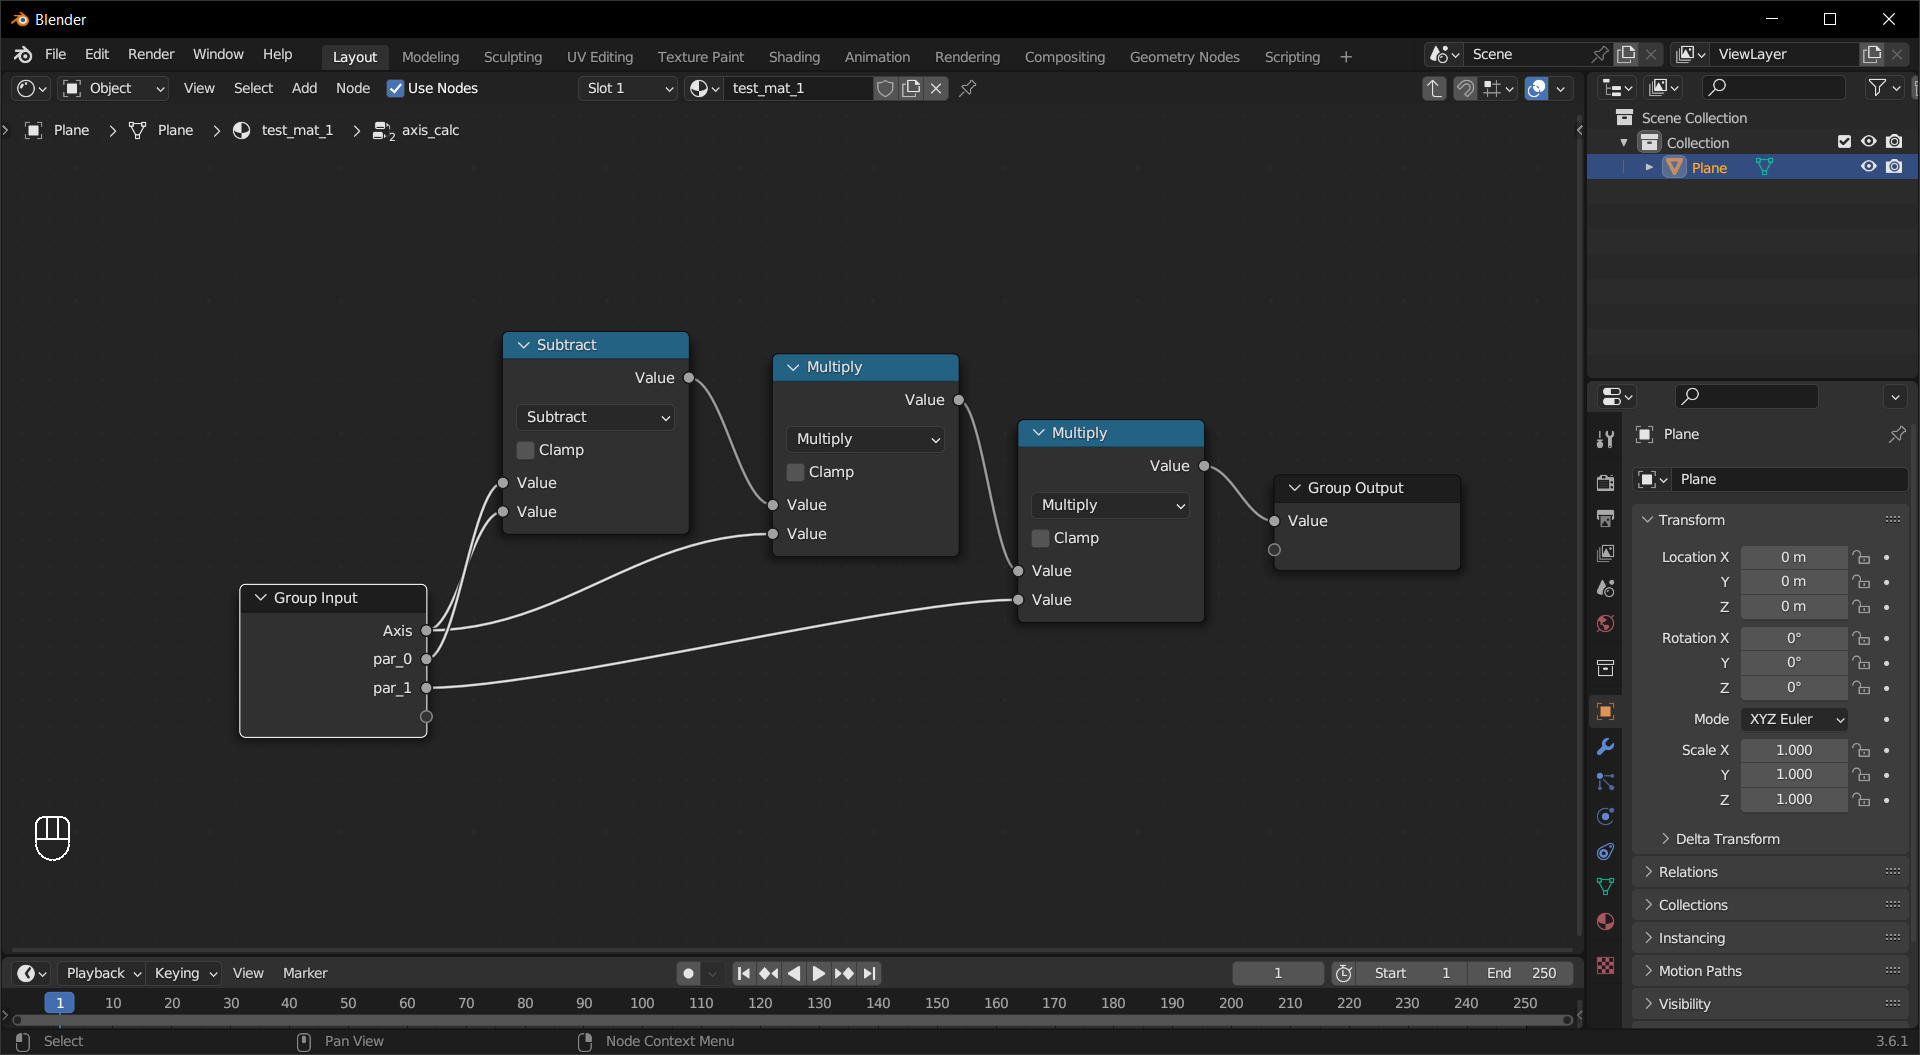
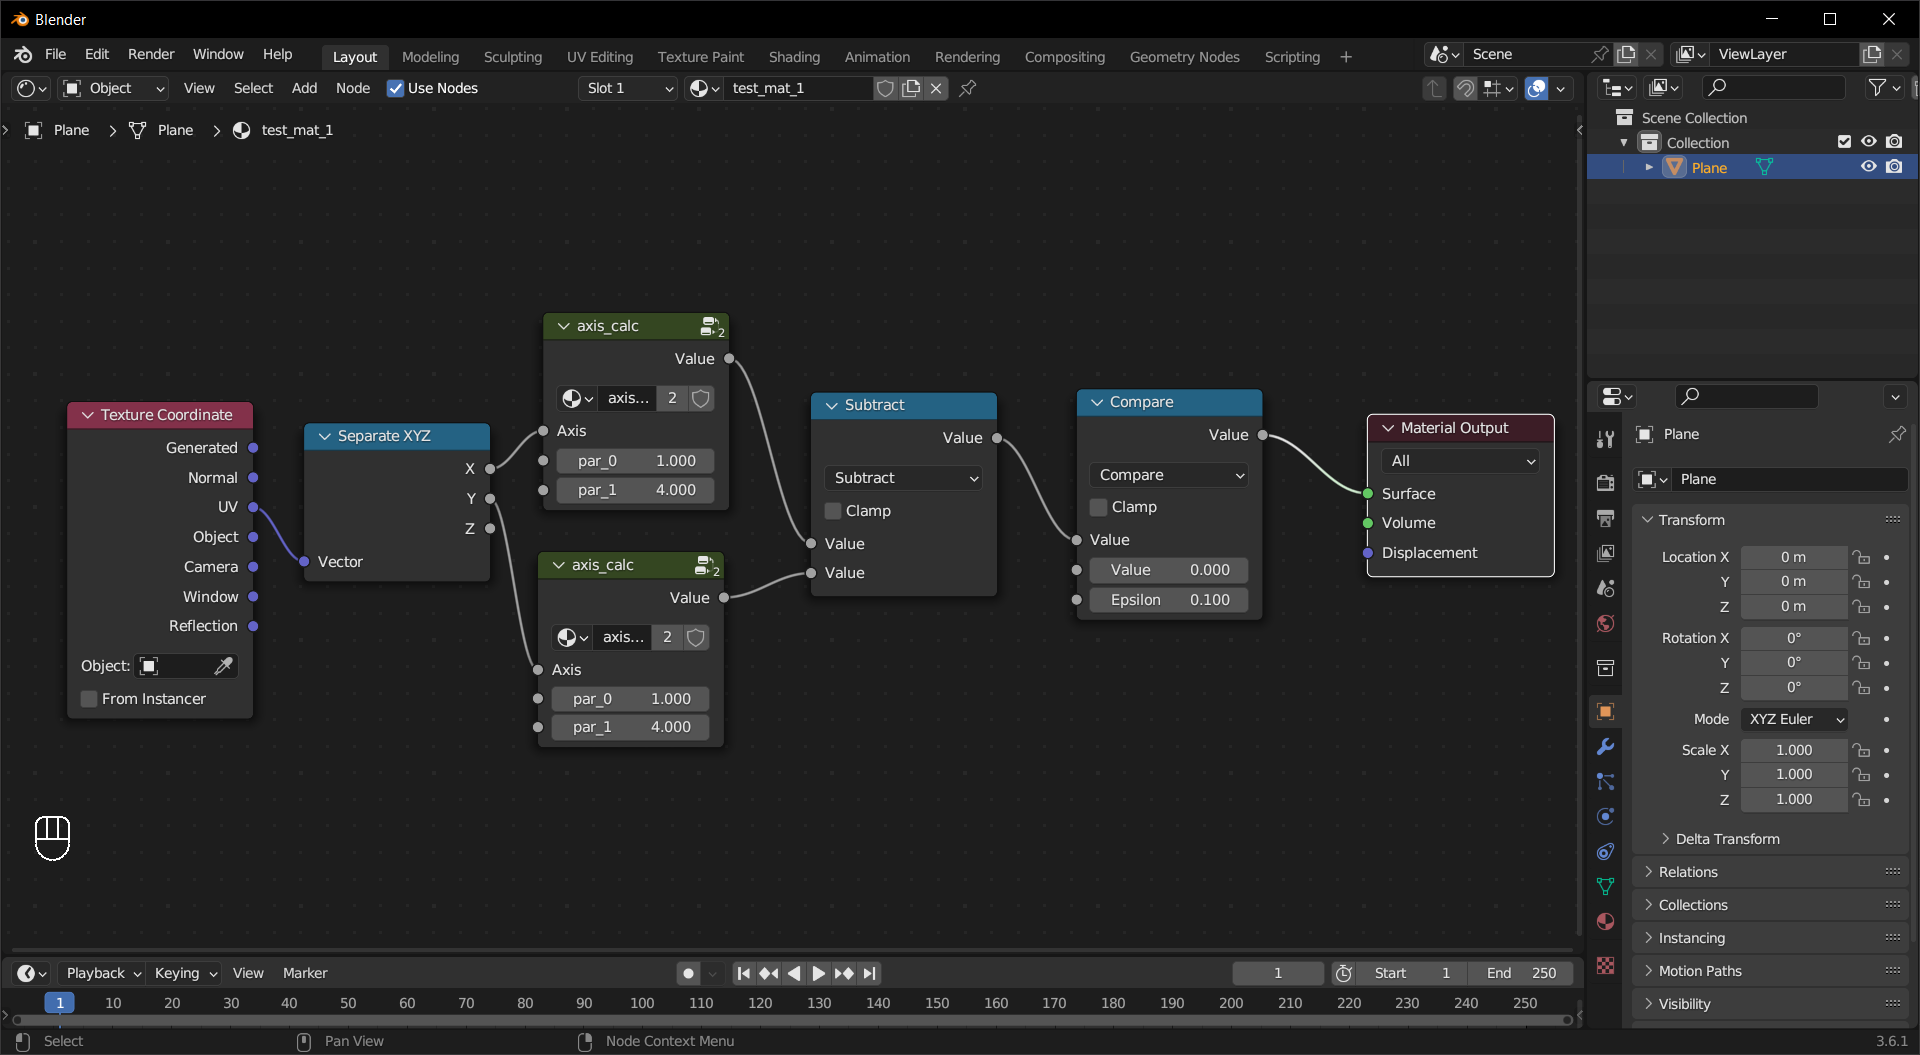
The resulting shader nodes should look like this
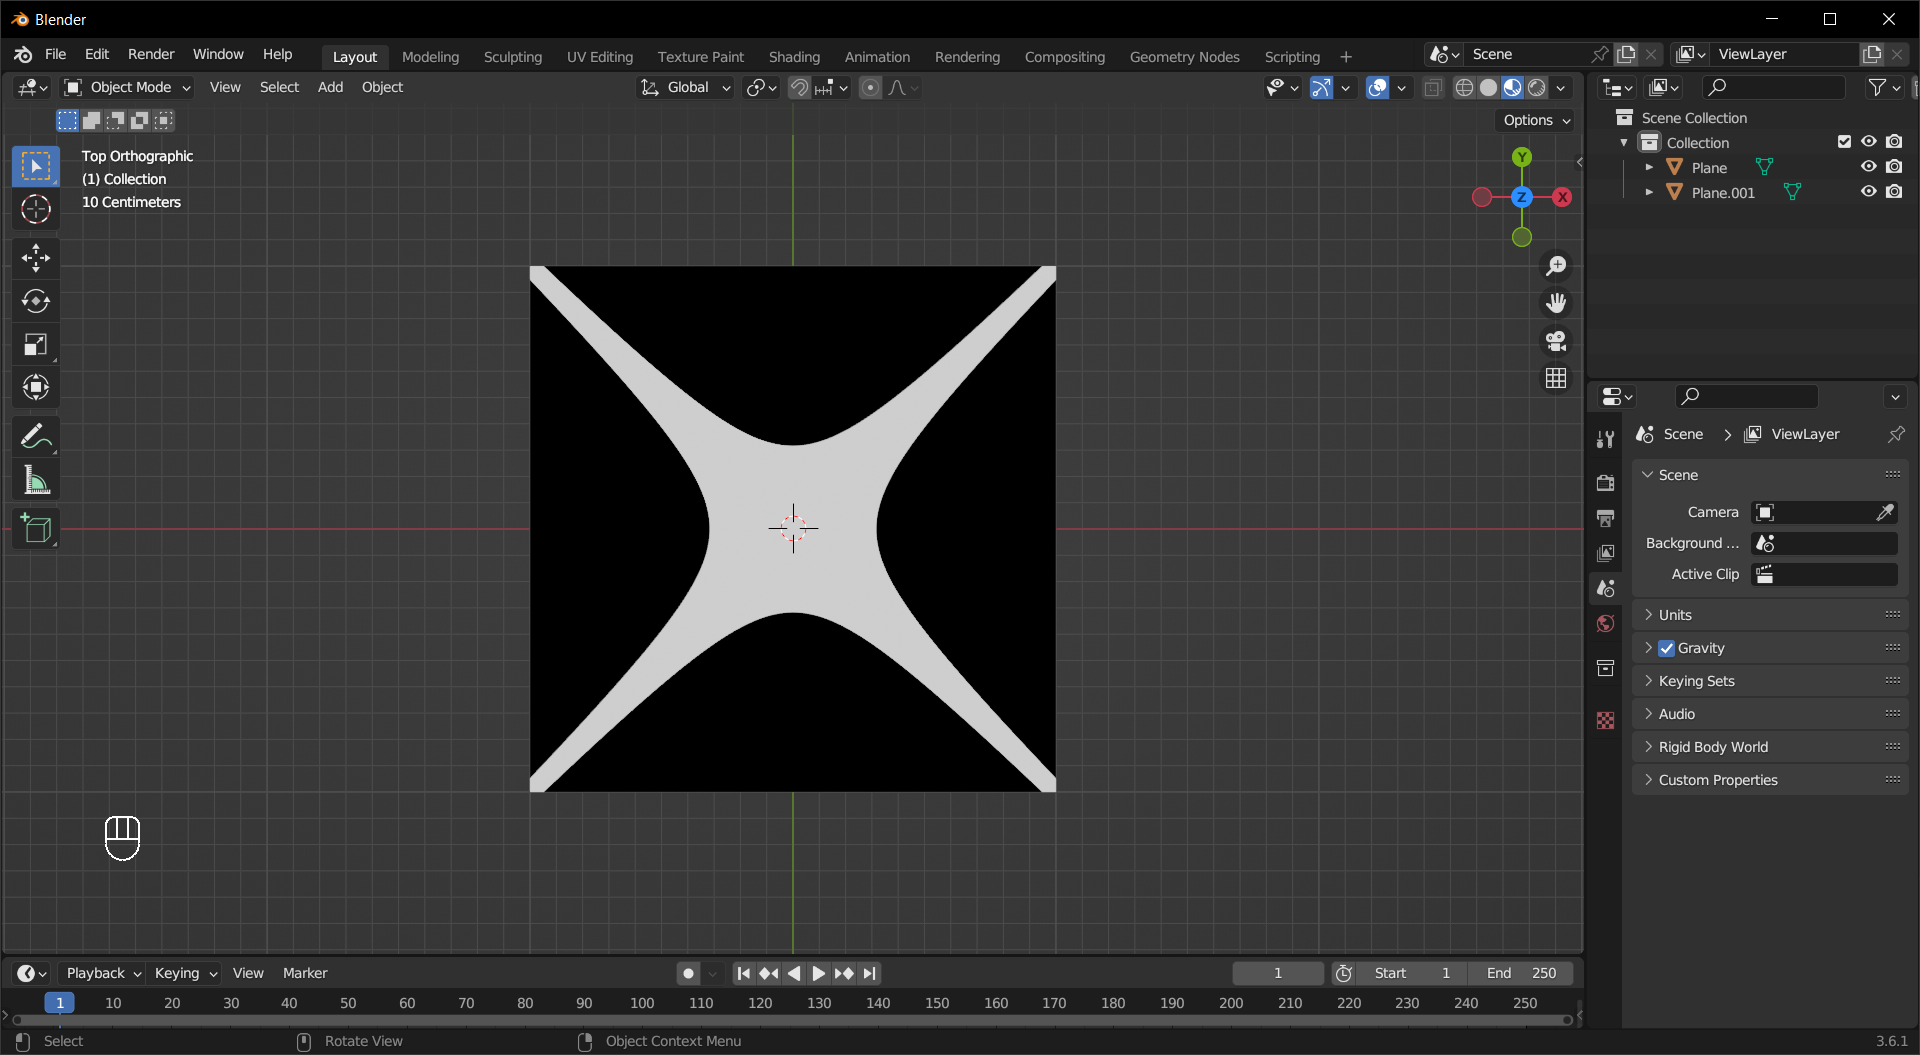
Add a plane to the scene, then link the material to the plane.
# add plane
bpy.ops.mesh.primitive_plane_add()
mat_plane = C.active_object
mat_plane.data.materials.append(mat)
Switch to Material Preview and we can see the result
With the power of machine learning, we can estimate the 4 parameters from the rendered image. Let us start from making the previous code into a function.
def material_maker(obj):
    """Create math shape material"""
    # make material and add it to the object
    mat = D.materials.new("math_shape_1")
    mat.use_nodes = True
    mat.node_tree.nodes.clear()
    obj.data.materials.append(mat)
    # create node groups
    ng_par = node_group_1_maker()
    # make nodes
    tex_coord = mat.node_tree.nodes.new("ShaderNodeTexCoord")
    sep_xyz = mat.node_tree.nodes.new("ShaderNodeSeparateXYZ")
    out_node = mat.node_tree.nodes.new("ShaderNodeOutputMaterial")
    ngroup_x = mat.node_tree.nodes.new("ShaderNodeGroup")
    ngroup_x.node_tree = D.node_groups[ng_par["ng_name"]]
    ngroup_y = mat.node_tree.nodes.new("ShaderNodeGroup")
    ngroup_y.node_tree = D.node_groups[ng_par["ng_name"]]
    sub_node = mat.node_tree.nodes.new("ShaderNodeMath")
    sub_node.operation = "SUBTRACT"
    comp_node = mat.node_tree.nodes.new("ShaderNodeMath")
    comp_node.operation = "COMPARE"
    # link nodes
    mat.node_tree.links.new(tex_coord.outputs["UV"], sep_xyz.inputs[0])
    mat.node_tree.links.new(sep_xyz.outputs["X"], ngroup_x.inputs[0])
    mat.node_tree.links.new(sep_xyz.outputs["Y"], ngroup_y.inputs[0])
    mat.node_tree.links.new(
        ngroup_x.outputs[ng_par["ng_outputs"][0]], sub_node.inputs[0]
    )
    mat.node_tree.links.new(
        ngroup_y.outputs[ng_par["ng_outputs"][0]], sub_node.inputs[1]
    )
    mat.node_tree.links.new(sub_node.outputs["Value"], comp_node.inputs[0])
    mat.node_tree.links.new(comp_node.outputs["Value"], out_node.inputs["Surface"])
    # set parameters
    comp_node.inputs[1].default_value = 0.0
    comp_node.inputs[2].default_value = 0.1
    return [
        ngroup_x.inputs[1],
        ngroup_x.inputs[2],
        ngroup_y.inputs[1],
        ngroup_y.inputs[2],
    ]
This allows us to change the parameters easily.
To render a batch of images for training, validataion, and testing, we need another script
import bpy
import importlib

D = bpy.data
C = bpy.context

def batch_render(mat_module, parlist, png_path, res):
    # import material script
    mat_mod = importlib.import_module(mat_module)
    material_maker = getattr(mat_mod, "material_maker")
    # clean the scene
    bpy.ops.object.select_all(action="SELECT")
    bpy.ops.object.delete()
    bpy.ops.outliner.orphans_purge()
    # render settings
    C.scene.render.engine = "BLENDER_EEVEE"
    C.scene.render.resolution_x = res
    C.scene.render.resolution_y = res
    # add camera
    bpy.ops.object.camera_add(location=(0.0, 0.0, 2.75), rotation=(0.0, 0.0, 0.0))
    C.scene.camera = C.active_object
    # add plane
    bpy.ops.mesh.primitive_plane_add()
    mat_plane = C.active_object
    # create material
    list_vars = material_maker(mat_plane)
    # render
    for n, i in enumerate(parlist):
        for j, k in zip(list_vars, i):
            j.default_value = k
        # bpy.ops.render.render()
        # img_list.append(render2np(res, res))
        D.scenes[0].render.filepath = str(png_path) + f"/batch_output_{n}.png"
        bpy.ops.render.render(write_still=True)
The importlib module allows us to dynamically import other modules, so you can use it for other material scripts. The parlist need to match the number of tunable parameters in the shader, and its length decides the number of images rendered.
To implement the machine learning algorithm, we use PyTorch Lightning here, but you are free to use any library you like. First we import the necessary modules
Tip
Make sure you have the other two scripts in the same folder.
import torch
import math
import lightning.pytorch as pl
import natsort
from torchvision import transforms
from lightning.pytorch import loggers as pl_loggers
from batch_renderer import batch_render
from PIL import Image
from pathlib import Path
We need a function that turns the images into tensors
def img_trans(img_path, flatten=True):
    """Convert image to tensor"""
    image = Image.open(img_path).convert("RGB")
    tensor_image = transforms.Normalize((0.5), (0.5))(
        transforms.ToTensor()(transforms.Grayscale(1)(image))
    )
    if flatten:
        tensor_image = torch.flatten(tensor_image)
    return tensor_image
and a class that loads the .png files.
class png_loader(torch.utils.data.Dataset):
    """Load the .png files"""
    def __init__(self, img_path, true_pars):
        super().__init__()
        self.img_path = Path.cwd() / img_path
        self.all_imgs = Path(self.img_path).iterdir()
        self.total_imgs = natsort.natsorted(self.all_imgs)
        self.true_pars = true_pars

    def __len__(self):
        return len(self.total_imgs)

    def __getitem__(self, idx):
        img_loc = Path(self.img_path) / self.total_imgs[idx]
        tensor_image = img_trans(img_loc)
        return tensor_image, self.true_pars[idx]
For this material, we need to restric the range of the parameters so the image will not be completely black
def scale_func(x, to_gpu=True):
    a = torch.tensor([1.0, 2.0, 1.0, 2.0])
    b = torch.tensor([1.0, 3.0, 1.0, 3.0])
    if to_gpu:
        a = a.to("cuda")
        b = b.to("cuda")
    return x * a + b
The model in this example is a simple Multi-Layer Perceptron(MLP) with 2 hidden layers, and a mean-square-error loss function is used. The output is scaled from \((0,1)\) to the range specified in scale_func.
Tip
Feel free to try your own model.
class test_shader_nn(pl.LightningModule):
    def __init__(
        self,
        img_size,
        scale_func,
        n_par,
        nn_size,
    ):
        super().__init__()
        self.save_hyperparameters()
        self.shader_nn = torch.nn.Sequential(
            torch.nn.Linear(img_size * img_size, nn_size[0]),
            torch.nn.ReLU(),
            torch.nn.Linear(nn_size[0], nn_size[1]),
            torch.nn.ReLU(),
            torch.nn.Linear(nn_size[1], n_par),
            torch.nn.Sigmoid(),
        )
        # self.tmp_path = Path.cwd() / tmp_path
        self.scale_func = scale_func
        self.img_size = img_size

    def forward(self, x, output_par=True):
        parlist = self.shader_nn(x)
        parlist = self.scale_func(parlist)
        if output_par:
            return parlist

    def training_step(self, batch, batch_idx):
        loss = self._calc(batch)
        self.log("train_loss", loss)
        return loss

    def validation_step(self, batch, batch_idx):
        loss = self._calc(batch)
        self.log("val_loss", loss)
        return loss

    def test_step(self, batch, batch_idx):
        loss = self._calc(batch)
        self.log("test_loss", loss)
        return loss

    def _calc(self, batch):
        x, y = batch
        y_hat = self.forward(x)
        loss = torch.nn.functional.mse_loss(y_hat, y)
        return loss

    def configure_optimizers(self):
        return torch.optim.Adam(self.parameters(), lr=0.001)
Define the parameters
pl.seed_everything(42)
shader_name = "math_shape_1"
max_epochs = 100
batch_size = 64
data_size = int(1e5)
render_res = 32
test_res = 1024
es_patience = 5
data_path = "RENDER_PATH"
par_path = "PARAMETER_PATH"
tmp_path = "TEST_IMAGE_PATH"
test_image_ind = "148"
generate_data = True
training = True
n_par = 4
nn_size = [64, 8]
and render the images with randomly generated parameters.
Tip
When generate_data is False, it reuses the images rendered before. Make sure the other parameters have not been unchanged.
# generate/read data
if generate_data:
    data_par = scale_func(torch.rand(data_size, n_par), to_gpu=False)
    batch_render(shader_name, data_par.tolist(), str(Path.cwd() / data_path), render_res)
    (Path.cwd() / par_path).mkdir(parents=True, exist_ok=True)
    torch.save(data_par, Path.cwd() / par_path / "data_par.pt")
else:
    data_par = torch.load(Path.cwd() / par_path / "data_par.pt")
Split the image data into training, validataion and testing sets.
full_dataset = png_loader(data_path, data_par)
train_set, val_set, test_set = torch.utils.data.random_split(
    full_dataset, [0.7, 0.2, 0.1]
)
# make dataloaders
train_loader = torch.utils.data.DataLoader(
    train_set, batch_size=batch_size, shuffle=True
)
val_loader = torch.utils.data.DataLoader(
    val_set, batch_size=batch_size, shuffle=False
)
test_loader = torch.utils.data.DataLoader(
    test_set, batch_size=batch_size, shuffle=False
)
Train the model and test it.
# use early stopping
cb_es = pl.callbacks.EarlyStopping("val_loss", patience=es_patience)
trainer = pl.Trainer(
    max_epochs=max_epochs,
    accelerator="gpu",
    callbacks=[cb_es],
    logger=pl_loggers.CSVLogger("logs/"),
    # logger=pl_loggers.CSVLogger(Path.cwd() / par_path),
)
if training:
    shader_fit_nn = test_shader_nn(
        render_res,
        # tmp_path,
        scale_func,
        # dropout_par,
        n_par,
        nn_size,
    )
    # train
    trainer.fit(
        model=shader_fit_nn,
        train_dataloaders=train_loader,
        val_dataloaders=val_loader
    )
    trainer.save_checkpoint(Path.cwd() / par_path / "checkpoint.ckpt")
else:
    shader_fit_nn = test_shader_nn.load_from_checkpoint(
        Path.cwd() / par_path / "checkpoint.ckpt"
    )

# testing
trainer.test(model=shader_fit_nn, dataloaders=test_loader)
Using the estimated parameters, you can check how closely the image generated resembles the original.
shader_fit_nn.eval()
##get one sample
test_image = img_trans(
    Path.cwd() / data_path / ("batch_output_" + test_image_ind + ".png"), False
).to("cuda")
shader_fit_nn.to("cuda")
fit_par = shader_fit_nn.forward(torch.flatten(test_image).to("cuda"))
batch_render(
    shader_name,
    [data_par.tolist()[int(test_image_ind)], fit_par.tolist()],
    str(Path.cwd() / tmp_path),
    test_res,
)
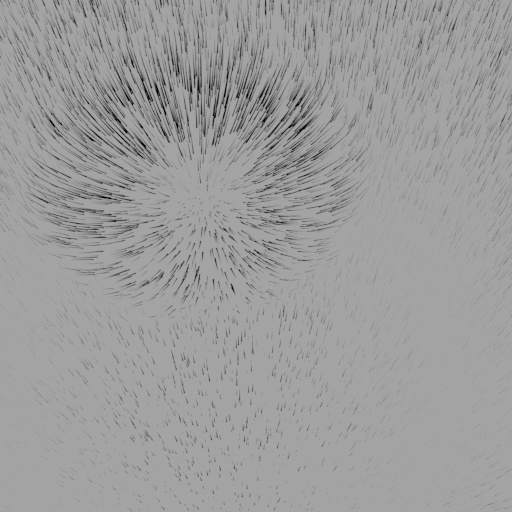
Original

Estimated

Here we render the “Grass Deformation” project we made in the last chapter using Python script. As usual, import the modules first
import bpy
import importlib

D = bpy.data
C = bpy.context
and load the .blend file
# open blender file
bpy.ops.wm.open_mainfile(filepath="PATH_TO_YOUR_FILE")
You can move the control object to influence the rendering
# move control object
D.objects["Control"].location.x = -0.2
D.objects["Control"].location.y = 0.1
D.objects["Control"].location.z = 0.9
and change the render settings.
C.scene.render.engine = "BLENDER_EEVEE"
C.scene.render.resolution_x = 512
C.scene.render.resolution_y = 512
C.scene.render.filepath = "RENDER_PATH"
With everything set, render the scene.
bpy.ops.render.render(write_still=True)
Using a basic machine learning model allows us to estimate the location of the control object from the rendered image. First, we need a script that can render images needed for model training
import bpy
import importlib

D = bpy.data
C = bpy.context

def batch_render_2(config_module, par_list, bl_path, png_path, res):
    # open blender file
    bpy.ops.wm.open_mainfile(filepath=bl_path)
    # import
    bl_config_mod = importlib.import_module(config_module)
    bl_config = getattr(bl_config_mod, "bl_config")
    # render settings
    C.scene.render.engine = "BLENDER_EEVEE"
    C.scene.render.resolution_x = res
    C.scene.render.resolution_y = res
    # render
    for n, i in enumerate(par_list):
        bl_config(i)
        D.scenes[0].render.filepath = str(png_path) + f"/batch_output_{n}.png"
        bpy.ops.render.render(write_still=True)
The config_module here is a function that adjusts the position of the control object
Tip
You can put the code in the batch_render_2 at the cost of a bit flexibility.
import bpy

D = bpy.data
C = bpy.context

def bl_config(par_list):
    # set parameters
    D.objects["Control"].location.x = par_list[0]
    D.objects["Control"].location.y = par_list[1]
    D.objects["Control"].location.z = par_list[2]
The model setup is the same as the ones in the Math Shape project.
import torch
import lightning.pytorch as pl
import natsort
from torchvision import transforms
from lightning.pytorch import loggers as pl_loggers
from batch_render_2 import batch_render_2
from PIL import Image
from pathlib import Path

def img_trans(img_path, flatten=True):
    """Convert picture to tensor"""
    image = Image.open(img_path).convert("RGB")
    tensor_image = transforms.Normalize((0.5), (0.5))(
        transforms.ToTensor()(transforms.Grayscale(1)(image))
    )
    if flatten:
        tensor_image = torch.flatten(tensor_image)
    return tensor_image

class png_loader(torch.utils.data.Dataset):
    def __init__(self, img_path, true_pars):
        super().__init__()
        self.img_path = Path.cwd() / img_path
        self.all_imgs = Path(self.img_path).iterdir()
        self.total_imgs = natsort.natsorted(self.all_imgs)
        self.true_pars = true_pars

    def __len__(self):
        return len(self.total_imgs)

    def __getitem__(self, idx):
        img_loc = Path(self.img_path) / self.total_imgs[idx]
        tensor_image = img_trans(img_loc)
        return tensor_image, self.true_pars[idx]

class test_shader_nn(pl.LightningModule):
    def __init__(
        self,
        img_size,
        scale_func,
        n_par,
        nn_size,
    ):
        super().__init__()
        self.save_hyperparameters()
        self.shader_nn = torch.nn.Sequential(
            torch.nn.Linear(img_size * img_size, nn_size[0]),
            torch.nn.ReLU(),
            torch.nn.Linear(nn_size[0], nn_size[1]),
            torch.nn.ReLU(),
            torch.nn.Linear(nn_size[1], n_par),
            torch.nn.Sigmoid(),
        )
        self.scale_func = scale_func
        self.img_size = img_size

    def forward(self, x, output_par=True):
        parlist = self.shader_nn(x)
        parlist = self.scale_func(parlist)
        if output_par:
            return parlist

    def training_step(self, batch, batch_idx):
        loss = self._calc(batch)
        self.log("train_loss", loss)
        return loss

    def validation_step(self, batch, batch_idx):
        loss = self._calc(batch)
        self.log("val_loss", loss)
        return loss

    def test_step(self, batch, batch_idx):
        loss = self._calc(batch)
        self.log("test_loss", loss)
        return loss

    def _calc(self, batch):
        x, y = batch
        y_hat = self.forward(x)
        loss = torch.nn.functional.mse_loss(y_hat, y)
        return loss

    def configure_optimizers(self):
        return torch.optim.Adam(self.parameters(), lr=0.001)
The parameters in scale_func are changed according to the movement range of the control object
def scale_func(x, to_gpu=True):
    a = torch.tensor([2.0, 2.0, 0.2])
    b = torch.tensor([-1.0, -1.0, 0.8])
    if to_gpu:
        a = a.to("cuda")
        b = b.to("cuda")
    return x * a + b
Set the parameters
pl.seed_everything(42)
bl_module = "CONFIG_MODULE_NAME"
bl_file = "PATH_TO_BLEND_FILE"
max_epochs = 100
batch_size = 64
data_size = int(1e5)
render_res = 64
test_res = 1024
es_patience = 5
data_path = "RENDER_PATH"
par_path = "PARAMETER_PATH"
tmp_path = "TEST_IMAGE_PATH"
test_image_ind = "6"
generate_data = True
training = True
n_par = 3
nn_size = [64, 8]
and render the images.
# generate/read data
if generate_data:
    data_par = scale_func(torch.rand(data_size, n_par), to_gpu=False)
    batch_render_2(
        bl_module,
        data_par.tolist(),
        bl_file,
        str(Path.cwd() / data_path),
        render_res,
    )  # rendering
    (Path.cwd() / par_path).mkdir(parents=True, exist_ok=True)
    torch.save(data_par, Path.cwd() / par_path / "data_par.pt")
else:
    data_par = torch.load(Path.cwd() / par_path / "data_par.pt")
Split the image data into training, validation, and testing sets.
# make datasets
full_dataset = png_loader(data_path, data_par)
train_set, val_set, test_set = torch.utils.data.random_split(
    full_dataset, [0.7, 0.2, 0.1]
)
# make dataloaders
train_loader = torch.utils.data.DataLoader(
    train_set, batch_size=batch_size, shuffle=True
)
val_loader = torch.utils.data.DataLoader(
    val_set, batch_size=batch_size, shuffle=False
)
test_loader = torch.utils.data.DataLoader(
    test_set, batch_size=batch_size, shuffle=False
)
Train the model
# use early stopping
cb_es = pl.callbacks.EarlyStopping("val_loss", patience=es_patience)
trainer = pl.Trainer(
    max_epochs=max_epochs,
    accelerator="gpu",
    callbacks=[cb_es],
    logger=pl_loggers.CSVLogger("logs/"),
)
if training:
    shader_fit_nn = test_shader_nn(
        render_res,
        scale_func,
        n_par,
        nn_size,
    )
    # train
    trainer.fit(
        model=shader_fit_nn,
        train_dataloaders=train_loader,
        val_dataloaders=val_loader
    )
    trainer.save_checkpoint(Path.cwd() / par_path / "checkpoint.ckpt")
else:
    shader_fit_nn = test_shader_nn.load_from_checkpoint(
        Path.cwd() / par_path / "checkpoint.ckpt"
    )
and test it
trainer.test(model=shader_fit_nn, dataloaders=test_loader)
You can generate an image from the esitmated paramters and compare it to the original.
# image test
shader_fit_nn.eval()
##get one sample
test_image = img_trans(
    Path.cwd() / data_path / ("batch_output_" + test_image_ind + ".png"), False
).to("cuda")
shader_fit_nn.to("cuda")
fit_par = shader_fit_nn.forward(torch.flatten(test_image).to("cuda"))
batch_render_2(
    bl_module,
    [data_par.tolist()[int(test_image_ind)], fit_par.tolist()],
    bl_file,
    str(Path.cwd() / tmp_path),
    test_res,
)
Original
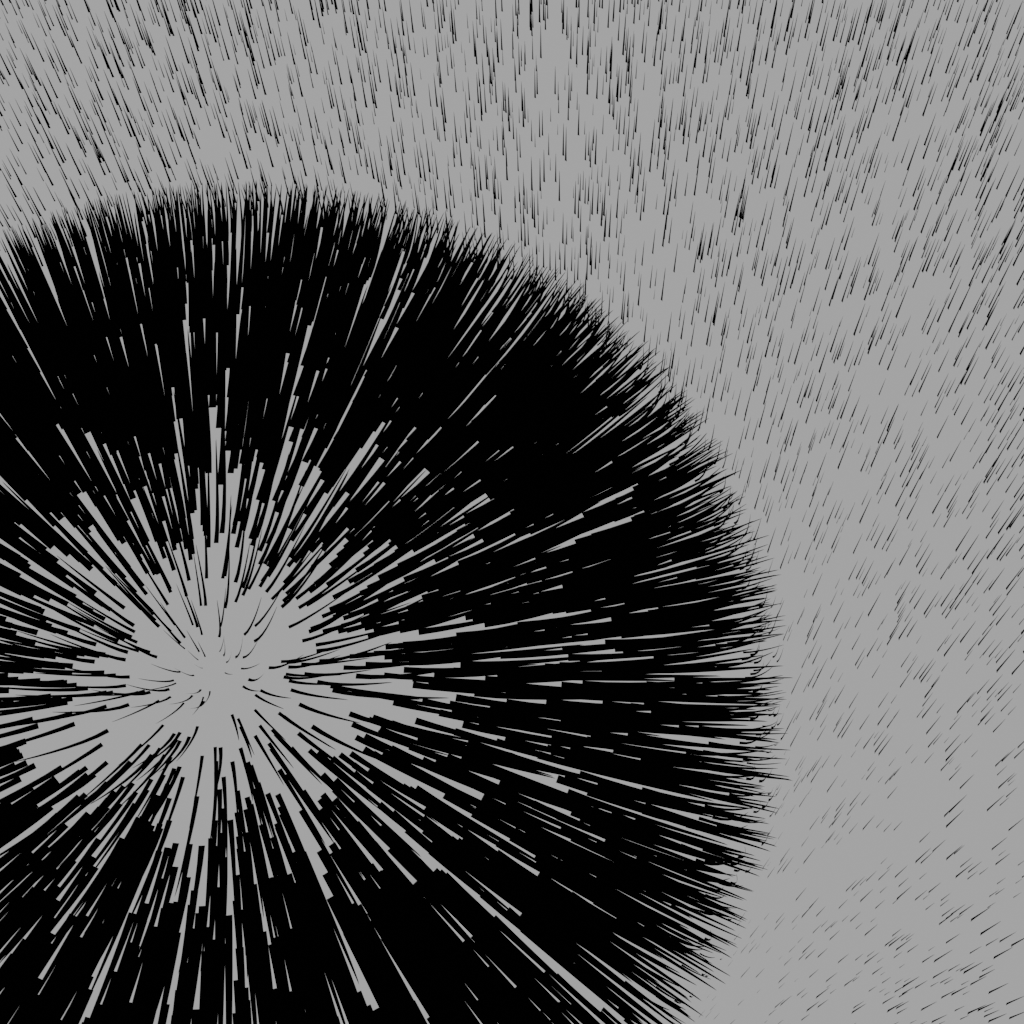
Estimated
